The "Sweeper"
Mengfei Xiong(mx224) and Ziqi Wang(zw568)
Dec. 5th 2018
Demonstration Video
Objective
For our ece 5724 final project, we created a cleaning robot called the“Sweeper”, which functions are pick up “trash” and throw it to specific location and achieve “waste sorting”. The hardware of the “Sweeper” is a Raspberry Pi, a camera, five servos and software design on the Raspberry Pi based on python language with openCV and pygame library. We use OpenCV to identify the type “trash” by its color, the distance of target by its area shown in the video frame. It will run atomically and can be controlled by buttons displayed on the PiTFT screen to achieve start, resume and quit. When get a trash or drop a trash, the “Sweeper” will show what it got on screen.
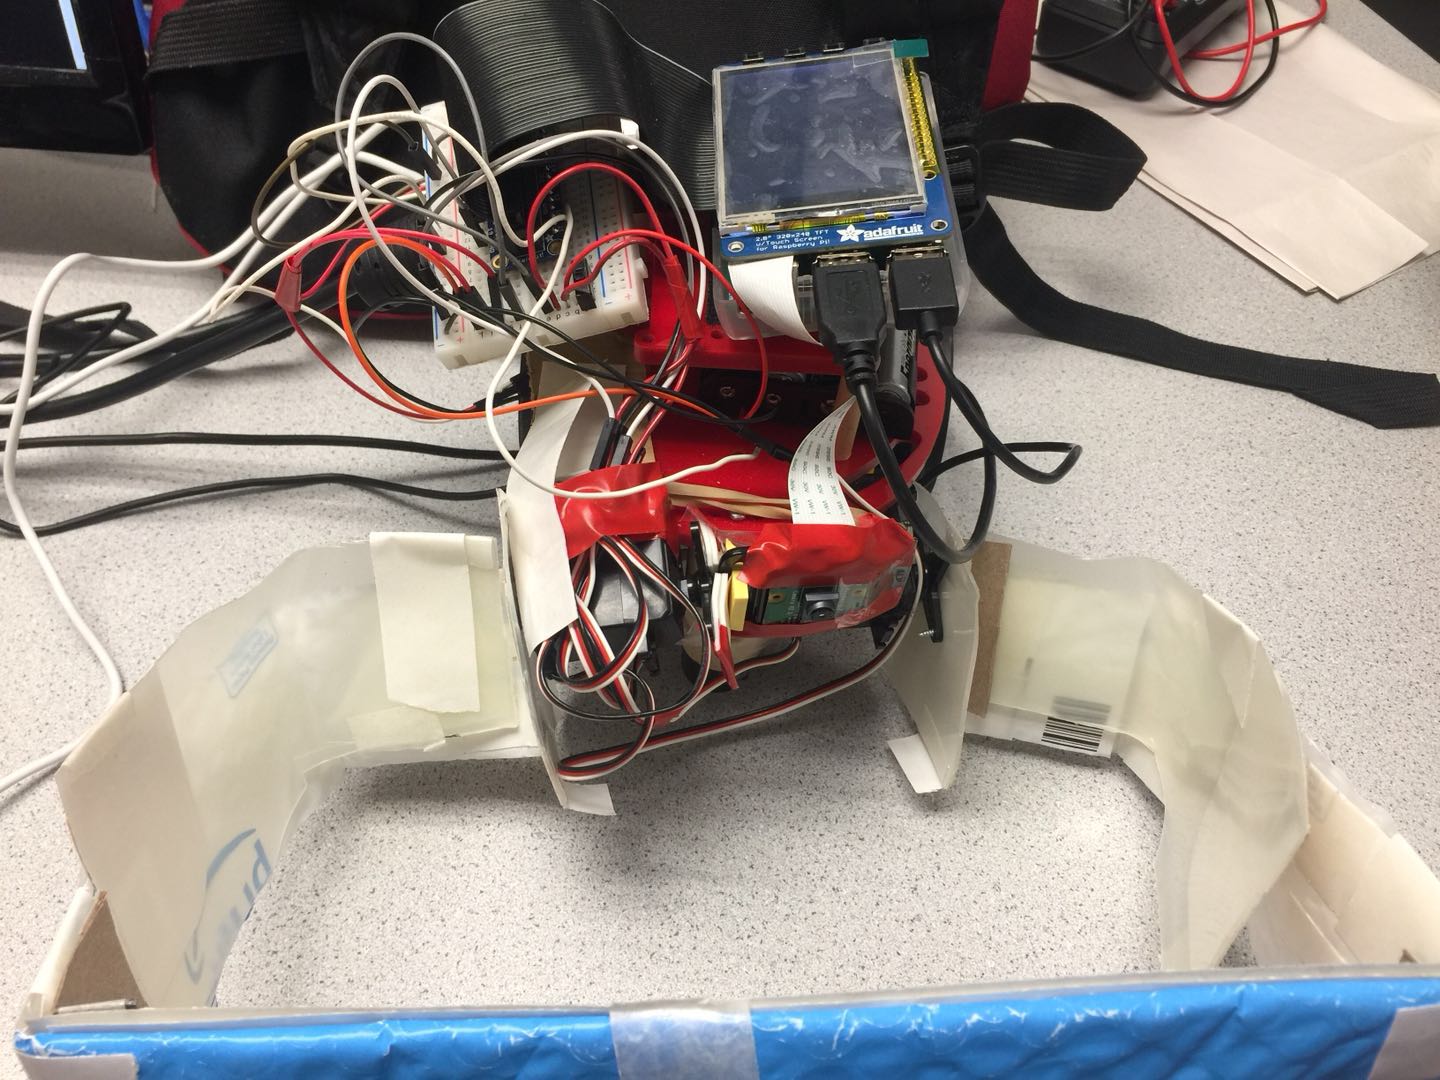
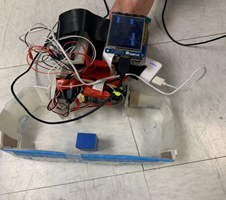
Figure 1. Assembled the "Sweeper"
Project Introduction
1. Run automatically on bash script.
2. Wait until press the “start” button on the screen.
3. Rotate until find the target.
4. Recognize the trash on the floor, get the trash and move it to the corresponding trash can.
5. Keep search and throw the target until press the quit button.
6. Show the type of trash on screen.
- Use cap = cv2.VideoCapture(0) to create a video capture object named cap. Then use ret, frame = cap.read() to get the 640x480x3 image array of the video frame in RGB color space. Since the default size of the frame is large and may slow the processing speed, we use cv2.resize(frame,(320,160)) to resize the image to 320x160.
- To achieve object detection, we use hsv = cv2.cvtColor(frame, cv2.COLOR_BGR2HSV) to change the image to hsv space. Then we use mask = cv2.inRange() function to create the mask of the frame which return to a picture only displays the target color in white and other color in black.
- To remove the noise of the mask, we use mask = cv2.erode(mask, None, iterations=4) and mask = cv2.dilate(mask, None, iterations=4). The result is shown in the following figure.
- Use cv2.findContours() function to get the contour of the object, and use cv2.contourArea() function to get the area of the object. When area of the specific color larger than a threshold, we judged that a object is found, and when there are more than one objects is found in a frame, we only detect the object that shows the largest area in the frame.
- We use cv2.moment() function to extract and then calculate the center of the object that we found with the maximum contour area in the frame.
- When we obtain an object in the frame, we use cv2.line to draw two reference line to separate the frame into three part, the left part, the middle part and the right part. The next motion of the “Sweeper” rely on the position of the center of the object’s contour. If the center is in the left/right part of the frame, the “Sweeper” will turn left/right until the center reach the middle part; if the center is in the middle part, the “Sweeper” will forward.
- Raspberry Pi $35.00(Not Included)
- Raspberry Pi Camera V2 $25.00
- Standard Servo x 3 $12.00 x 3
- Continuous Servo x 2 $5.00 x 2
- wood particle, Resistors and Wires - Provided in lab
- The overall work involved the collaboration of both Mengfei Xiong and Ziqi Wang.
- Mengfei: responsible for software design and program, including object detection algorithm, servo motor control algorithm, software PWM control and set up the communication between the RPi and the hardware components. Helped with hardware design
- Ziqi: responsible for the hardware design, including wired all the connections for the RPi with all of the other hardware components such as the servo motors, the camera module, and the mechanical arm. Developed hardware PWM control and helped with software design.
- The final overall system assembly and debugging required the combined efforts of both Mengfei and Ziqi to try and understand if the errors in the system were caused by a software or hardware issue or both.
The robot we designed and built is an automatically identify trash and recycle robot that runs on the Raspberry Pi (R-Pi) which integrates image processing software with GPIO I/O regulation. The robot was designed to identify different types of garbage, recycle to different designated locations and control “start”, “pause”, “resume” and “terminate” tasks of the robot through pygame as well as show the status of the "Sweeper". The initial foundation of this robot concept was based on the pygame studied in Lab 2 and the robot developed in Lab 3 in ECE 5725: Design with Embedded Operating System.
The Raspberry Pi served as the brain for the entire system which controlled all the other components on "Sweeper". The hardware of this project included two continuous servos which were used for the wheels and two standard servos to control the behavior of mechanic arm in front of the robot. The mechanic arm were made of recyclable bottle. One standard servo was used to cooperate camera gimbal at the front of the robot. The camera we used in this project was PiCamera Module V2. The details of the hardware design will be introduced in Hardware Design part.
The entire system was developed in Python. By designing our robot in Python on R-Pi, we were able to take advantages of the wide variety of packages available to integrate the robot software into one platform which had no need for any higher level OS. The primary packages that applied in our final project were OpenCV, RP.IGPIO and PIGPIO. The OpenCV was used to operate the camera module and perform all the image processing tasks, which were supposed to detect different kinds of trash and locations. The OpenCV package is an all-inclusive one that allows variety of image processing functions to be applied. The RPI.GPIO in Python was used to control the I/O port on the Rasyberry Pi in order to establish the communication between hardware and software. Hardware PWM (PIGPIO) was used in camera gimbal to keep the rotate steady. The details of the software design will be introduced in Software Design part.
Design and Testing
Hardware Design
The hardware design of our "Sweeper" consisted of a R-Pi, five servos, which included two continuous servos and three standard ones, a mechanic arm, a camera module. The specific functions of each parts will be introduced as following.
The R-Pi which included a PiTFT serve as the central of the whole project, and PiTFT which includes two buttons on screen which is “start” and “quit” can control the motion states of "Sweeper" (start, pause, resume) and button 23 which is a bail out button can terminate the program to the console window. In the meanwhile, once "Sweeper" find the trash or put the trash to designated location, the PiTFT will show “get trash” or “drop trash”. The figure 2 show below is the initial and terminated screen. And figure 3 is the trash conditions showed in the screen.
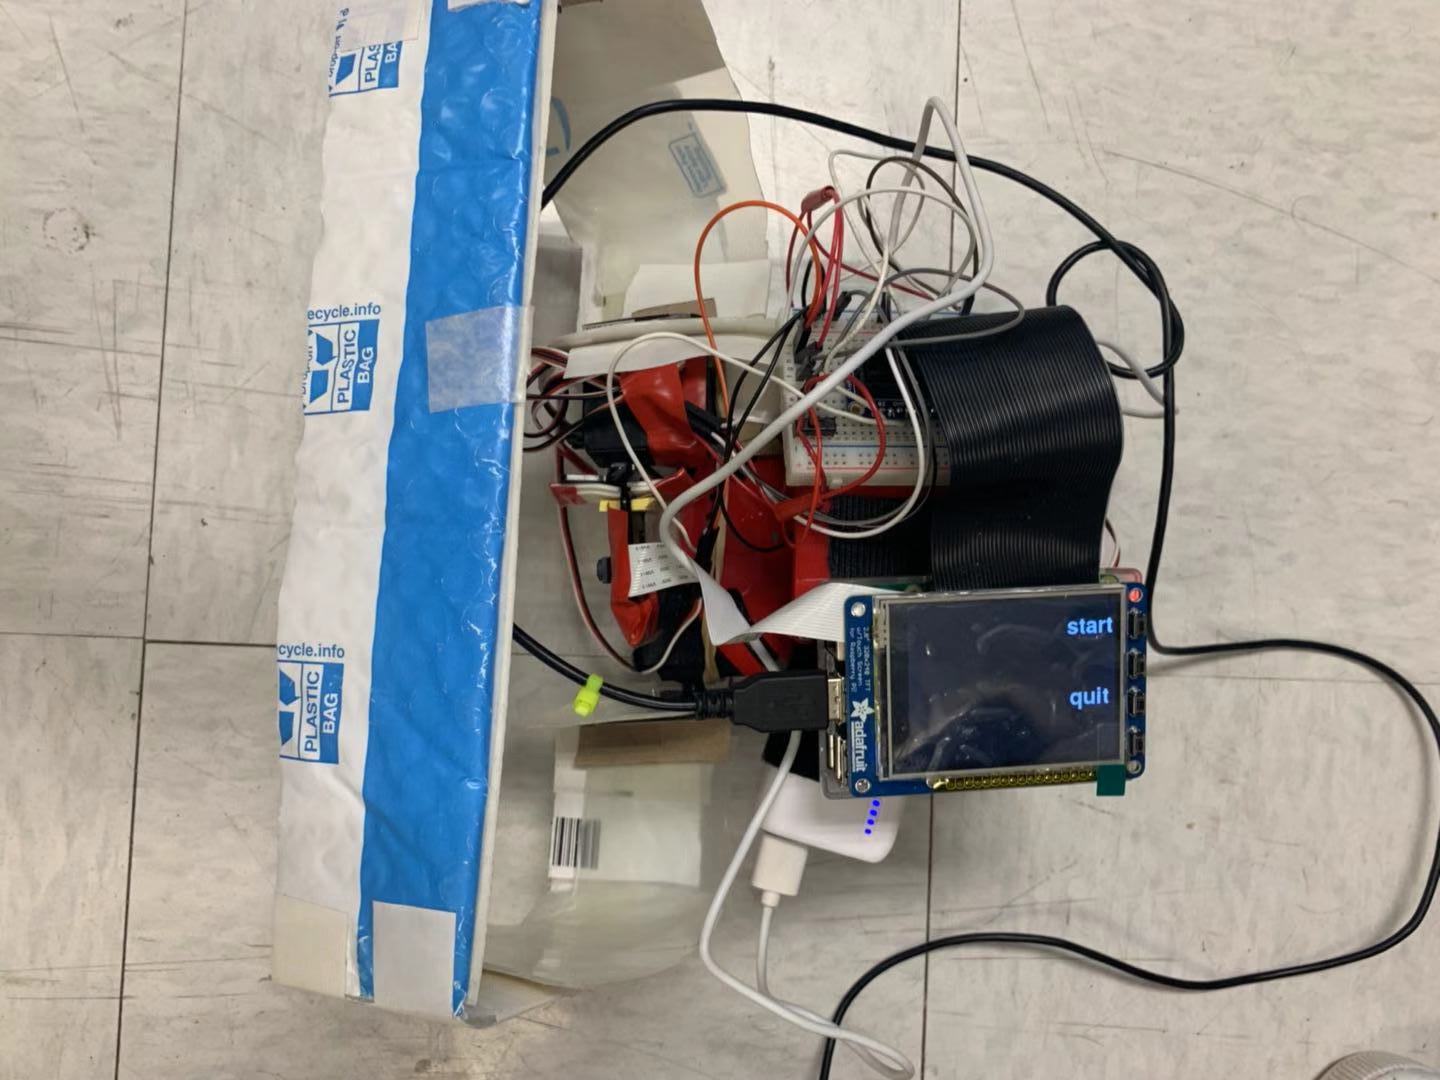
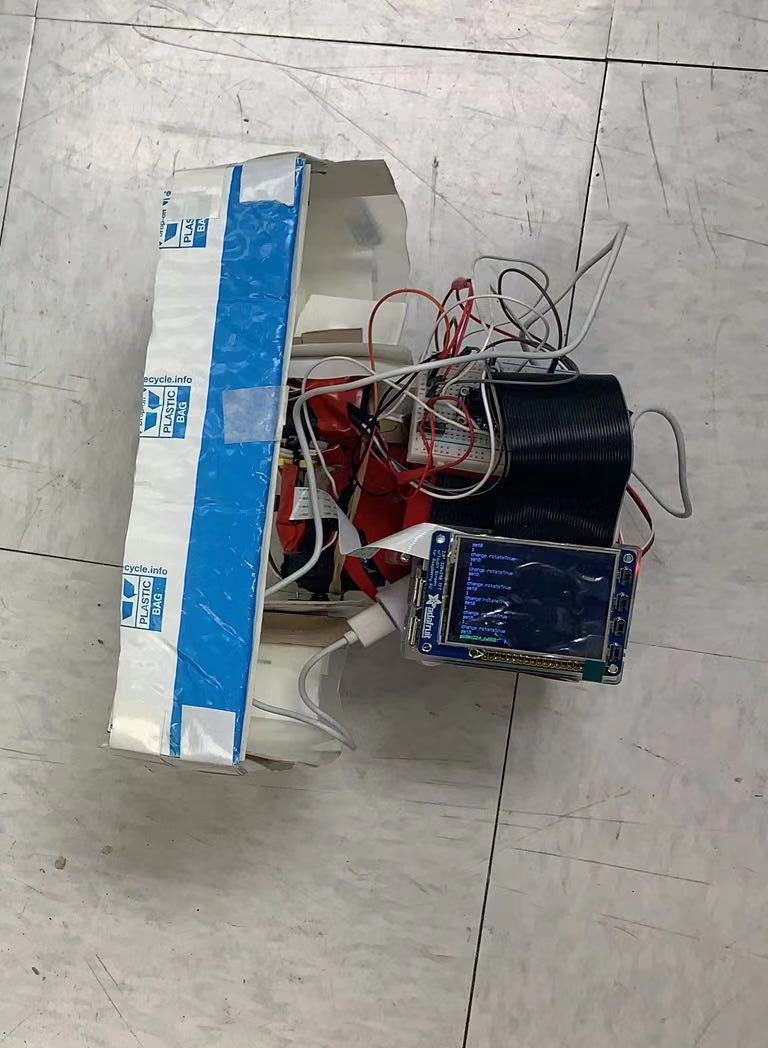
Figure 2 initial and terminated screen
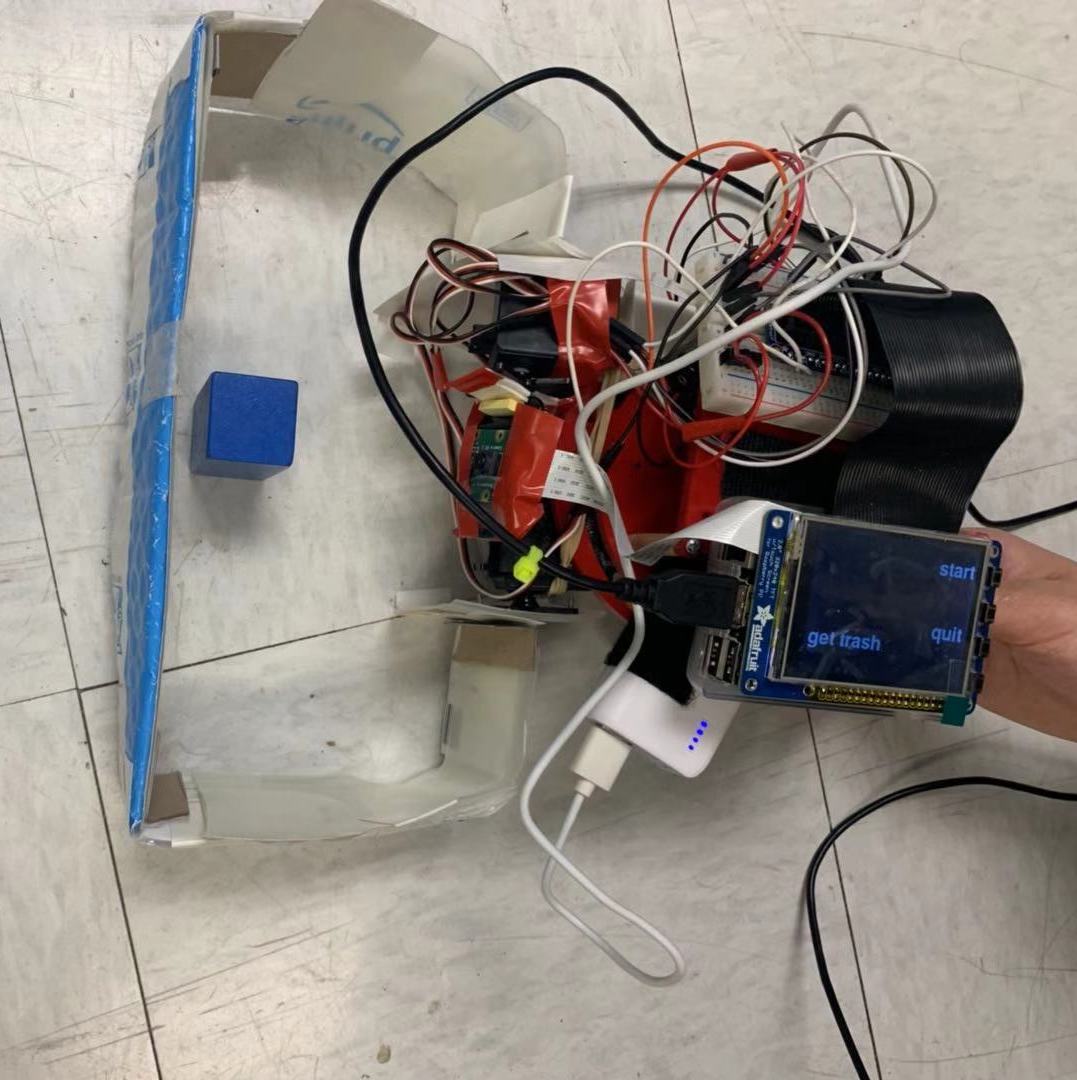

Figure 3 trash conditions
One mechanic arm which is able to frame the target in a certain range and drag the target to a specific location.
The two continuous servos served as the wheels of "Sweeper" because they can bidirectional continuous rotate. By using software GPIO pin 6 and pin16 as output PWM signals. Our project can achieve rotate, go forward, turn left a designed angle and turn right a designed angle. Figure 4 is wire connection of Parallax continuous servo motor.
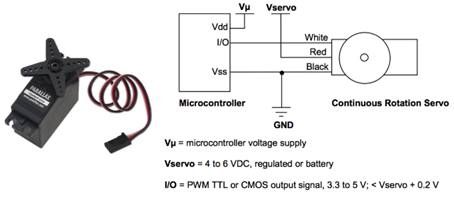
Figure 4 Parallax continuous servo motor
The two standard servos served as driving force of the robotic arm. The standard servo can hold any position between 0 and 180 degrees. By using software GPIO pin 5 and pin 19 as output PWM signals, in the initial state, the servos control the arm to lift at 90 degrees until the signal of put down is received. When the target is close enough designed in our algorithm, these two standard servos will rotate for another 90 degrees which put down the mechanical arm in order to frame the object. Similarly, the put-down arm will never lift up until it receives the pull up signal again, which means the location is arrived. The function of lift up can be seen this portion of code below, and put down was very similar to this. And figure 5 is pull up and put down conditions of mechanical arm.
#change the mode of arms
def lift_up():
    global p1, p2
    initial_left1 = 2
    initial_right1 = 1.2

    initial1 = initial_left1
    dc1 = initial1
    c1 = 20.0 + dc1
    p1.ChangeFrequency(1000/c1) #frequency
    p1.ChangeDutyCycle(100 * dc1/(dc1 +20.0 )) # calculate the dc

    initial1 = initial_right1
    dc1 = initial1
    c1 = 20.0 + dc1
    p2.ChangeFrequency(1000/c1) #frequency
    p2.ChangeDutyCycle(100 * dc1/(dc1 +20.0 )) # calculate the dc
    print"lift up"
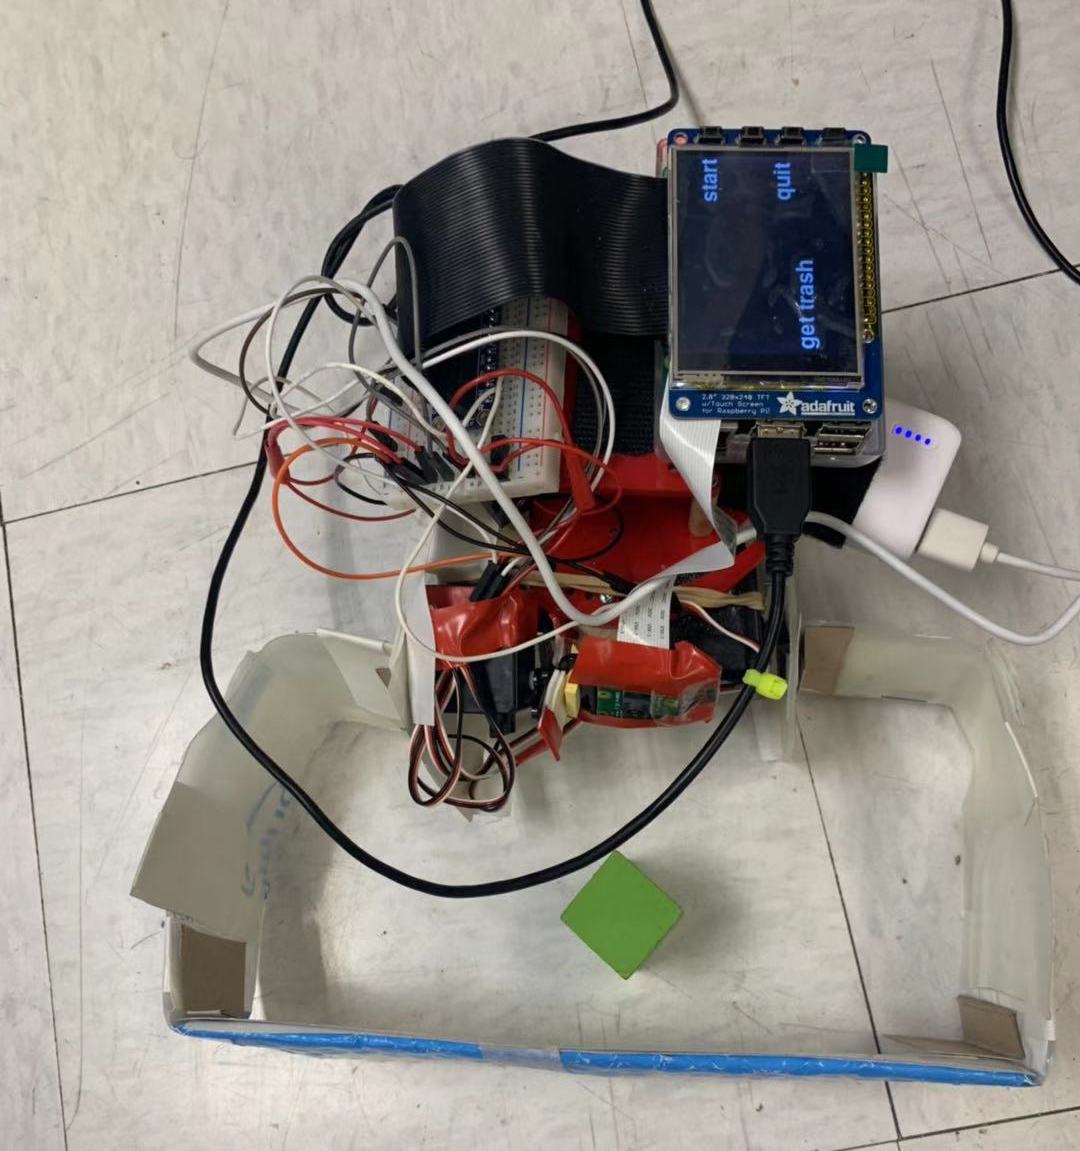
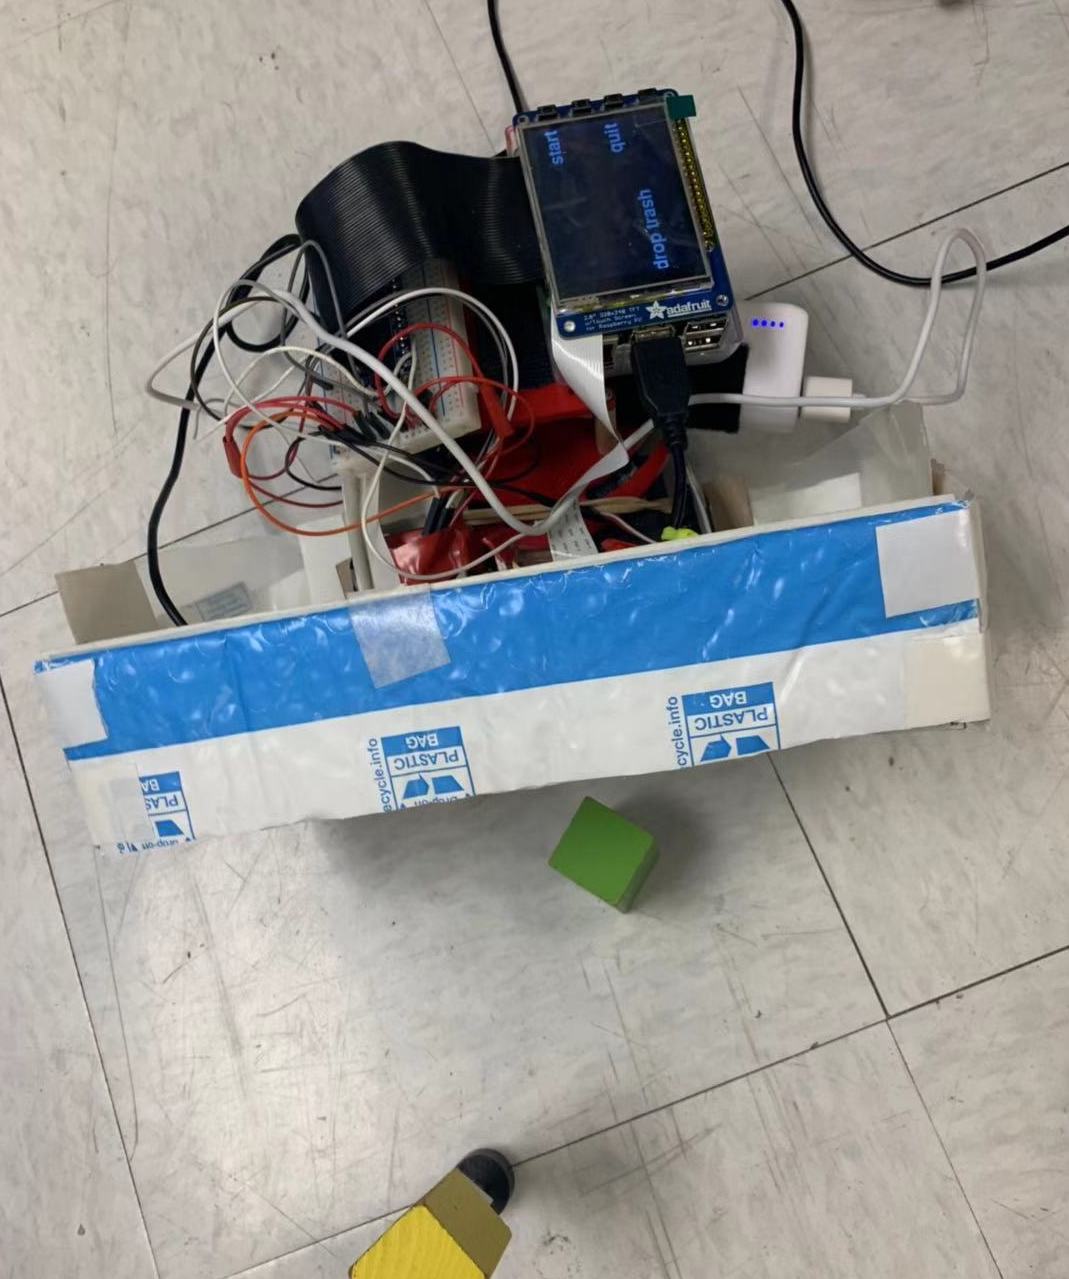
Figure 5 pull up and put down conditions
The last standard servo was served as camera gimbal,,in order to ensure that camera field of view does not shake, which is an disadvantage of software PWM, we used PIGPIO (hardware PWM signal) to make sure the camera is steady. According to the PIGPIO PIN library, we chose PIN 12 as the hardware PWM output signal. The code below is the import and initial part of hardware PWM.
import sys
import pigpio
pi_hw = pigpio.pi()
pi_hw.set_mode(12,pigpio.OUTPUT)
When looking for garbage, the camera looks down in order to get the area of target as much as possible even though the "Sweeper" is very close to the object. After grabbing the garbage, because the mechanical arm is put down, keep the camera in low condition will affect the field of view, which will impact the accuracy of detect location. Therefore, the camera raises a certain angle to avoid this effect. The testing code is following below
#change the mode of camera by controlling the servo
def look_up():
    global p5
    p5=pi_hw.hardware_PWM(12,50,76000)
    print "look up"

def look_down():
    global p5
    p5=pi_hw.hardware_PWM(12,50,91500)
    print "look down"
The last part of hardware in our project is camera, the camera module used for this robot was the PiCamera Module V2 which allowed for easy integration with the RPi.
The whole hardware circuit design is shown below in figure 6
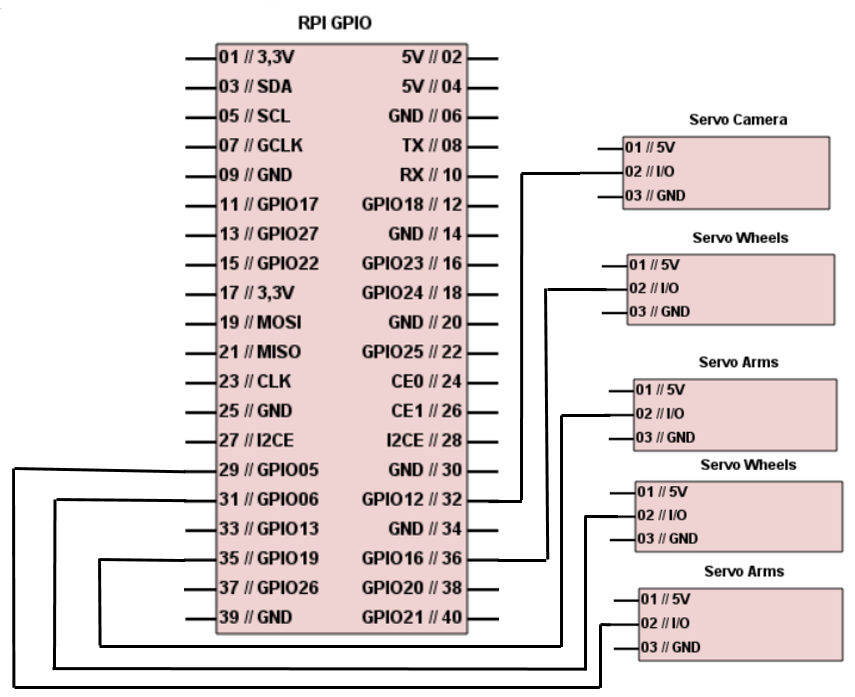
Figure 6 hardware circuit of the "Sweeper"
Software Design
Overall Design
We use a camera in front of the “Sweeper” to capture picture. For each frame, we classify different type of objects by its color (blue objects represent for trash 1, yellow objects represent for the drop location of trash 1; green objects represent for trash 2, purple objects represent for the drop location of trash 2). For the detection part, if there is a target object in the frame, the “Sweeper” will adjust its direction slowly until the target object is in the middle part of the frame, then it will go forward and adjust its direction by the following frames; if there isn’t a target object in the frame, it will keep rotate quickly until the camera captured a target object. For the get trash and drop trash part, the “Sweeper” will judge if it get the distance by the area of the target object appeared in the frame, if the object’s area larger than threshold, it will judge that it get the designated location. If it get the location of a trash, it will run put_down() function and look_up function to put down the mechanical arm and adjust the camera angle to make it look up and change the color its searching for to find the drop location. If it get a drop location, the ”Sweeper” will run lift_up() function and look_down() function to lift up the mechanical arm and adjust the camera angle to make it look down and change the color to find the next trash, then in order to avoid hitting the drop location, the “Sweeper” will backward before starting the next turn of searching.
Object Detection
It’s very convenient to use openCV library in python to achieve object detection. Firstly we installed the openCV to raspberryPi. According to the instruction, we installed the compiled version of openCV by sudo apt-get install libopencv-dev python-opencv.
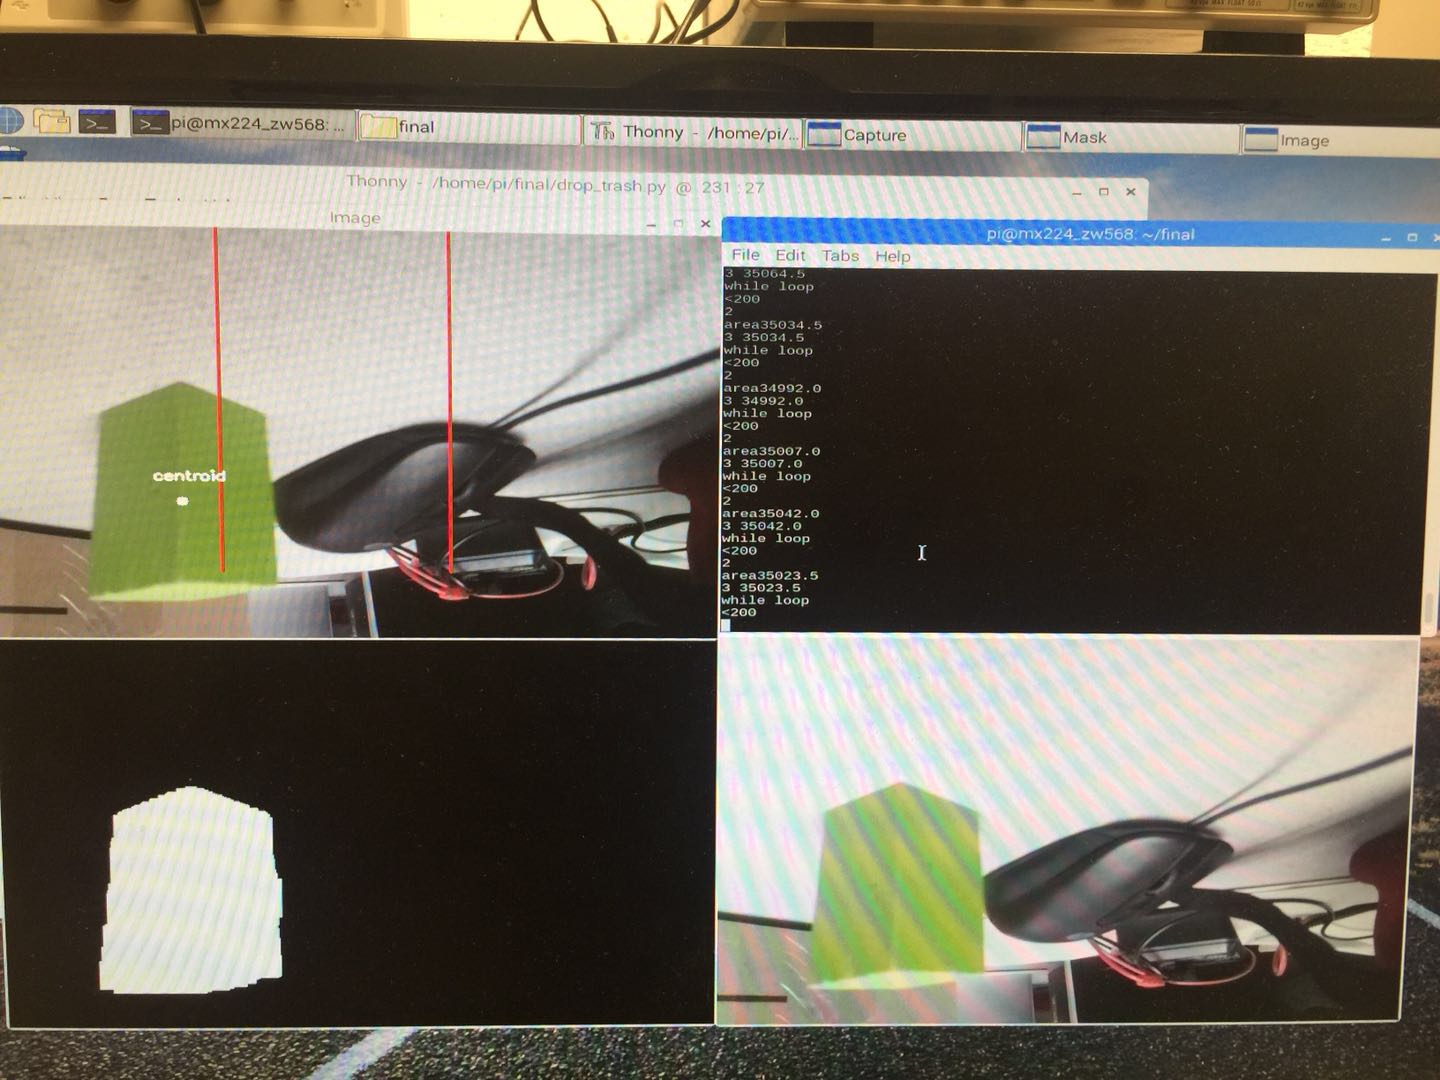
Figure 7. Result of Object Detection
Result
Our robot performed as planned and met the goals we expected. It performed perfectly in controlled environments with good lighting, no dark or black objects, and no other objects similar to the trash and location. In a well-defined environment, there was almost no noise and the "Sweeper" successfully detected and got the target. And the "Sweeper" can distinguish different kinds of trash as well as different recycle locations. Meanwhile, the buttons on PiTFT can control specific motions of "Sweeper" just as we expected and displayed the conditions of trash successfully.
The robot took a relatively long time to find the target when the target is too far from the "Sweeper" and since the speed of our robot is relatively slow, it also took some times to get the target. Still, the robot was able to track down the target object ad deliver the trash to the drop-off point eventually.
The figure 7 below is the final-realized functions of our project.
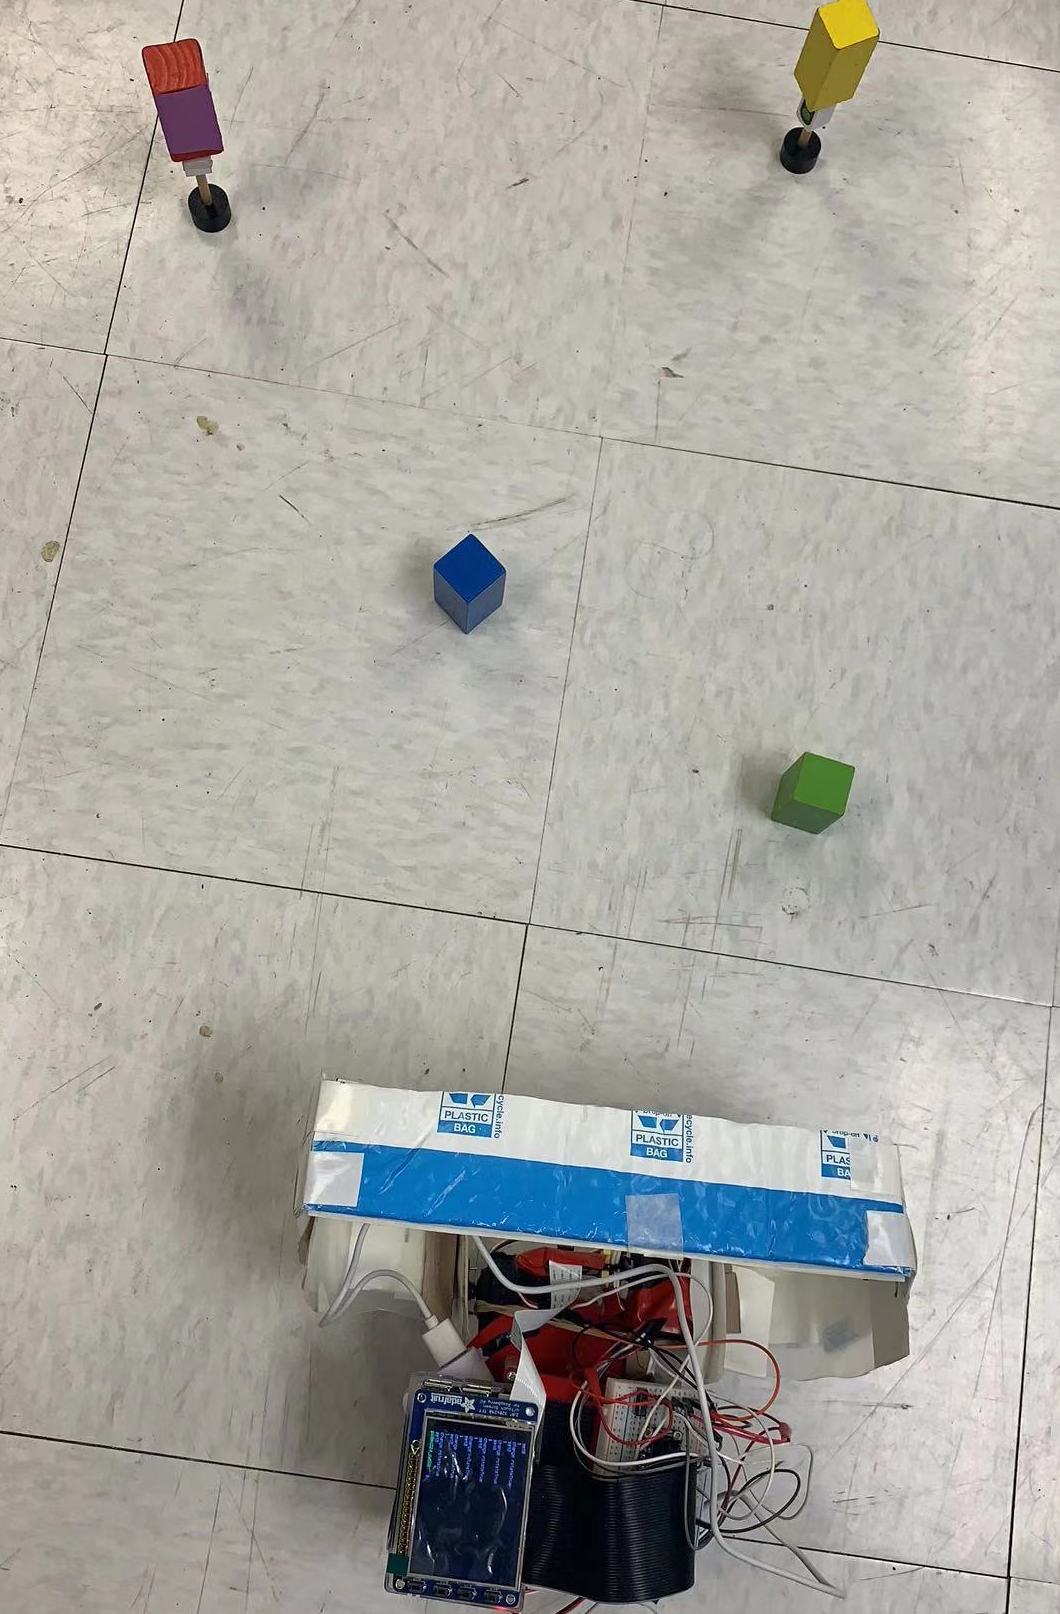
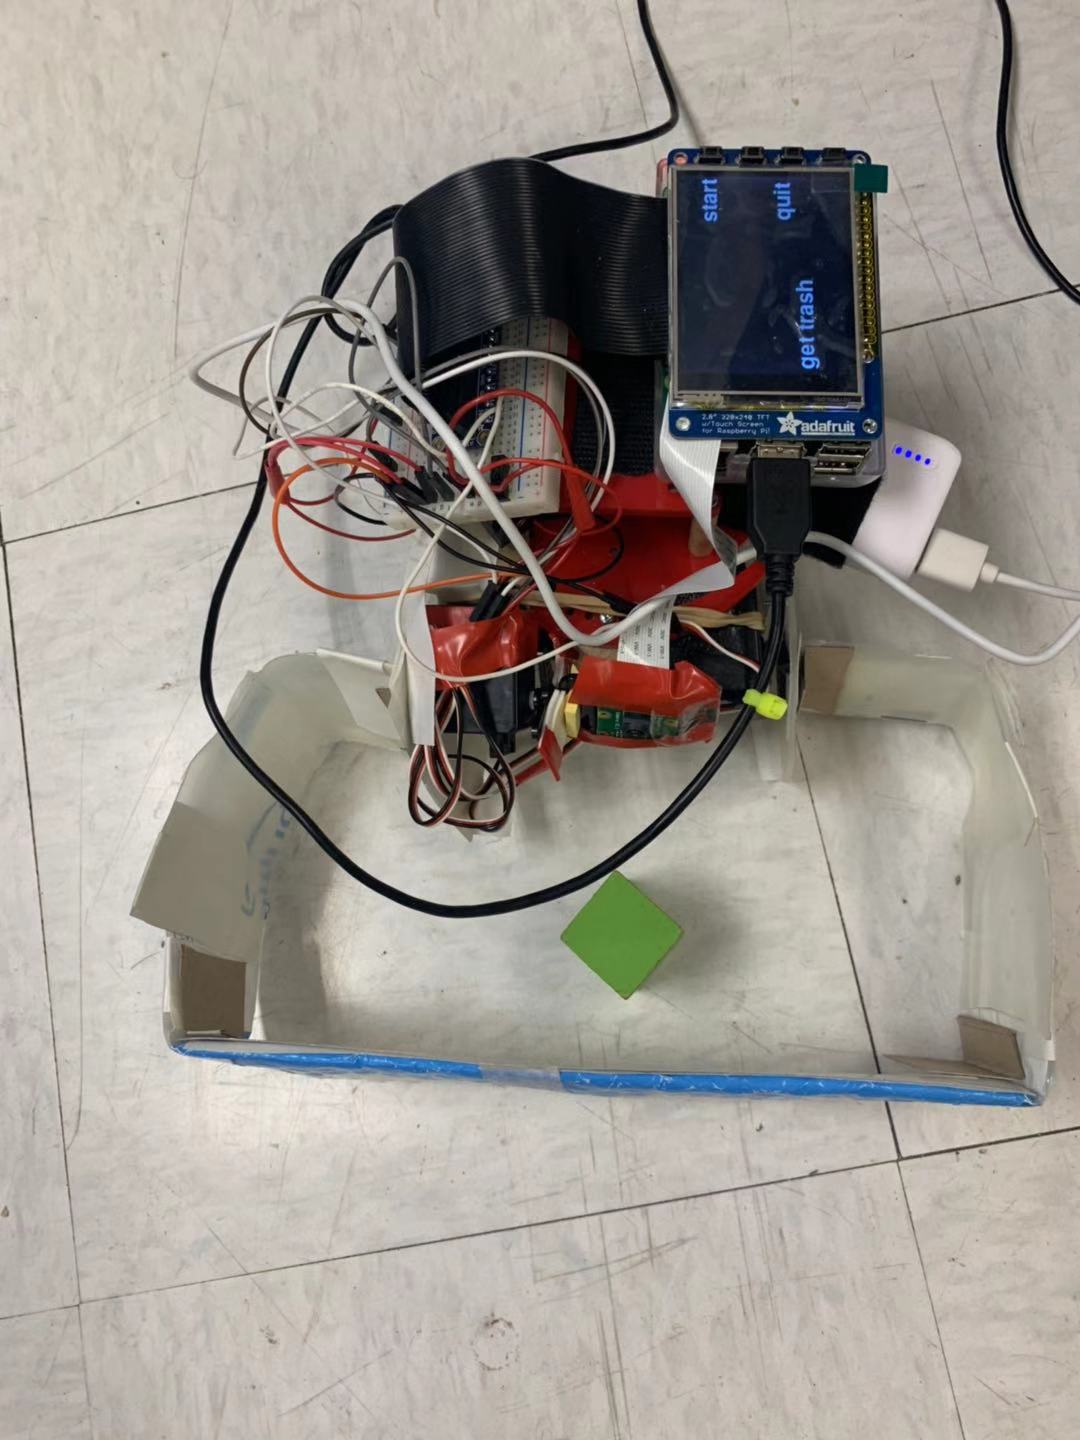
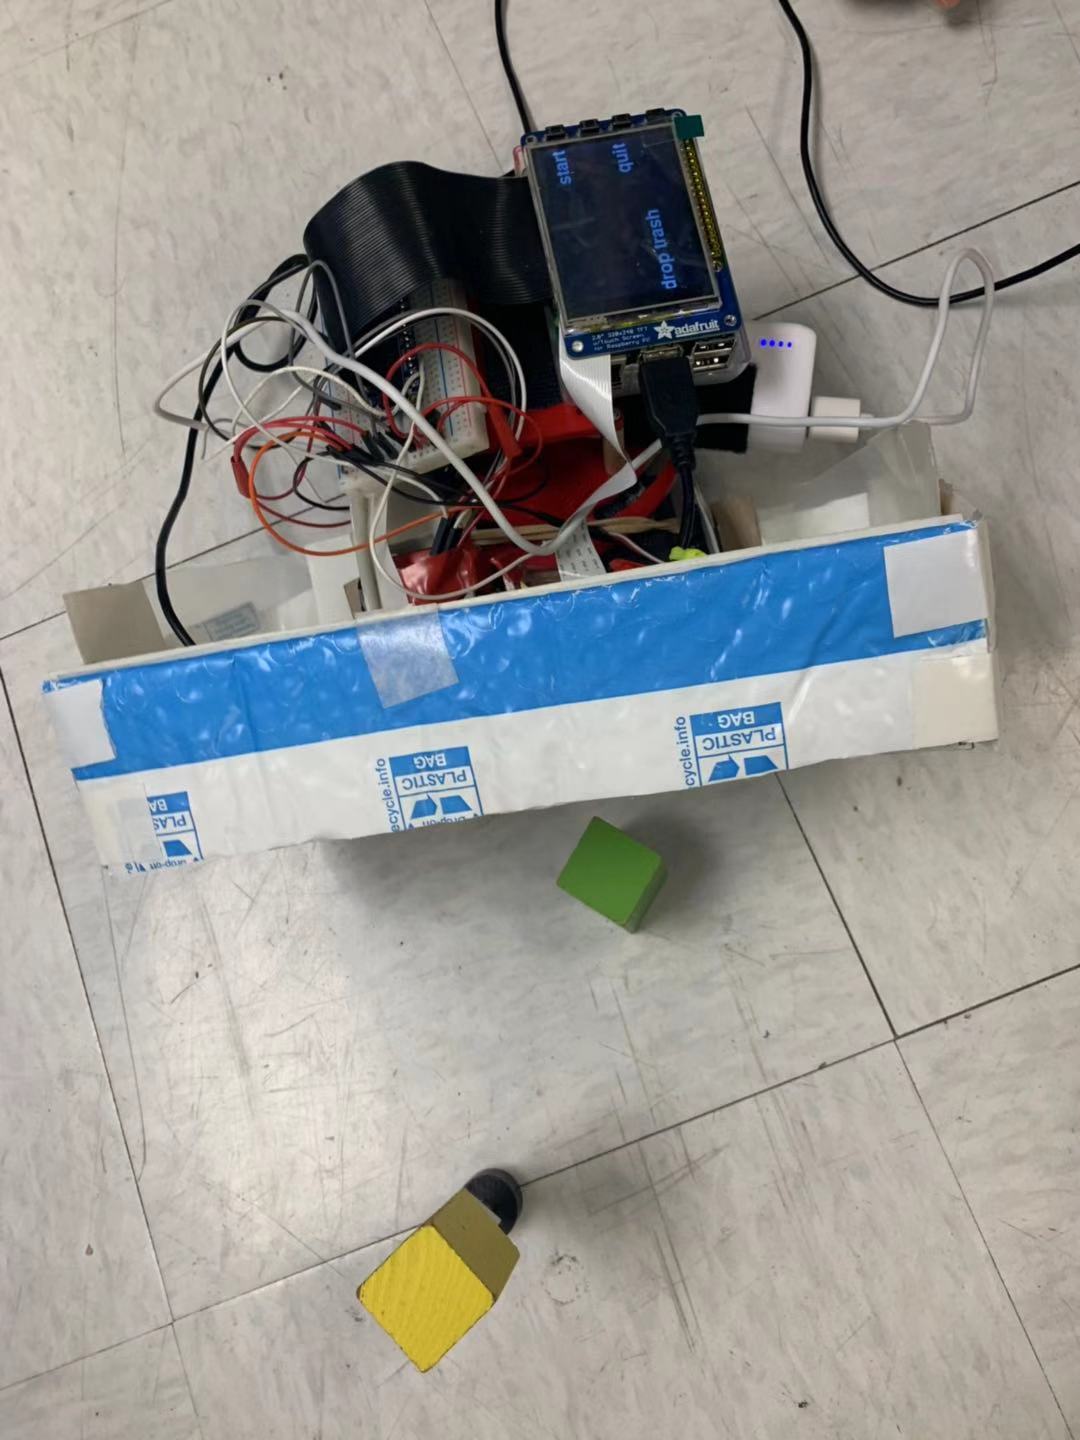
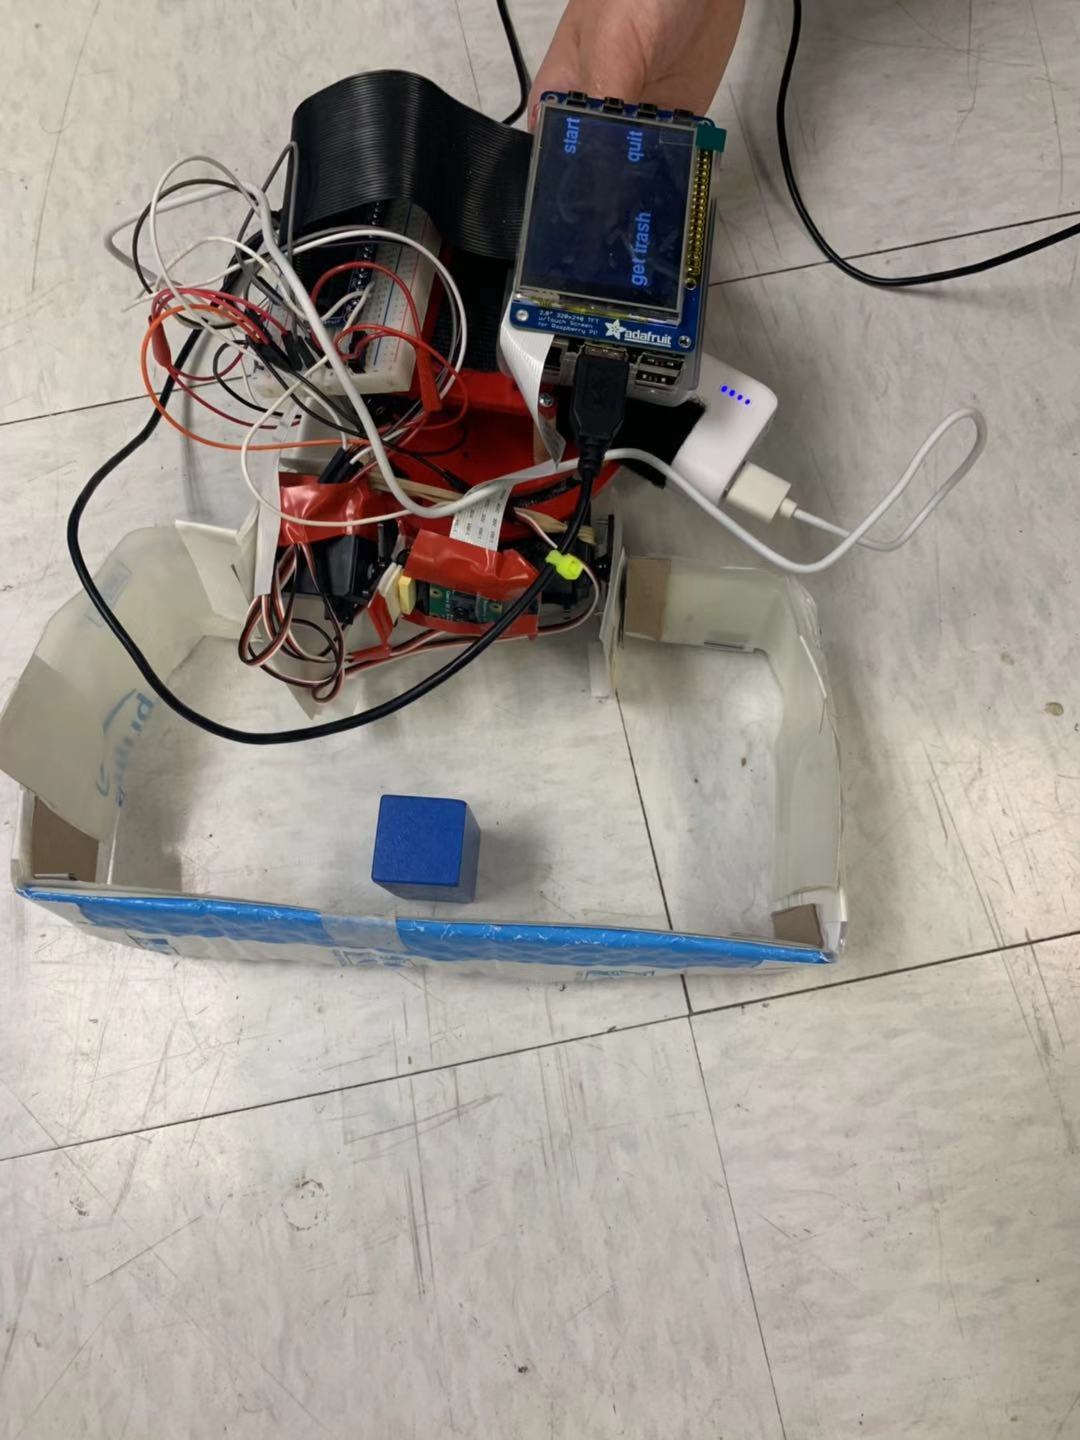
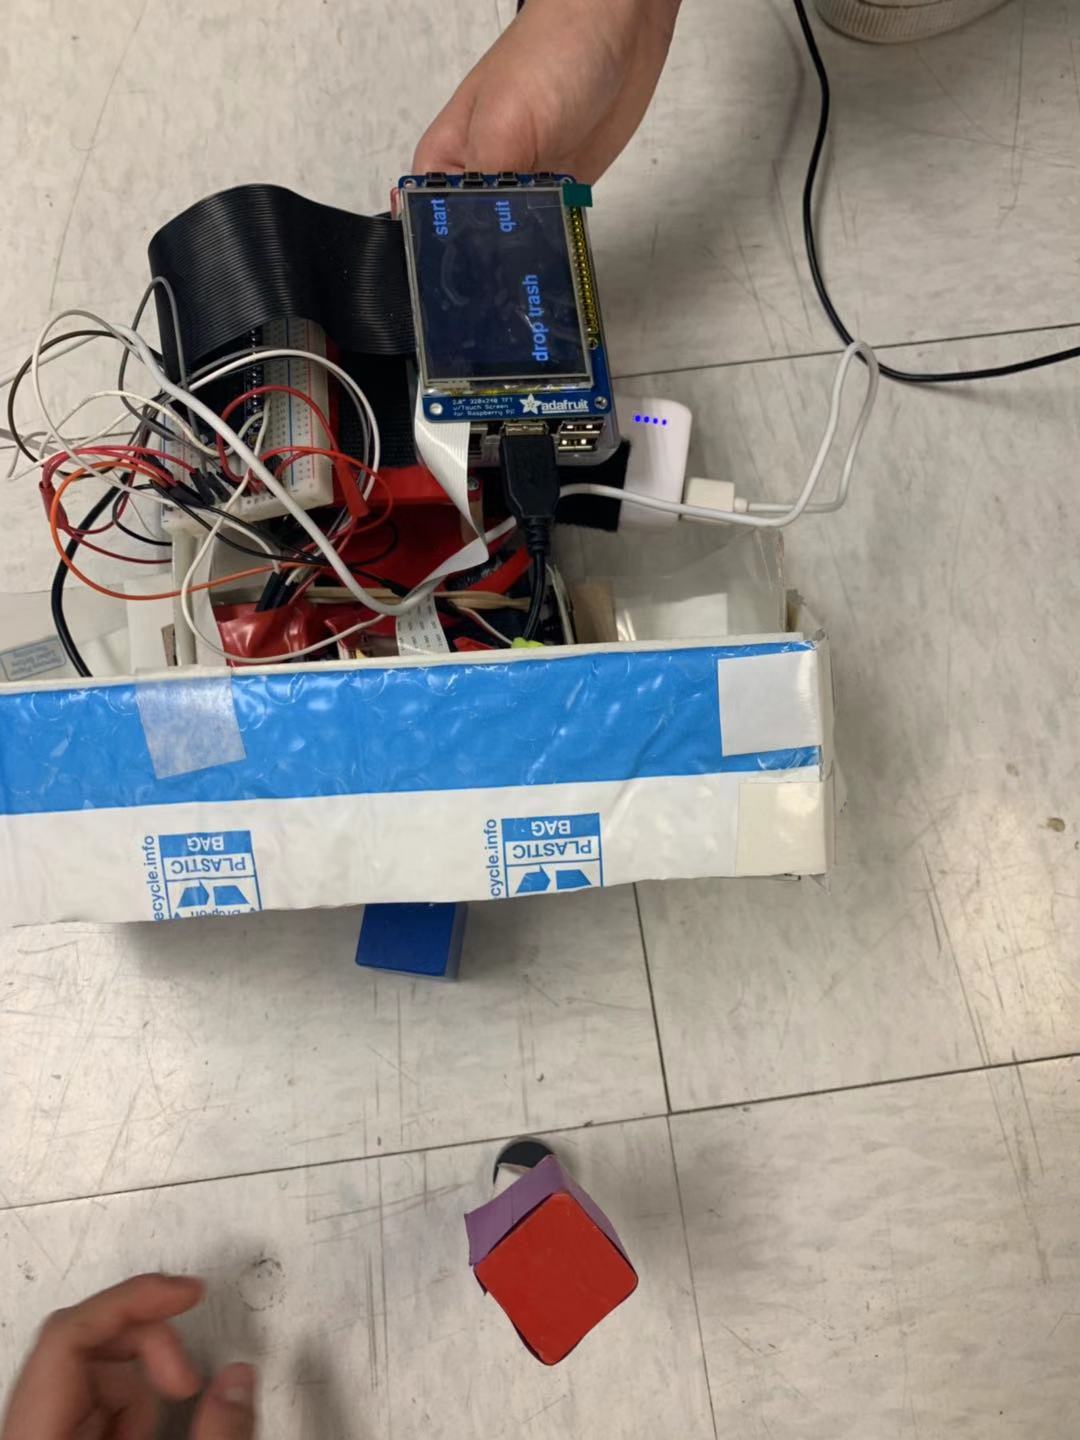
Figure 8 Sweeper Demonstration
Conclusion
The overall final design, development, and demonstration was a success for our "Sweeper". The robot was able to navigate in an open environment and detect the trash and deliver the trash to the ideal location without any issues. We were able to successfully implement a colored object detection algorithm based on OpenCV with the R-Pi in order to detect both the target and the drop-off location. The robot is able to search indefinitely until the target is found or stop button is pressed. "Sweeper" integrates all the aforementioned modules successfully create a robust cleaning robot that is able to perform its tasks fully autonomously.
During the process of final project, we faced a lot of problems:
First of all, our aim is to detect different kinds of colors to identify different kinds of trash and locations and OpenCV requires us to switch RGB value to HSV value. When we chose red as one location and blue as one trash, since there has some overlap of HSV value in these two colors, it cannot distinguish one from the other one. Our solution was change another color which has no overlap with blue in HSV value (purple). Then the accuracy of detection improved a lot.
Secondly, when we used the Pi-camera to get the object image, since the software PWM cannot avoid shaking even though we have already done calibration. So we changed hardware PWM as the output signal of camera gimbal servo. After that, it can perfectly stay steady. In term of hardware PWM, we first chose GPIO 26 as output PIN, but it prompt that there has no hardware PWM signal. After searching PIGPIO Library, we found that only PIN 12 and 13 can generate hardware PWM signal.
During the process, we also learned a lot from this project:
First of all, we have deepened the understanding of OpenCV application in image processing, and applied OpenCV to implement some functions of this final project.
Second, we have deepened our understanding of hardware PWM and understand the difference between software PWM and hardware PWM. At the same time, software PWM and hardware PWM is applied to our final project.
At the same time, we have deepened the understanding of servo by datasheet, and understand the difference between the use method and function of standard servo and continuous servo. At the same time, standard servo and continuous servo are applied to the final project.
Finally, by applying both LAB 2 and LAB 3 learning, we have a good application of what ECE 5725 has learned.
Future Work
There are several different possible future improvements that we foresee would greatly improve the functionality of the "Sweeper".
First of all, ultrasonic sensors can be used to avoid obstacle, such as wall and object other than the finding target. Adding specific number of sensors will definitely be helpful to the accuracy and reliable of our project.
Secondly, multi-process can be applied into our project, which can improve the speed of processing significantly. There has some time delay because of image processing, which often cause some inaccuracy of targeting detecting. Using multi-process can shorten the time delay and robot can response once the target is found.
Parts List
Total: $71.00
References
ECE 5725 Final Project: Fetchbot by Bryan H. Zhao and Jun KoParallax Continuous Rotation Servo Data Sheet
Parallax Standard Servo Data Sheet
Pigpio Library
ECE 5725 Embedded Operating Systems Lecture 30 by Prof. Joseph F. Skovira
Work Distribution
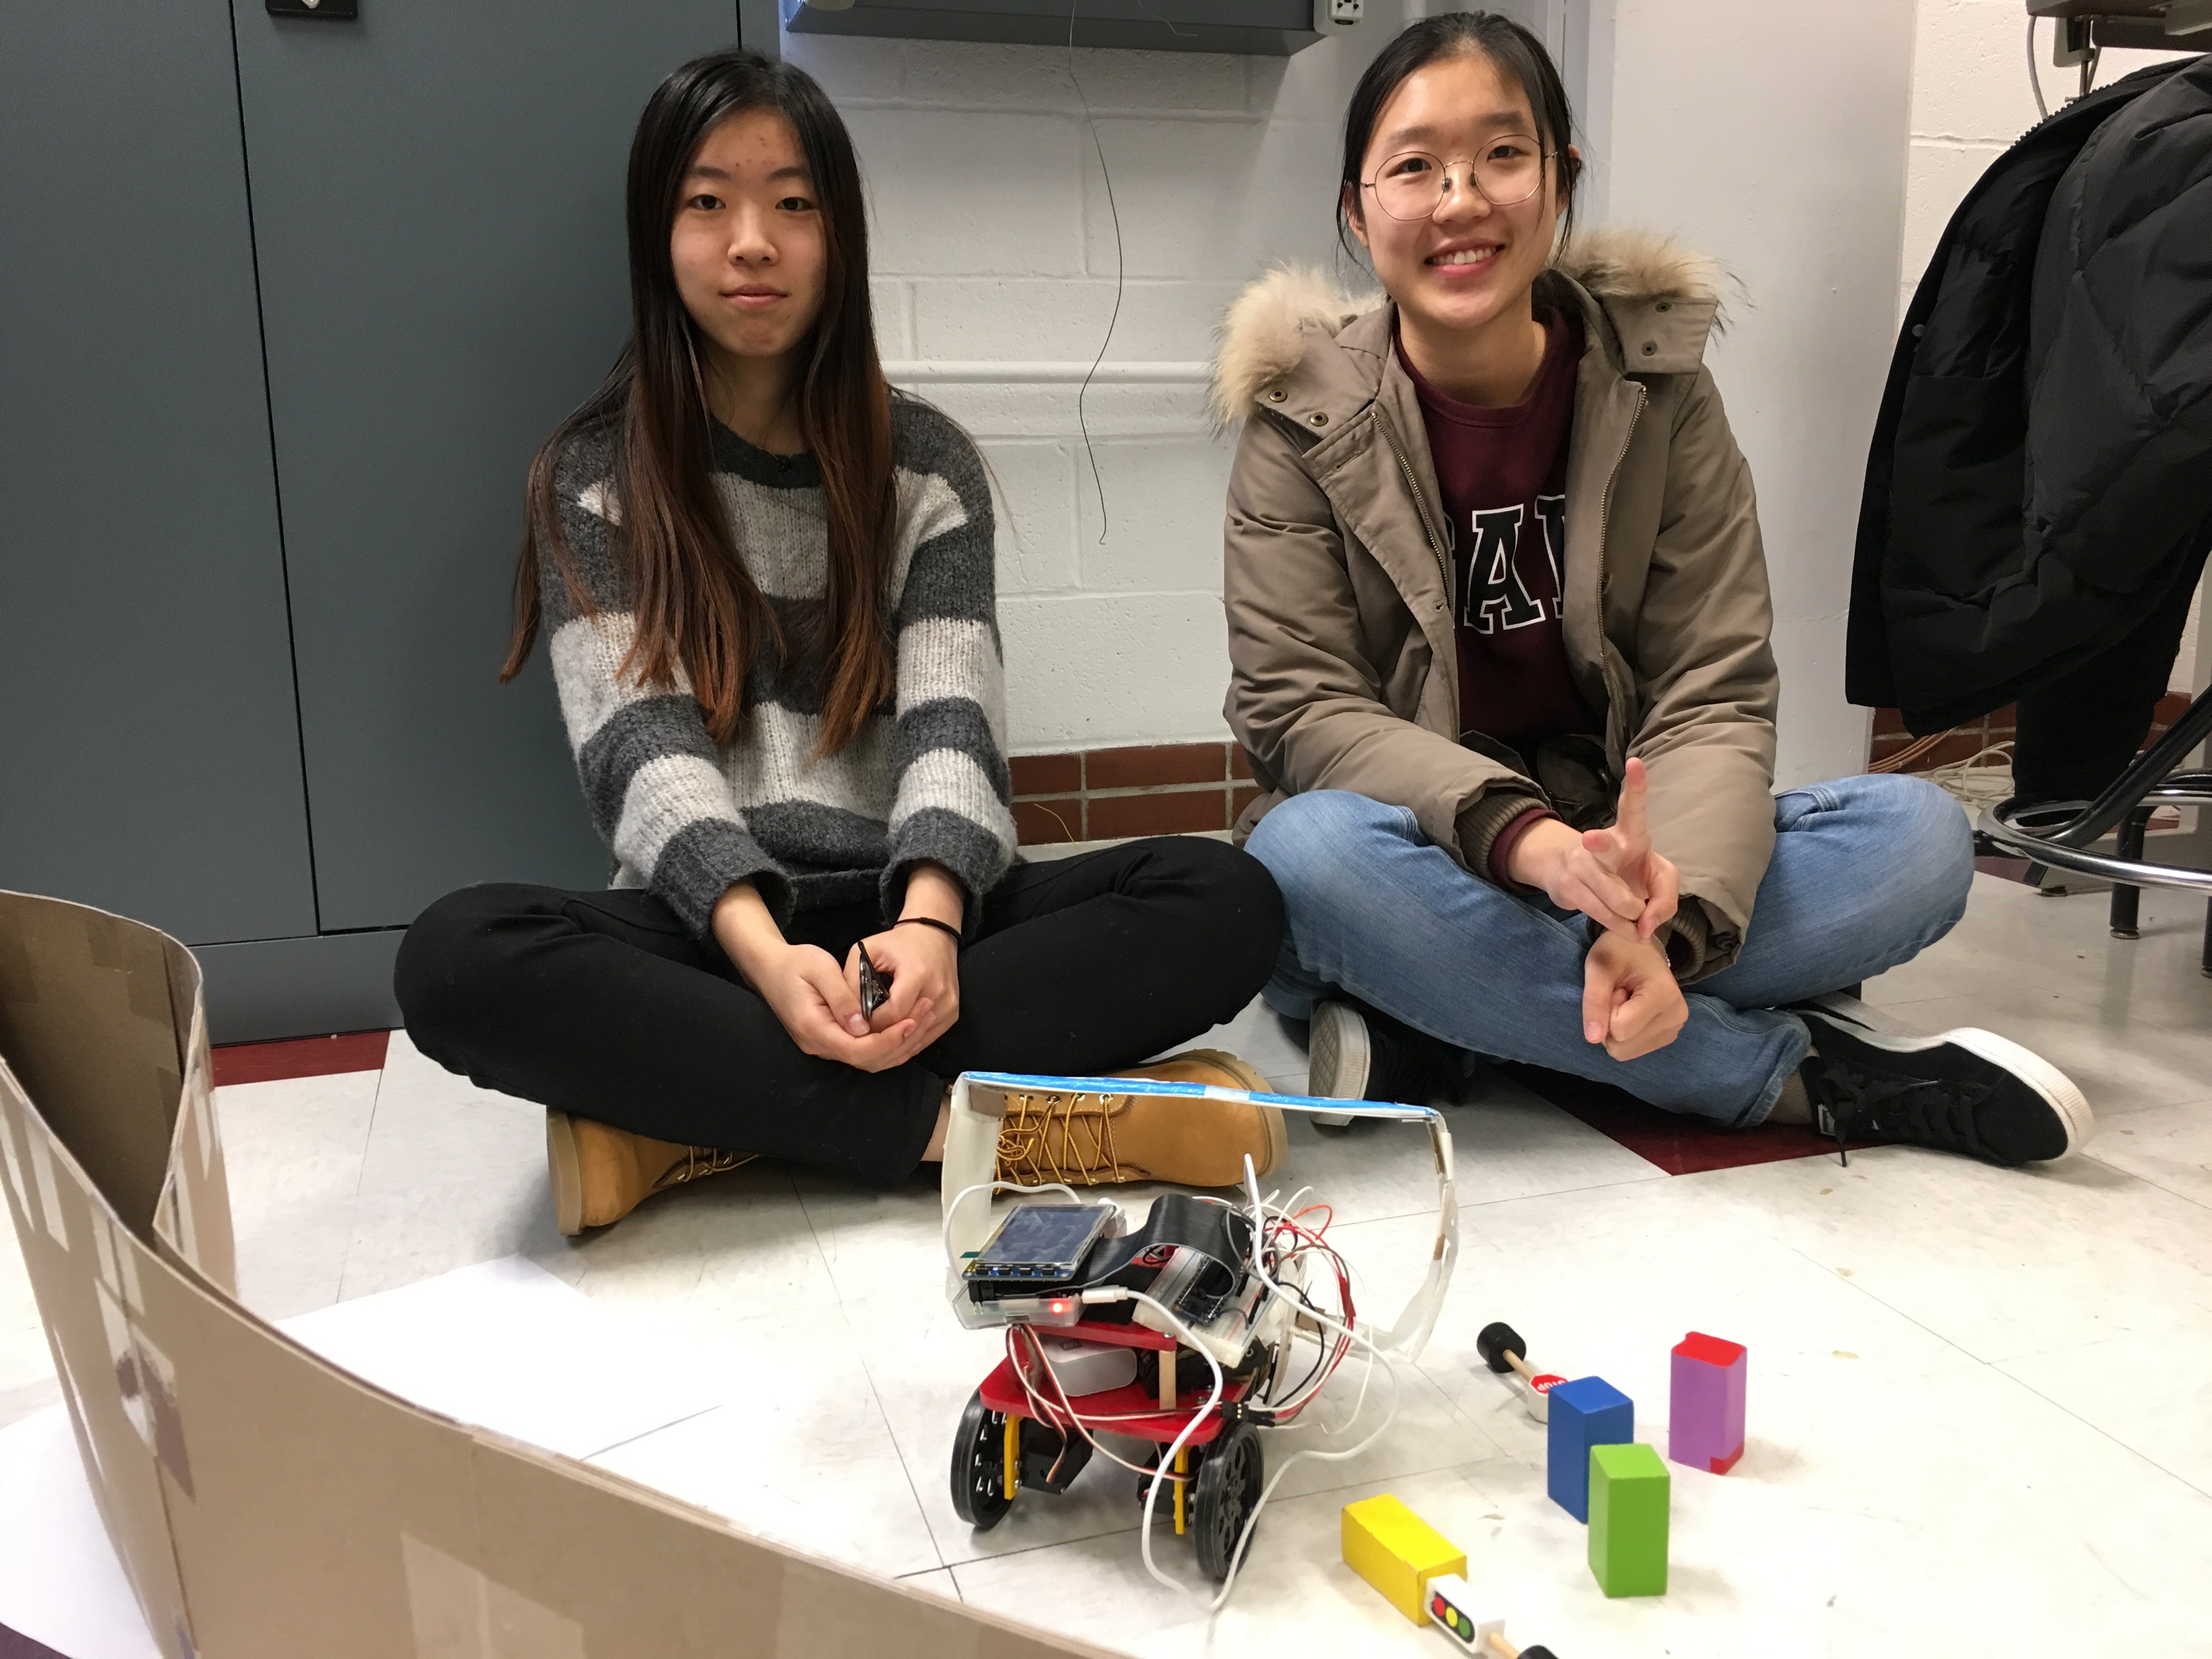
Project group picture

Mengfei Xiong
mx224@cornell.edu
Designed the overall software architecture
Helped with hardware design.

Ziqi Wang
zw568@cornell.edu
Designed the overall hardware architecture
Helped with software design.
Appendix
1 2 3 4 5 6 7 8 9 10 11 12 13 14 15 16 17 18 19 20 21 22 23 24 25 26 27 28 29 30 31 32 33 34 35 36 37 38 39 40 41 42 43 44 45 46 47 48 49 50 51 52 53 54 55 56 57 58 59 60 61 62 63 64 65 66 67 68 69 70 71 72 73 74 75 76 77 78 79 80 81 82 83 84 85 86 87 88 89 90 91 92 93 94 95 96 97 98 99 100 101 102 103 104 105 106 107 108 109 110 111 112 113 114 115 116 117 118 119 120 121 122 123 124 125 126 127 128 129 130 131 132 133 134 135 136 137 138 139 140 141 142 143 144 145 146 147 148 149 150 151 152 153 154 155 156 157 158 159 160 161 162 163 164 165 166 167 168 169 170 171 172 173 174 175 176 177 178 179 180 181 182 183 184 185 186 187 188 189 190 191 192 193 194 195 196 197 198 199 200 201 202 203 204 205 206 207 208 209 210 211 212 213 214 215 216 217 218 219 220 221 222 223 224 225 226 227 228 229 230 231 232 233 234 235 236 237 238 239 240 241 242 243 244 245 246 247 248 249 250 251 252 253 254 255 256 257 258 259 260 261 262 263 264 265 266 267 268 269 270 271 272 273 274 275 276 277 278 279 280 281 282 283 284 285 286 287 288 289 290 291 292 293 294 295 296 297 298 299 300 301 302 303 304 305 306 307 308 309 310 311 312 313 314 315 316 317 318 319 320 321 322 323 324 325 326 327 328 329 330 331 332 333 334 335 336 337 338 339 340 341 342 343 344 345 346 347 348 349 350 351 352 353 354 355 356 357 358 359 360 361 362 363 364 365 366 367 368 369 370 371 372 373 374 375 376 377 378 379 380 381 382 383 384 385 386 387 388 389 390 391 392 393 394 395 396 397 398 399 400 401 402 403 404 405 406 407 408 409 410 411 412 413 414 415 416 417 418 419 420 421 422 423 424 425 426 427 428 429 430 431 432 433 434 435 436 | #sweeper.py #lab:thursday section in 2018 Fall #developed by Mengfei Xiong(mx224) and Ziqi Wang(zw568) #final project of ECE5725 #function: run automatically to collect and throw different trash #into different trash cans import RPi.GPIO as GPIO import os, time import cv2 import numpy as np import pygame from pygame.locals import* import sys import pigpio import subprocess global p1, p2, p3, p4, p5 global setColor, hisColor os.putenv('SDL_VIDEODRIVER','fbcon') os.putenv('SDL_FBDEV','/dev/fb1') os.putenv('SDL_MOUSEDRV','TSLIB') os.putenv('SDL_MOUSEDEV','/dev/input/touchscreen') pygame.init() #pygame and GPIO initial pygame.mouse.set_visible(False) GPIO.setmode(GPIO.BCM) pi_hw = pigpio.pi() pi_hw.set_mode(12,pigpio.OUTPUT) GPIO.setup(6, GPIO.OUT)# pin2 as the servo GPIO output GPIO.setup(16, GPIO.OUT) GPIO.setup(23, GPIO.IN, pull_up_down=GPIO.PUD_UP) #initial stop mode initial_left = 1.5 initial_right = 1.5 initial = initial_left dc = initial c = 20.0 + dc p3=GPIO.PWM(6,1000/c) p3.start(100 * dc/(dc +20.0 )) initial = initial_right dc = initial c = 20.0 + dc p4=GPIO.PWM(16,1000/c) p4.start(100 * dc/(dc +20.0 )) #Change the speed of a servo def set_speed(speed, p): global p3,p4 if p == p3: init = initial_left else: init = initial_right dc = 0 c = 20 + dc p.ChangeFrequency(1000/c) p.ChangeDutyCycle(100 * dc/(20+dc)) def set_speed(speed, p): global p3,p4 if p == p3: init = initial_left else: init = initial_right dc=init + 0.2 * speed c=20+dc p.ChangeFrequency(1000/c) p.ChangeDutyCycle(100 * dc/(20+dc)) #change the mode of arms def lift_up(): global p1, p2 initial_left1 = 2 initial_right1 = 1.2 initial1 = initial_left1 dc1 = initial1 c1 = 20.0 + dc1 p1.ChangeFrequency(1000/c1) #frequency p1.ChangeDutyCycle(100 * dc1/(dc1 +20.0 )) # calculate the dc initial1 = initial_right1 dc1 = initial1 c1 = 20.0 + dc1 p2.ChangeFrequency(1000/c1) #frequency p2.ChangeDutyCycle(100 * dc1/(dc1 +20.0 )) # calculate the dc print"lift up" time.sleep(0.2) def put_down(): global p1, p2 initial_left1 = 1.3 initial_right1 = 1.9 initial1 = initial_left1 dc1 = initial1 c1 = 20.0 + dc1 p1.ChangeFrequency(1000/c1) #frequency p1.ChangeDutyCycle(100 * dc1/(dc1 +20.0 )) # calculate the dc initial1 = initial_right1 dc1 = initial1 c1 = 20.0 + dc1 p2.ChangeFrequency(1000/c1) #frequency p2.ChangeDutyCycle(100 * dc1/(dc1 +20.0 )) # calculate the dc print"put down" time.sleep(0.2) def arm_initial(): global p1, p2 GPIO.setup(5, GPIO.OUT)# pin2 as the servo GPIO output GPIO.setup(19, GPIO.OUT) initial_left1 = 2 initial_right1 = 1.2 initial1 = initial_left1 dc1 = initial1 c1 = 20.0 + dc1 p1=GPIO.PWM(5,1000/c1) p1.start(100 * dc1/(dc1 +20.0 )) initial1 = initial_right1 dc1 = initial1 c1 = 20.0 + dc1 p2=GPIO.PWM(19,1000/c1) p2.start(100 * dc1/(dc1 +20.0 )) #change the mode of camera by controlling the servo def look_up(): global p5 p5=pi_hw.hardware_PWM(12,50,76000) print "look up" def look_down(): global p5 p5=pi_hw.hardware_PWM(12,50,91500) print "look down" #draw text on the screen def lock_react(): my_font = pygame.font.Font(None, 50) my_button = { 'get trash':(80, 180)} size = width, height = 320,240 black=0,0,0 screen=pygame.display.set_mode(size) screen.fill(black)# Erase the Work space for my_text, text_pos in my_buttons.items(): text_surface = my_font.render(my_text, True, white) rect = text_surface.get_rect(center=text_pos) screen.blit(text_surface, rect) for my_text, text_pos in my_button.items(): text_surface = my_font.render(my_text, True, white) rect = text_surface.get_rect(center= text_pos) screen.blit(text_surface, rect) pygame.display.flip() def drop_react(): my_font = pygame.font.Font(None, 50) my_button = { 'drop trash':(80, 180)} screen.fill(black) # Erase the Work space #pygame.draw.rect(screen,black,((0,0),(150, 240))) for my_text, text_pos in my_buttons.items(): text_surface = my_font.render(my_text, True, white) rect = text_surface.get_rect(center=text_pos) screen.blit(text_surface, rect) for my_text, text_pos in my_button.items(): text_surface = my_font.render(my_text, True, white) rect = text_surface.get_rect(center= text_pos) screen.blit(text_surface, rect) pygame.display.flip() #function of object detection alg. def run_test(color): time.sleep(0.2) global flagRotate global setColor #get a frame if flagRotate == True: print "1" set_speed(0.2, p3) set_speed(0.2, p4) time.sleep(0.1) set_speed(0, p3) set_speed(0, p4) time.sleep(0.2) else: print"2" set_speed(0, p3) set_speed(0, p4) time.sleep(0.1) ret, frame = cap.read() cv2.resize(frame,(320,160)) #cv2.imshow('Capture', frame) #change to hsv hsv = cv2.cvtColor(frame, cv2.COLOR_BGR2HSV) #get mask for colors if setColor == 0: mask = cv2.inRange(hsv, lower_green, upper_green) if setColor == 1: mask = cv2.inRange(hsv, lower_yellow, upper_yellow) if setColor == 2: mask = cv2.inRange(hsv, lower_blue, upper_blue) if setColor == 3: mask = cv2.inRange(hsv, lower_purple, upper_purple) mask = cv2.erode(mask, None, iterations=4) mask = cv2.dilate(mask, None, iterations=4) #cv2.imshow('Mask', mask) #detect blue res = cv2.bitwise_and(frame, frame, mask=mask) #cnts = cv2.findContours(mask.copy(),cv2.RETR_TREE,cv2.CHAIN_APPROX_SIMPLE) cnts = cv2.findContours(mask.copy(), cv2.RETR_EXTERNAL, cv2.CHAIN_APPROX_SIMPLE)[-2] #draw two direction lines cv2.line(frame, (150,0), (150,450), (0,0,255), 2) cv2.line(frame, (450,0), (450,450), (0,0,255), 2) if len(cnts) != 0: #find the largest contour in the mask c = max(cnts, key=cv2.contourArea) #((x,y),radius) = cv2.minEnclosingCircle(c) cv2.drawContours(res, cnts, -1, 255, 3) area = cv2.contourArea(c) print"area" + str(area) #calculate x,y coordinate of center M = cv2.moments(c) cX = int(M["m10"] / M["m00"]) cY = int(M["m01"] / M["m00"]) #draw the center of the object cv2.circle(frame, (cX, cY), 5, (255, 255, 255), -1) cv2.putText(frame, "centroid", (cX - 25, cY - 25),cv2.FONT_HERSHEY_SIMPLEX, 0.5, (255, 255, 255), 2) #run to the blue object thrshold 15000 if area > 1000: start_run_time = time.time() #current_run_time = time.time() flagRotate = False #print"3 " +str(area) set_speed(0, p3) set_speed(0, p4) time.sleep(0.1) print "setColor " + str(setColor) time_flag = 1 #if the trash can is in the middle of the image and the area is larger than threshold #lift up the arm and make the camera look up if cX > 150 and cX < 450 and area > 15000 and setColor % 2 == 1: set_speed(0, p3) set_speed(0, p4) print "reached drop position" lift_up() print"drop it" drop_react() setColor = (setColor + 1) % 4 print "setColor " + str(setColor) #look_down() p5=pi_hw.hardware_PWM(12,50,91500) print "look down" set_speed(-0.3, p3) set_speed(0.3, p4) time.sleep(0.5) set_speed(-0.3, p3) set_speed(-0.3, p4) print"180 " time.sleep(1.0) print"180 " time.sleep(1.5) #if the trash in the middle of the image and the area is larger than threshold #put down the arm and make the camera look down elif cX > 150 and cX < 450 and area > 45000 and setColor % 2 == 0 and time_flag == 1: set_speed(0, p3) set_speed(0, p4) print "reached object" put_down() time.sleep(0.1) print"got it" lock_react() setColor = (setColor + 1) % 4 print "setColor " + str(setColor) #look_up() p5=pi_hw.hardware_PWM(12,50,76000) print "look down" #if the target is in the middle of the image and the area is smaller than threshold #go forward elif (cX > 150 and cX < 450 and area <= 35000 and setColor % 2 == 0) or (cX > 150 and cX < 450 and area <= 15000 and setColor % 2 == 1): set_speed(0.2, p3) set_speed(-0.2, p4) print"reaching " time.sleep(0.15) set_speed(0, p3) set_speed(0, p4) time.sleep(0.05) #if the target is in the left of the image #turn left elif cX >= 450: set_speed(-0.2, p3) set_speed(-0.2, p4) print">450" time.sleep(0.1) set_speed(0, p3) set_speed(0, p4) time.sleep(0.15) #if the target is in the right of the image #turn right elif cX <= 150: set_speed(0.2, p3) set_speed(0.2, p4) print"<150" time.sleep(0.1) set_speed(0, p3) set_speed(0, p4) time.sleep(0.15) #if there'no target in the image #start rotate else: flagRotate = 0 print"cannot find target rotate again" else: #if cannot found target -> rotate flagRotate = True time.sleep(0.2) print"change rotate" + str(flagRotate) # display the image with center #cv2.imshow("Image", frame) #main # set environment variable to play on Pi GPIO.setmode(GPIO.BCM) GPIO.setup(23, GPIO.IN, pull_up_down=GPIO.PUD_UP) time.sleep(0.25) size = width, height = 320,240 black=0,0,0 white= 255,255,255 text_pos=(80,180) screen=pygame.display.set_mode(size) #draw buttons on PiTFT my_font = pygame.font.Font(None, 40) my_buttons ={'start':(280, 40), 'quit':(280, 150)} my_font = pygame.font.Font(None, 50) my_button = { 'lock trash':(80, 180)} screen.fill(black) # Erase the Work space for my_text, text_pos in my_buttons.items(): text_surface = my_font.render(my_text, True, white) rect = text_surface.get_rect(center=text_pos) screen.blit(text_surface, rect) pygame.display.flip() #get picture cap = cv2.VideoCapture(0) #set color range lower_blue = np.array([100, 43, 46]) upper_blue = np.array([264, 255, 255]) lower_yellow = np.array([20, 100, 100]) upper_yellow = np.array([30, 255, 255]) lower_green = np.array([29, 86, 6]) upper_green = np.array([64, 255, 255]) lower_purple = np.array([125, 43, 46]) upper_purple = np.array([155, 255, 255]) #set initial arm mode:lift up #set initial camera mode:look_down arm_initial() #camera_servo_initial() global p5 p5=pi_hw.hardware_PWM(12,50,91500) #initial variable flagRotate = True setColor = 0 hisColor = 0 color = 0 start_flag = 0 while True: #set 23 as bail out button if(not GPIO.input(23) ): break for event in pygame.event.get(): if(event.type is MOUSEBUTTONDOWN): pos = pygame.mouse.get_pos() elif(event.type is MOUSEBUTTONUP): pos = pygame.mouse.get_pos() x,y = pos if x>150: #"start"button is pressed if y<100: start_flag = 1 color = hisColor run_test(color) #"stop"button is pressed else: start_flag = 0 hisColor = setColor set_speed(0, p3) set_speed(0, p4) #stop_react() if start_flag == 1: run_test(color) print"set" + str(setColor) #clear p1.stop() p2.stop() p3.stop() p4.stop() pi_hw.stop() GPIO.cleanup() cap.release() |