The Project:

|
|
|
|
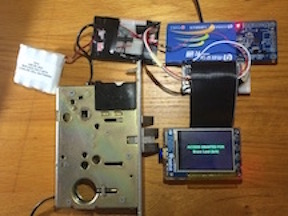
The goal of this project is to develop an RFID based entry system for Cornell labs based on the Raspberry Pi. The current entry system for the labs features a magnetic card reader which requires users to swipe their ID to gain access to the lab. The magnetic reader sometimes fails to read the card in one swipe, which means that user might have to swipe more than once to get into the lab. Moreover, the current system maintains user information locally on each door which means security personnel have to manually program the sensor to authorize or remove users. We have addressed these problems by using a RFID reader and leveraging the mySQL support on Raspberry Pi. The RFID reader is guaranteed to read the card in on go (provided that the card works) which eliminates the need for users to swipe many times. The mySQL database allows security personnel to control access through one central database.
The objective of this system can be roughly divided into three parts:
- RFID Reader: Establish method of reading RFID tags on Raspberry Pi
- mySQL database, GUI & RFID Manager:Write software to read tag data and query central database for user access, develop user interface to display output and develop user interface to modify central database.
- Lock control: Control the DC motor on the lock via GPIO pins on the Pi
Design and Testing:
The design and testing for this project were done in three phases according to the objectives section
Design:
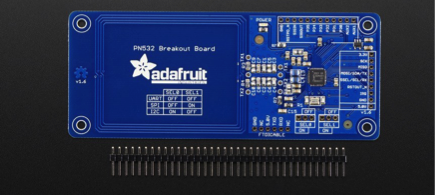
We have used the PN532 breakout board from Adafruit as the RFID reader for this project. PN532 is a popular NFC chip capable of both reading and writing NFC tags. This chip is strongly supported by libnfc, an open source library for nfc applications. It can communicate via 3.3V TTL UART at any baud rate making it ideal for interfacing with the Pi.
|
Libnfc communicates with the PN532 via UART, however the UART port on the Pi is dedicated for other purposes. Therefore we needed to disable kernel messages through UART on the Pi via raspi-config for the chip to communicate. After installing the required dependencies and configuring it to operate with PN532 chips, we proceeded to read one of the MiFare cards (provided with the chip) using a polling function provided by libnfc.
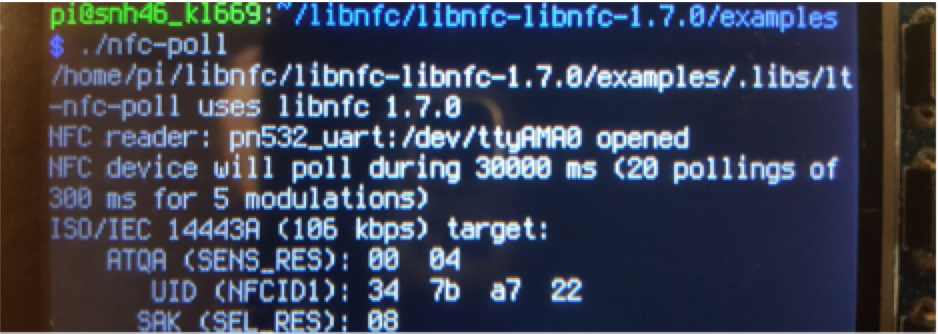
In order to test the functionality of the card reader, we used one of the example codes provided by the NFC library. nfc-poll polls the tag for a fixed amount of time and displays the UID read within that period. If nothing is read within the fixed interval, the reader times out. The diagram below shows the reader working with a Mifare card.
|
MySQL database:
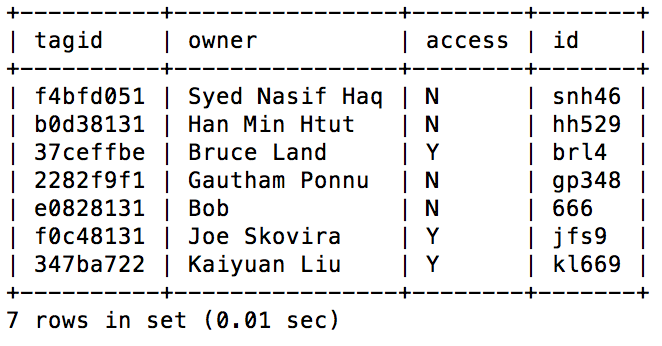
The database used for this project was a mySQL database. This database was used to store information for each RFID card, including the tag number, user's name, whether this person has access to the door and the user's ID number. The advantage of using a MySQL database is that it can be stored remotely, not just locally on each individual door lock. Also, this database allows the security personal to add whole groups of users to the database at once not just one user at a time. With the database being global, security personal need only to update the row in the database corresponding to the user to change the user's access for various doors in the building. They no longer need to program each door individually.
When we first tried to install the database on to the Pi, we were unable to because it would not let us create a root user. Every time we tried to create one, it would say the install was not successful and give the error "Unable to set root password". We tried many fixes including setting the local to "en_US", but the error persisted. After many attempts, we finally fixed it by completely removing directories for past installations of sql server. Also, we previously started to install the ip mailer to mail the ip address of the pi to us at startup, but never finished it, so the local host was not set up correctly. This also affected our ability to install MySQL server correctly since it used local host as its default domain.
After the database was setup correctly we created another user called "reader" on the database. Unlike the root user, reader is used strictly used by our rfid program to read and write to the "rfid" database. This was done for the sole purpose of protecting the database, as the reader can only mess with the "rfid" database and not add or remove users or add other databases to the server. We then created the table, shown below in figure 3, on the database.
|
GUI:
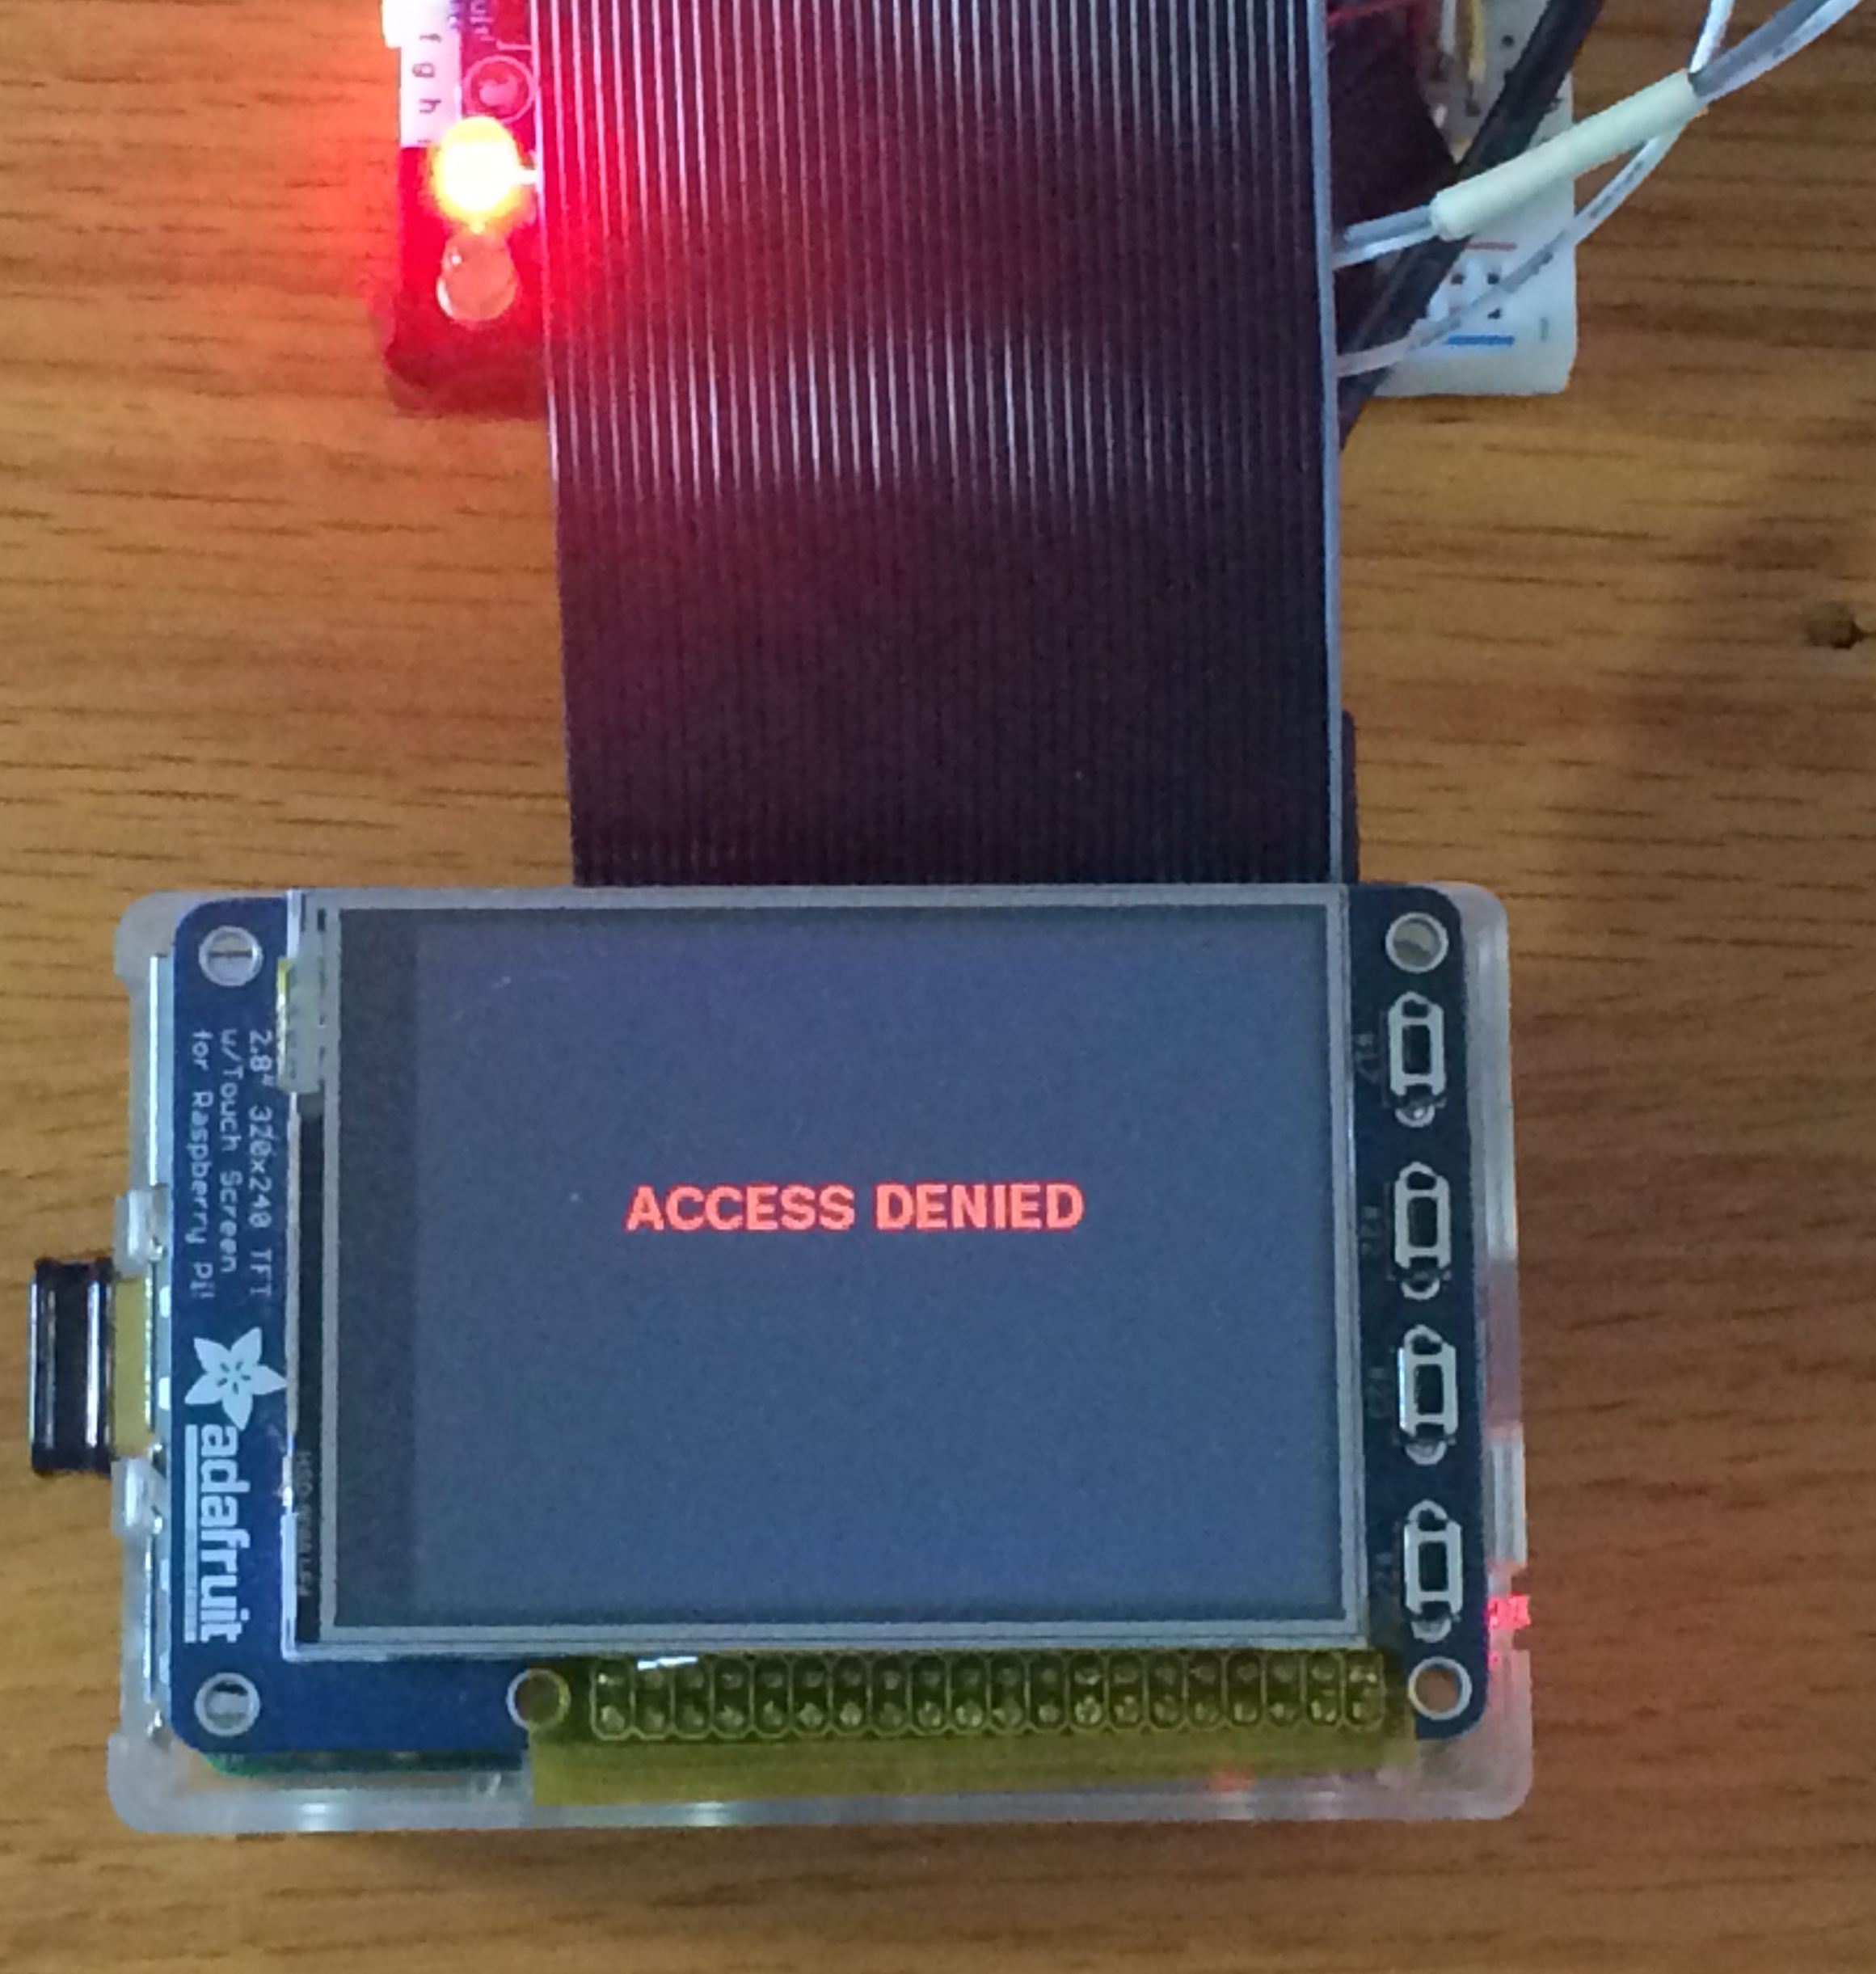
The GUI for the project was created using python and pygame. It used a pre-implemented C program "nfc-poll" in libnfc to poll for the rfid card. After a card is placed on the sensor, the "nfc-poll" program reads the UID on the card and stores it into a file. Then our python program reads the file and extracts out the UID number on the card and looks for it in the database. If the program can’t find the UID number in the database "Access Denied" is displayed in red on the PiTFT screen and the red LED blinks as shown in figure 4.
|
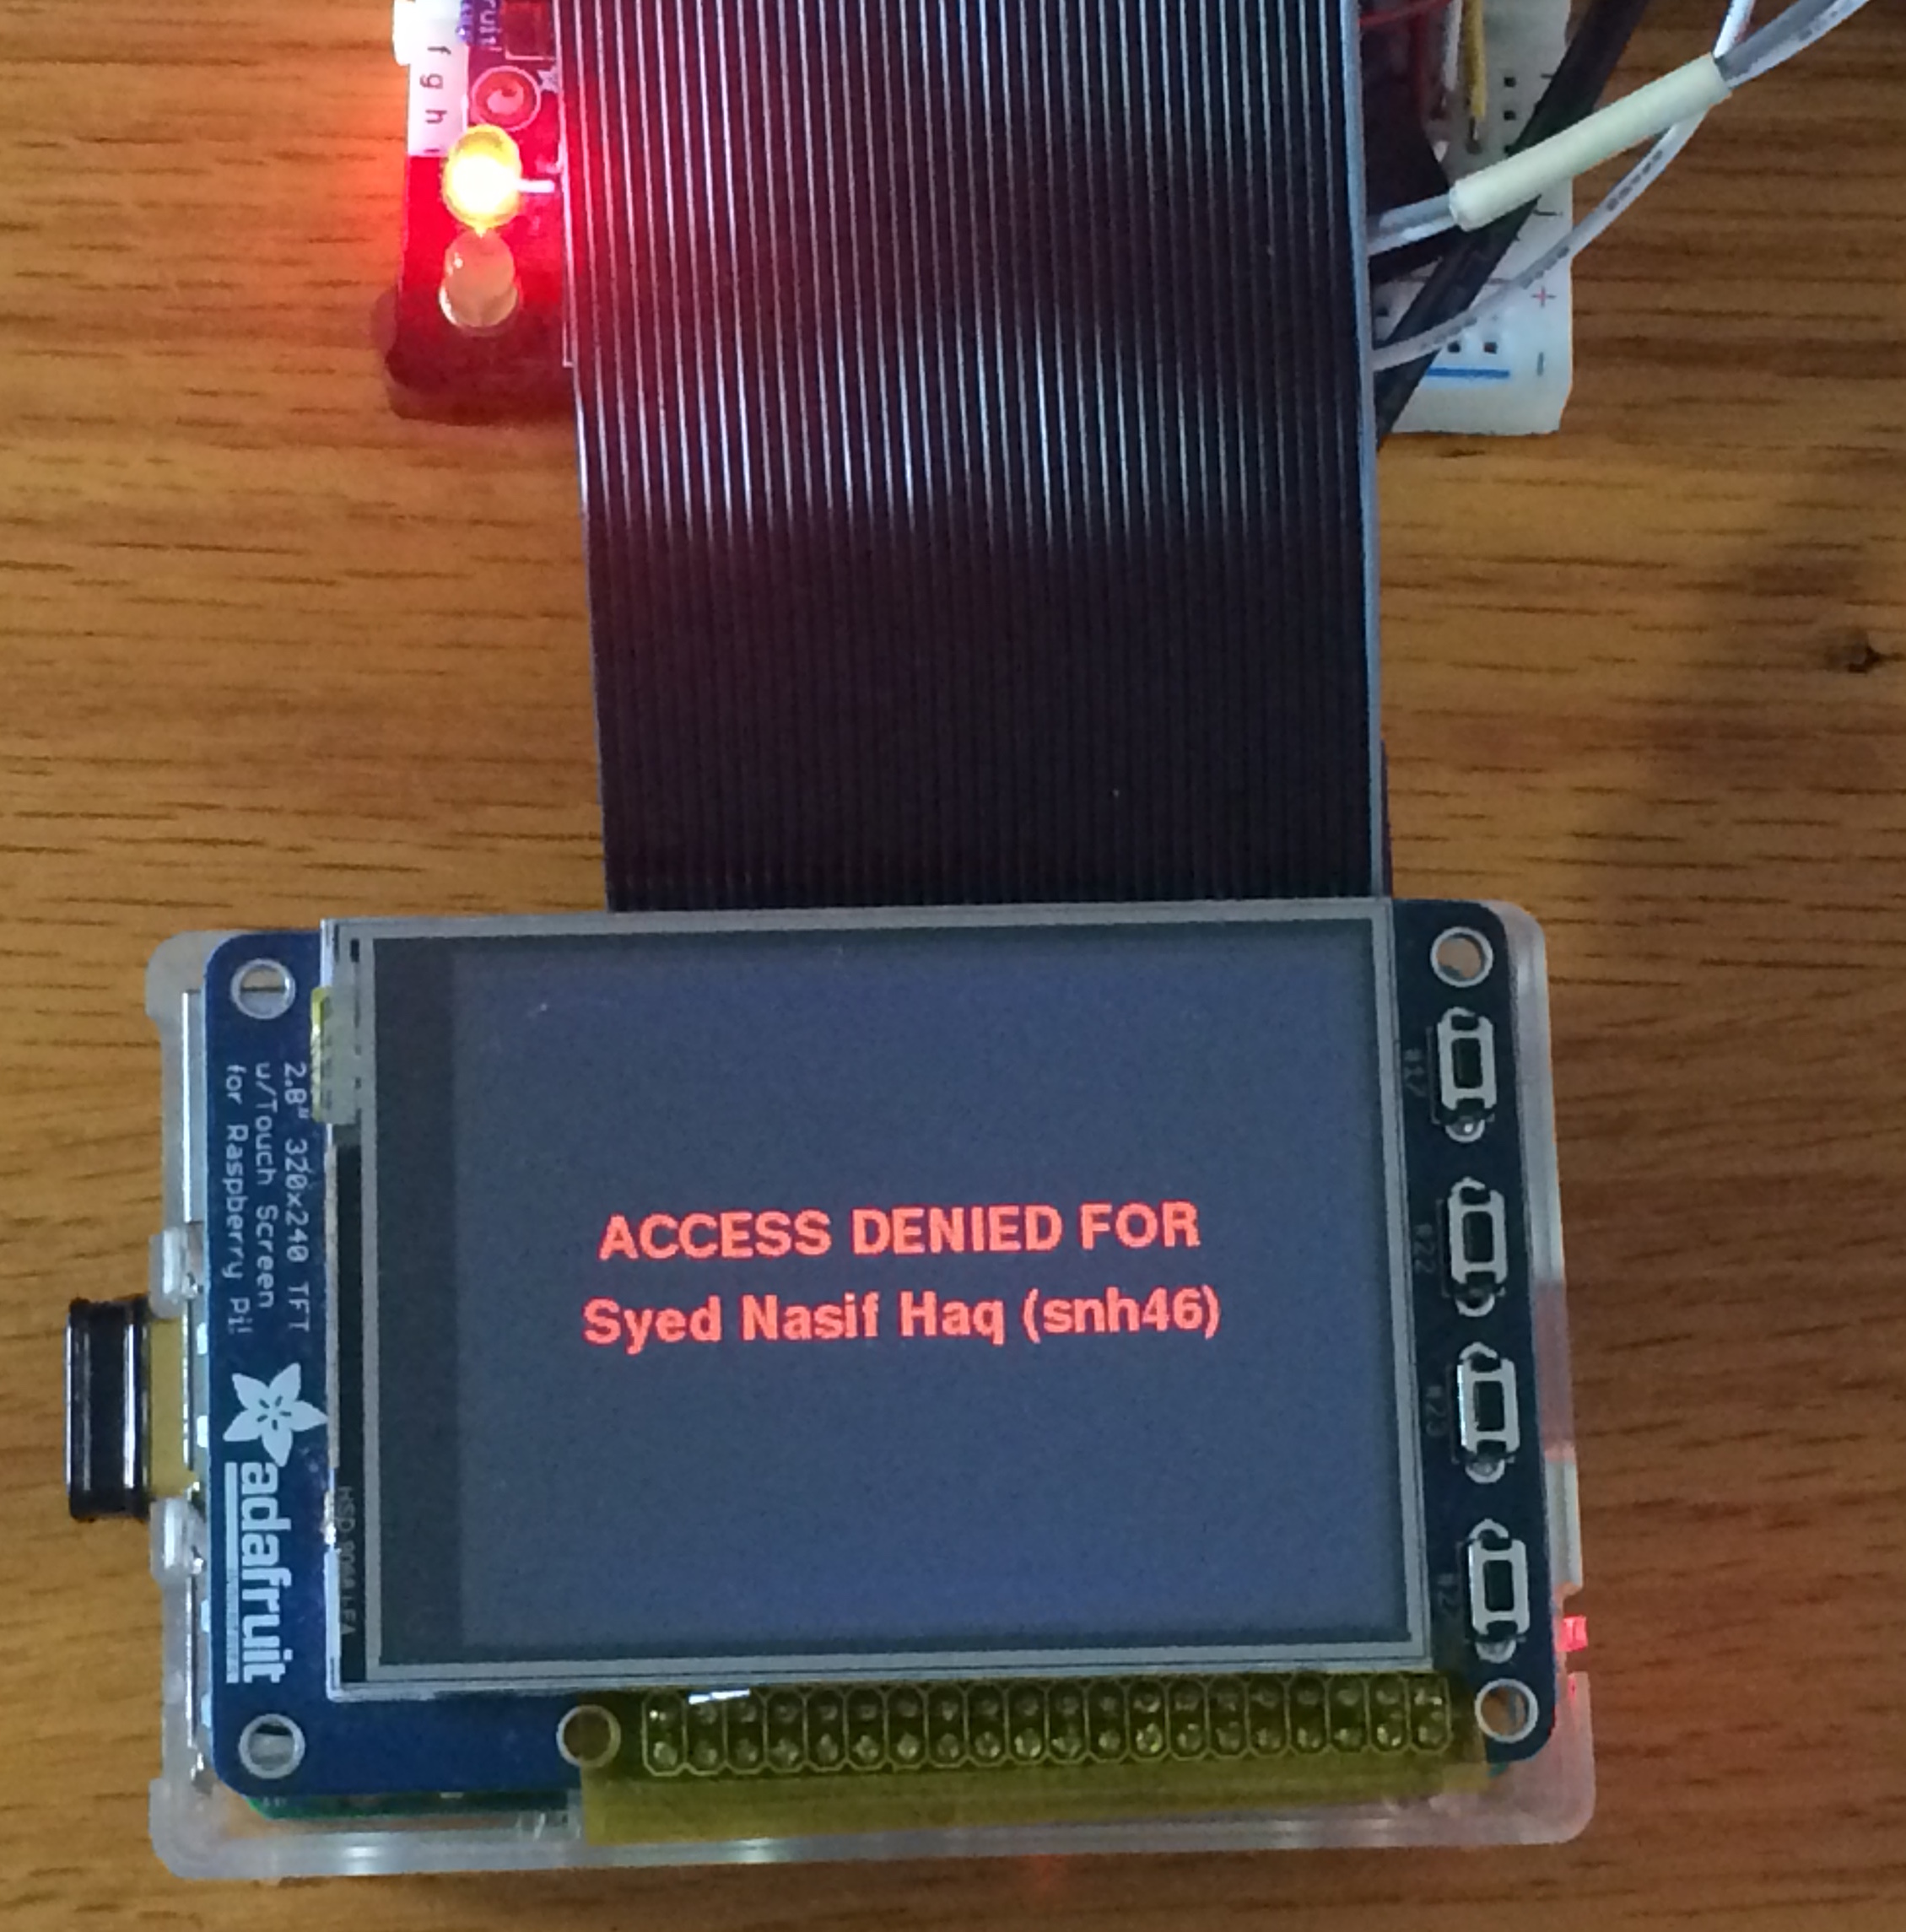
If the UID number is found in the database, but the owner does not have access (there is an "N" in the access column for the user) "Access Denied for user's name (user's id)" with "user's name" and "user's id" replaced by the name and id of the user of the card is displayed in red on the PiTFT screen and the red LED blinks as shown in figure 5.
|
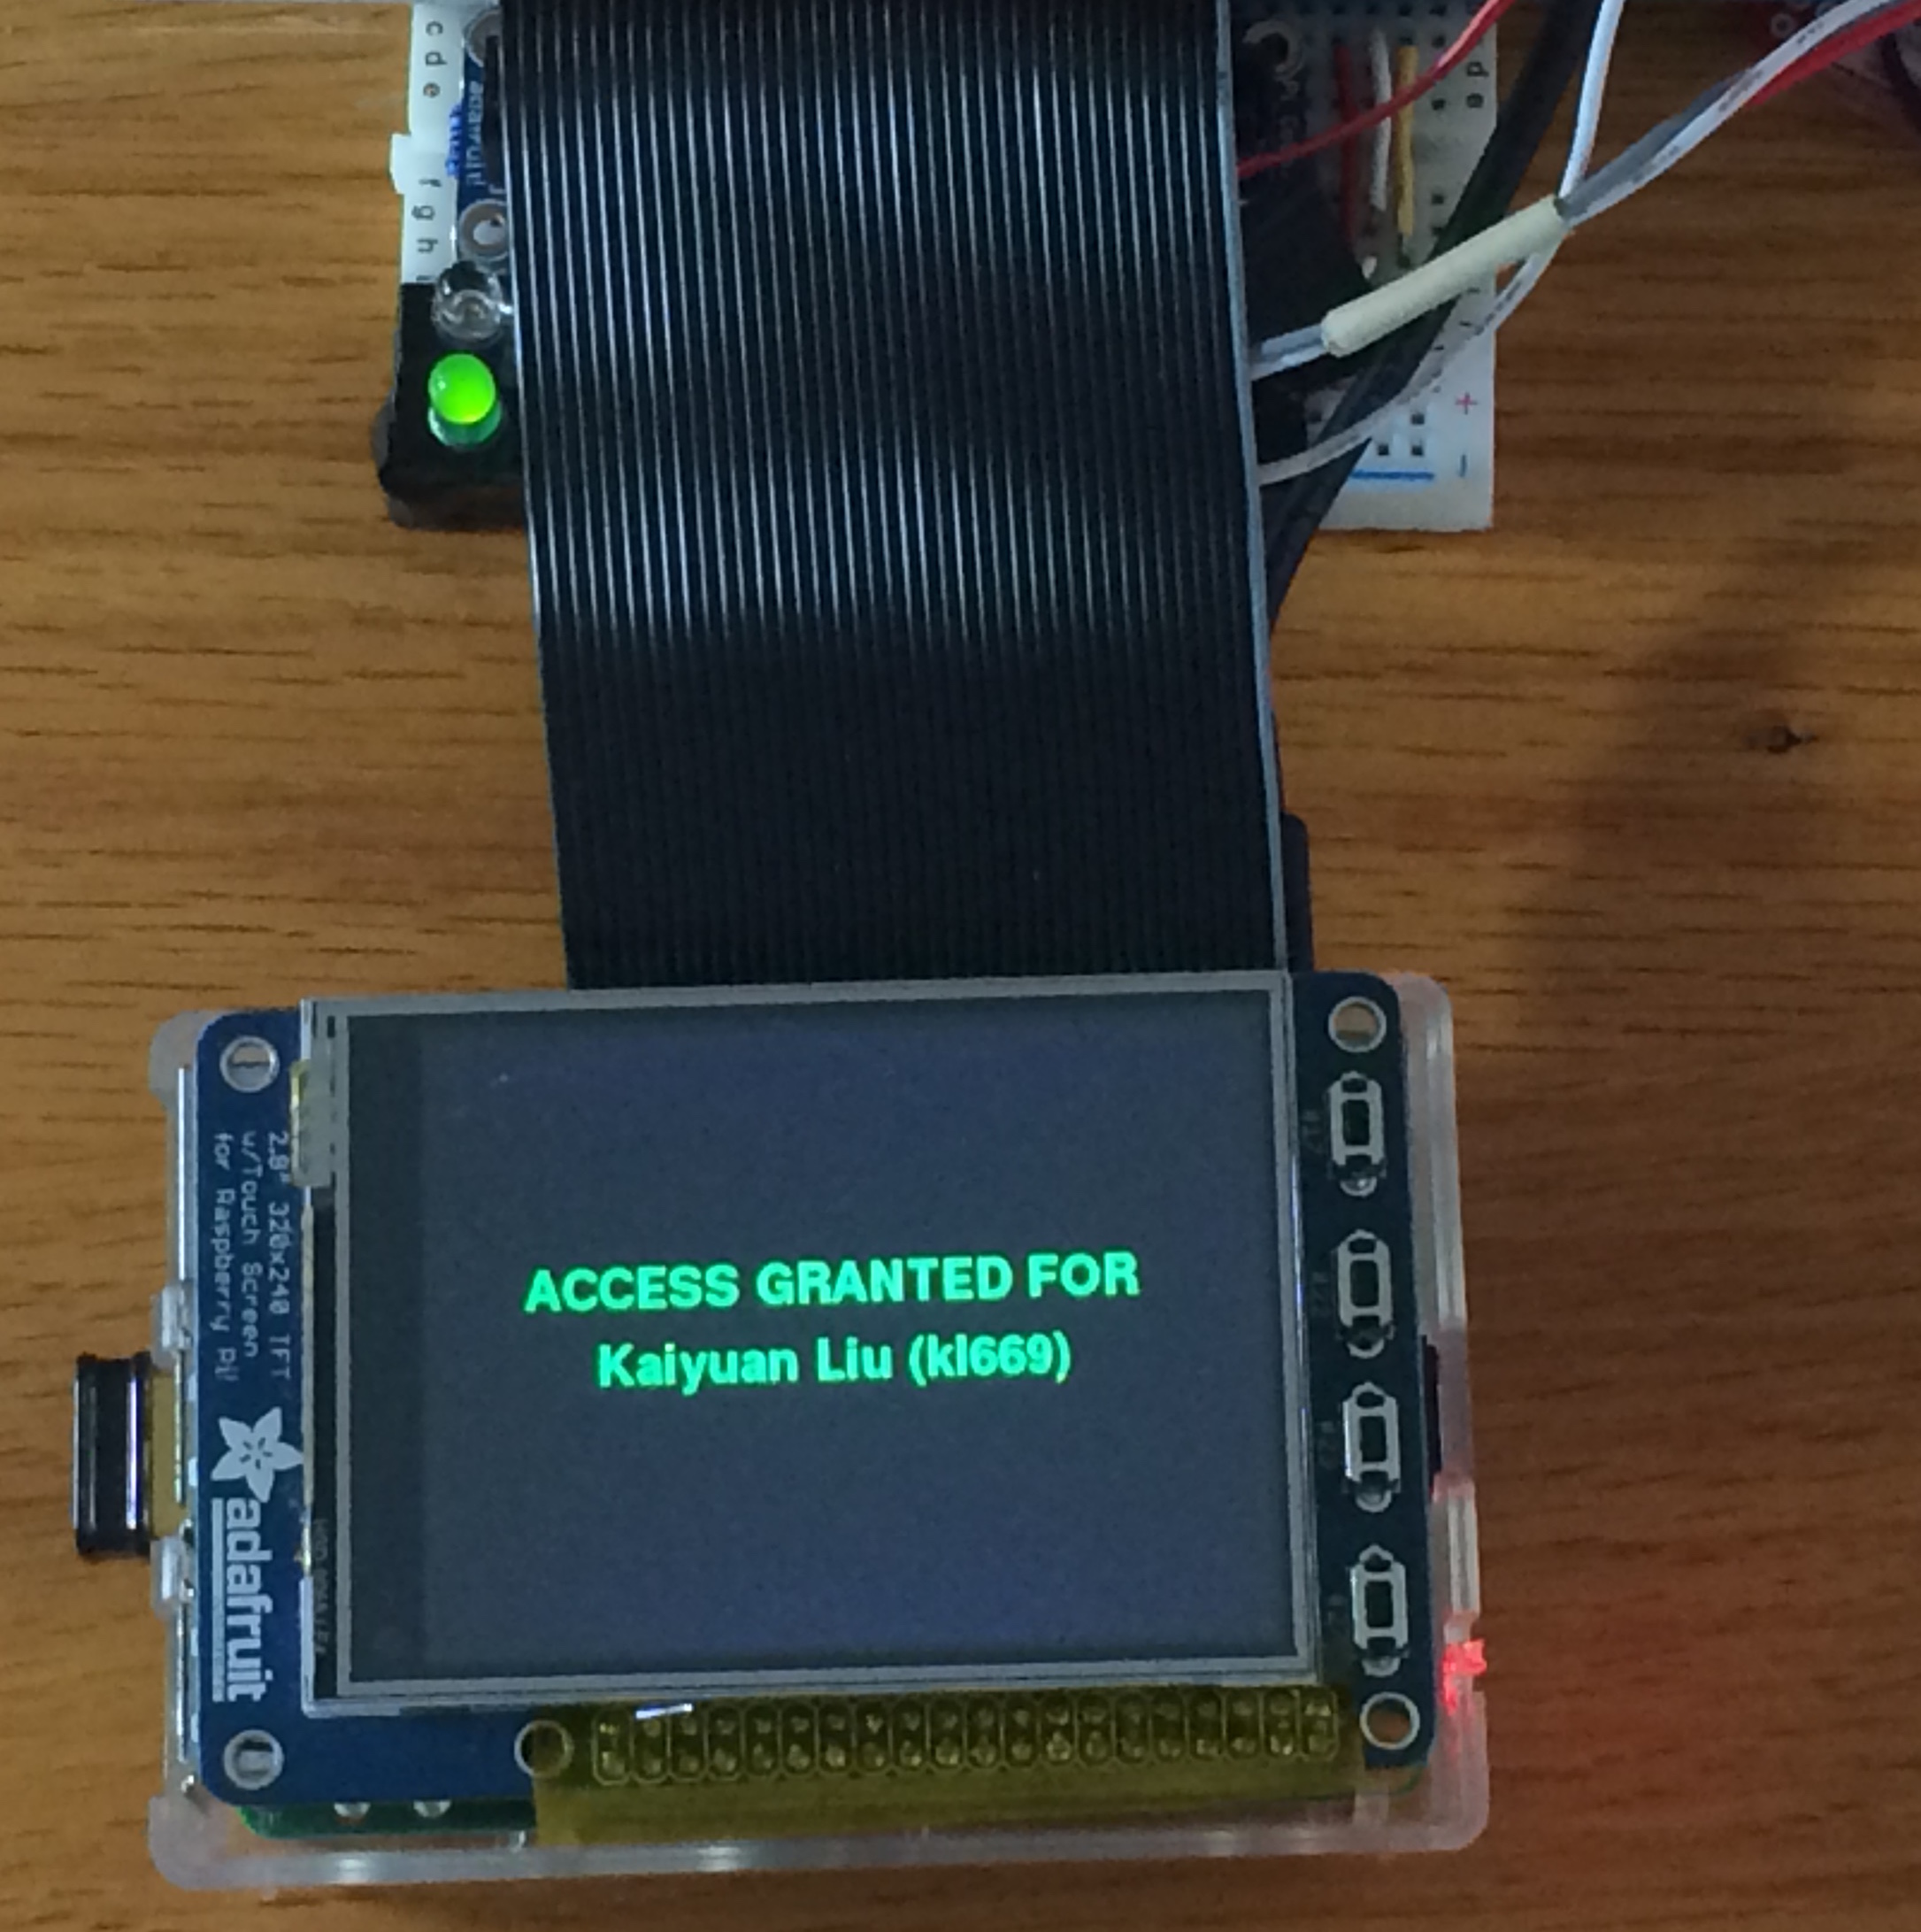
If the UID number is found in the database, and the user has access (there is an "Y" in the access column for the user) "Access Granted for user's name (user's id)" with "user's name" and "user's id" replaced by the name and id of the user of the card is displayed in green on the PiTFT screen and the green LED blinks as shown in figure 6.
|
Then the program waits for another card.
RFID Manager:
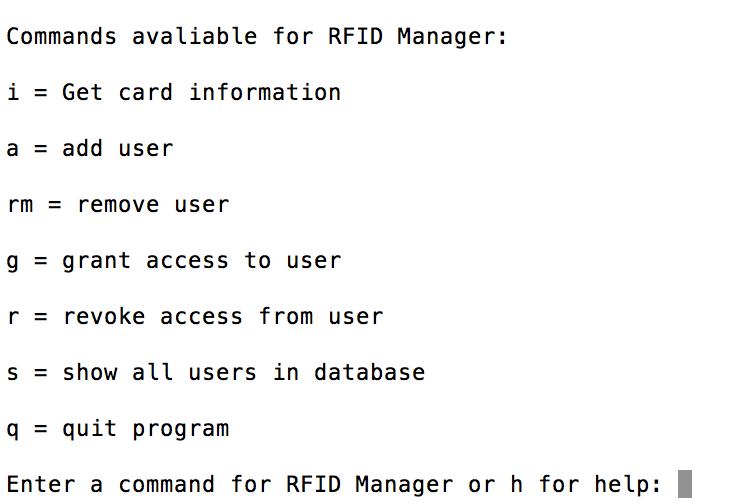
We created another python program that is used to manage the database called rfid manager. This program would allow the security personal to add users to the database, remove users from the database, identify the user of a card, grant access to a user and revoke access from a user. When the program starts up a prompt is shown for the security personal to enter a command for the RFID manager. If "h" is entered, the help menu shows up and a list of commands is shown. The commands are "i" to identify the user of a card, "a" to add an user to the database, "rm" to remove an user from the database, "g" to grant access to an user "r" to revoke access from an user and "s" to show all users in the database. The initial help screen is shown in figure 7.
|
If "i" is entered the program ask the security personal to place a card on the RFID sensor and will keep asking the security personal to place a card until the security personal answers "no" to the prompt "Do you want to identify another user?" Then it will look in the MySQL database and display the information of the user of any card in the database as shown in figure 8 below.

|
If "a" is entered the program does the same thing as with the "i" command excepts it only allow one card to be read at a time and then prompt for the name and id number of the new user for the card, if the card is not already in the data base. Otherwise the program displays "There is already a user associated with this card. Please remove them first." and does not add the new user as shown in figure 9 below.

|
If the name and id of the new user match another entry already in the database the program displays "This user is already associated with another card. Please remove them first" and does not add the new user as show in figure 10 below.

|
Otherwise the program adds the new user as shown in figure 11 below.

|
The "rm" commands does almost the same thing as the "a" command except the it checks to see if the User is actually in the database before attempting to remove them. A screenshot of the "rm" command is shown in figure 12 below.

|
The "g" command does the same thing as the above except the it only grants access to a user if the user is in the database and they do not already have access as shown in figure 13 below.

|
The "r" command does the same thing as the "g" command except that it only revokes access from a user if they are in the database and they currently have access as show in figure 14 below.

|
Testing:
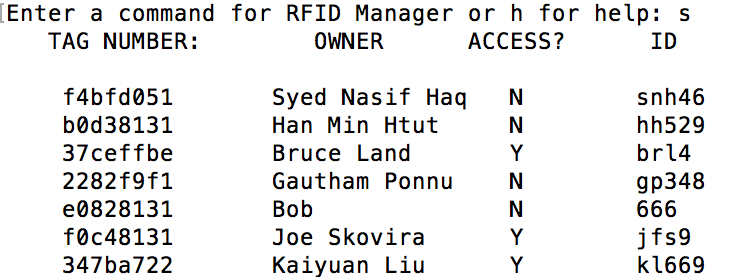
To test our python code and sql server, we manually added users to the database and tried to identify the users cards with the "i" command. As first this did not work as we kept getting errors from python saying our string was not formatted correctly. We looked into this problem, and after a few attempts at trying to fix it we found that we were mixing the old string formatting method in python with the new string formatting method in python. After making sure that our string formatting was consistent our program worked. After we got the "i" command, we gradually added other commands to the manager and tested each of them individually. In the end we added a "s" command which displays all users in the database as shown in figure 15 below.
|
This confirmed that our RFID Manager program worked. To test the GUI we ran the program and tried various "legal" and "illegal" cards on it to make sure the worked as expected. After the GUI was working we moved on to lock control.
Design:
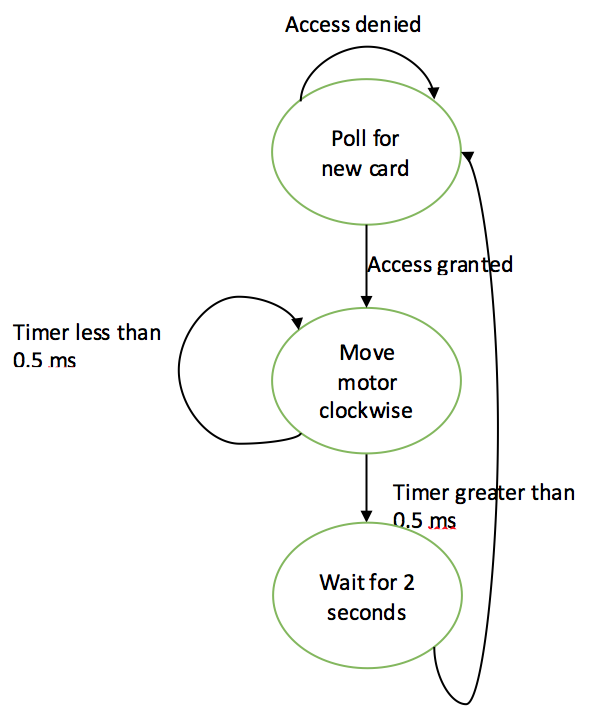
The lock is operated via a 6V DC motor. The motor must be able to move in both directions so as to lock and unlock the door upon verification. We have connected the lock's motor to GPIO outputs via an H-bridge. The H bridge is a circuit that enables voltage to be applied in either direction. The table below summarizes the logic used for the bridge.
| H Bridge Inputs | |||
|---|---|---|---|
| Enable | Input 1 | Input 2 | Motor Action |
| 1 | 1 | 0 | Clockwise (Unlock) |
| 1 | 0 | 1 | Counterclockwise (Lock) |
| 0 | x | x | Rapid Stop (Idle) |
The operation of the motor can be illustrated by the FSM in figure 16 below
|
Testing:
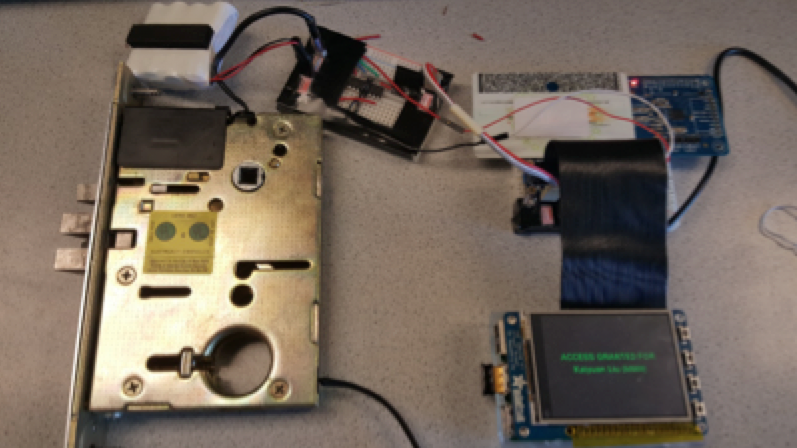
The circuit below was assembled to connect the Raspberry Pi to the lock and the system was tested with both authorized and non-authorized cards. We run checkaccess.py which checks the card against the database and upon authorization, enables the H bridge to turn the motor so as to unlock the door. After a fixed interval, it turns the motor in the opposite direction to lock the door back. The picture below in figure 17 shows the setup for testing the lock operation.
|
The motor did not initially respond to the output from the H-bridge. We debugged this by measuring the output at each stage from the GPIO pins to the H bridge. Initially, we realized the H-bridge did not produce any output. This problem was solved by replacing the H-bridge. However, this did not result in the motor turning. We then realized that the Pi and the H-bridge were not sharing a common ground which meant no power was being delivered to the H-bridge. Once this issue was resolved, the motor operated according to expectations.
The final setup for the project is shown below. Our project was successful in achieving the overall goal of this project: creating an RFID based entry system for Cornell labs. We were able to read the card through the PN532 chip, verify against mySQL database and control the motor, LED lights and GUI according to user's access.
We have developed a system that can make it much easier for the security personnel to maintain access to the door by leveraging a Raspberry Pi's ability to support mySQL databases. At its current state, the system supports MiFare cards at 13.56 MHz. It should be simple to incorporate it with Cornell cards by changing the sensor.
With more time, we could explore different methods of optimizing the power consumption of the system before it can be implemented on the door. One option is to implement it on a Pi Zero which is cheaper and has much lower power consumption compared to the Raspberry Pi 2.
Please click here to see our commented code for the GUI
Please click here to see our commented code for the RFID Manager
Below is the full schematic of our circuit

Below is a table of our cost details
| Part | Cost |
|---|---|
| Adafruit RFID Sensor | $39.95 |
| H-Bridge | $0 |
| RFID Tags | $0 |
| Resistors | $0 |
| LEDs | $0 |
| Total | $39.95 |
Below is the table of specific tasks done be each person.
| Task | Who did it |
|---|---|
| Installing NFC-Poll and MySQL Server | Syed |
| Writing the GUI and RFID Manager | Both |
| Testing the GUI and RFID Manager | Both |
| Integrating Door Lock Mechanism | Both |
| Ordering Parts for the project | Kaiyuan |
| Final Testing | Both |
| Writing the Report | Both |
| Making the Webpage | Kaiyuan |
Kaiyuan Liu
Email: kl669@cornell.edu
Syed Nasif Haq
Email: snh46@cornell.edu