Crossy Road in Real Life
5/13/25
Justine Eng and Tracy Zhang (jse77 & tz72)
Demonstration Video
Introduction
This project is a reimagination of the popular game “Crossy Road” where the objective is to get a car/figure to cross a road filled with moving obstacles. Our take on it is to incorporate the PiTFT screen and a robot car to make our own Pygame version. We will implement the crossy road game through a python script using Pygame, and we will use the PiTFT to display the game such as start, pause, displaying the game/score, etc. The input of the direction and forward/backwards movement will be the four GPIO pins that will each correspond to a movement. These are mounted on a physical game control we made with a bread board and colored buttons. The robot has to physically cross through the moving obstacles where the obstacles are a projection onto the floor. We will use omni-directional tires to allow our robot to move as controlled in the game above. The robot will be a physical representation of what is occurring on the screen, and will try to move through the course without touching any of the obstacles. We will also process on the Raspberry Pi whether or not something has hit the robot, and if that happens, the robot will go skidding off, simulating being hit by a car!
Project Objective:
Our project aims to make a real life version of the popular game, Crossy Road! As you play the game, an omni-wheel robot is a real-life representation of your character in the game! It will navigate through the moving obstacles displayed on the ground via a projector, and you will try to clear the levels! Have fun and be careful crossing!!
Design & Testing
In week 1-2, we finalized our project idea, and brainstormed how to best execute the project. We started drawing the characters and coding up the game in python, but nothing was moving or being displayed yet. We had to do a lot of searching of how to create a game, making characters and making functions to create each of them in random places, but overall no major roadblocks since we have not gotten very far.
In week 2-3, we continued coding up the game in python. We were still working on integrating it into the pi, but have been coding the screen on the PiTFT and the start screen and GPIO input. We were working on the different parts we needed to get the game playable, and mainly focusing on the software and coding part. We added score counting and implemented object collision detection. We also coded the speed increasing as you complete each background. Getting the game functional has been a little difficult, and the GPIO buttons and screen working has been the most challenging.
In week 3-4, we have been debugging our code to get the game working on the pi. We added score counting onto the screen and got the GPIO buttons to work. We have started to work on adding code to implement incorporating our robot from lab 3 into the project and planned to continue that work. As an incremental building step, this week we have gotten the two-directional robot from Lab 3 to move in sync with our character in the game. This is our final testing step before we start adding on and building our omni-directional robot.
In the remainder of the lab before our final demo, we had a lot of work left. The first thing we did was to wire up our robot to get the omni-directional wheels working. We hooked up a second motor control and wired it accordingly, choosing free GPIO pins and testing as we went. We created python scripts to test each of the wheels, and wrote functions to make all the wheels spin forward, backwards, etc. We referenced the previous year’s omni-directional robot’s code for this, and we have credited this. The motors from the omni-directional robot had a lot of difficulty functioning properly because all of its wires kept snapping. The tops of them would break, and so when we checked on the wiring, oftentimes, we would just see a loose wire, and the other end of it was still in the breadboard but disconnected. With a little bit of taping wires, and a lot of checking on each motor, we ended up getting everything taped and connected. We had a little bit of a problem in this step, and about 4/5th way through our robot testing, two of our wheels just stopped moving. We spent about an hour debugging, but in the end had to call it for that lab session. Miraculously, when we came in the next day, without touching any of our code or wiring, the robot began moving as it had previously. This was a road block we ran into, but it was nothing major, just surprising and a little bit time-consuming since the robot and pi were just having some technical difficulties.
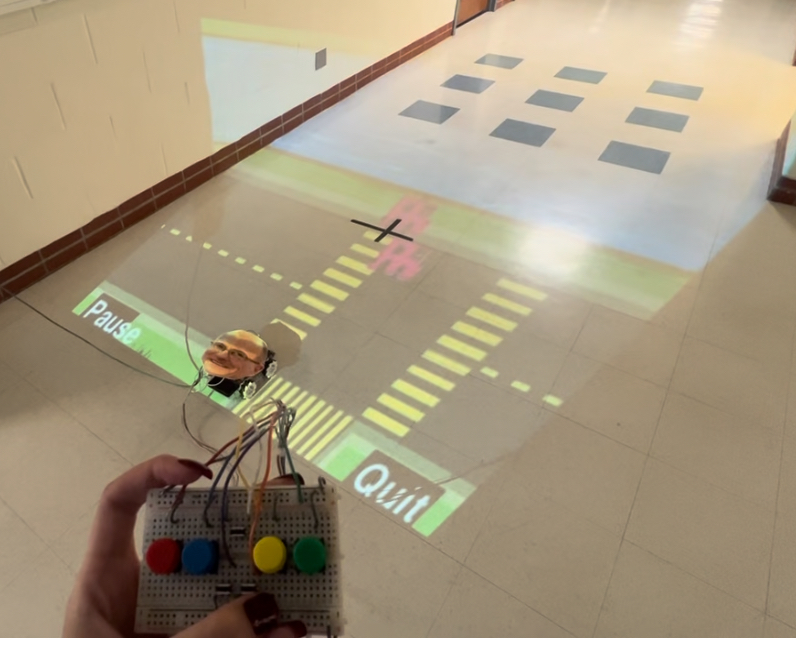
The following lab session, with our omni-directional robot moving well, we integrated it into our python script. This was relatively easy since we had a script that allowed us to move the robot, so we just called each of the respective functions when we detected a button press for moving the character. The only problem we ran into here is that every time we put away the robot and rewired it, the direction of each wheel changed, so we would adjust the script, using the left function for forward for example. Then, to make our game feel more like a game controller, we added on a breadboard with click buttons for the four directions, as well as a start, stop, and pause buttons for the rest of the game controls. We wired these to other free GPIO pins, which were harder to find since we had used so many of them. Adding the detection in our python script was simple, and the only issue we had was that we originally put it in a loop that was never entered, but after debugging that our new buttons worked well. We hooked this up, and this was relatively simple to execute and made our game a lot more fun to play with! We also hooked up a speaker to our raspberry pi, and the sounds with the buttons made the game awesome!
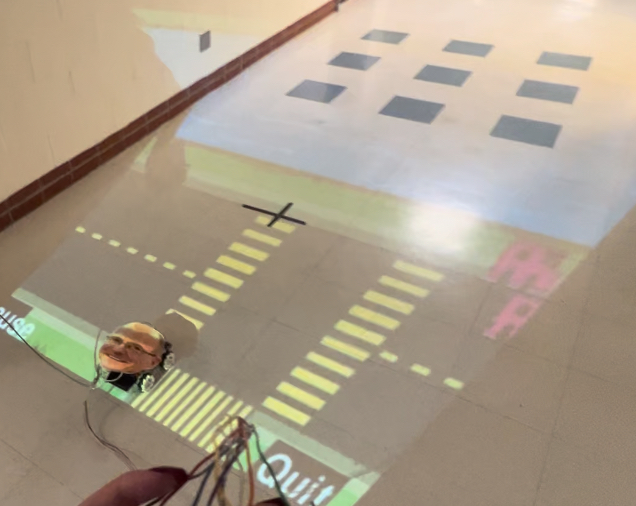
The next time we came in, we knew we wanted the game to be able to be displayed on the ground via a projector instead of just on the pi, so we worked on getting the Pygame screen to be able to run on our own computer that was ssh-ed into the pi. This way, we could hook up the projector via HDMI and project the game screen onto the ground. To do this, we went through many many iterations of trying to mirror the pi screen (fb1) to a monitor (fb0). After downloading many packages, the one we found to work was creating a UDP connection between the pi and the computer. To do this, in the ssh terminal of the pi, we ran “sudo ffmpeg -f fbdev -framerate 20 -i /dev/fb1 -f mpegts udp://10.49.82.170:1234” where 10.49.82.170 is IP address of our personal computer. Then, in personal terminal we ran “ffplay -fflags nobuffer -flags low_delay -framedrop -probesize 32 -analyzeduration 0 udp://@:1234” which caused a ffplay window to pop up which mirror our screen on the pi! It was important to add the low_delay flag into the command, because originally, it was taking about 5 seconds of delay time for the graphics to show up on our computer. However, with this tweak, the mirroring went much more smoothly.
With a way to now project our game on the floor, we moved onto getting the robot to move untethered to the power supplies and monitor. We slowly unplugged each element, starting with the mouse, keyboard, hdmi, ethernet, and monitor. We connected the power of the pi to a personal battery pack we brought in, and the motors were run with batteries from our lab 3 robot. We then took the time to resync the wheels, taping a red dot to each of them and adjusting each of their PWM to get them in sync and move all at the same rpm. We noticed during testing that one motor, specifically, our top left motor, seemed a bit weak. When we would pick the robot up, the wheel turned great, but on the ground with the weight of the speaker, pi, breadboard, battery pack, and batteries, it sometimes got stuck and caused our robot to move crooked since that wheel was unable to turn as well. Overall though, the robot was working, the game was playing, and all we had left was to get the projector set up.
The morning of our demo, we were planning on having Tracy up on a stool holding the projector while we drove the car through the game. We had practiced this the night before, but upon discussing with Prof Skovira, we decided to mount the projector instead. The display had to span about 10 tiles since our robot was about 1 time long, and we had 10 lanes we needed to navigate through for each of our levels. The first version we put it on the ceiling, but this was too small and only spanned about 3 tiles. The setup we settled on was on top of a display case with a few pieces of wood underneath it. We played the game a couple of times on the ground to make sure it worked, and then we were ready for our demo!
Drawings
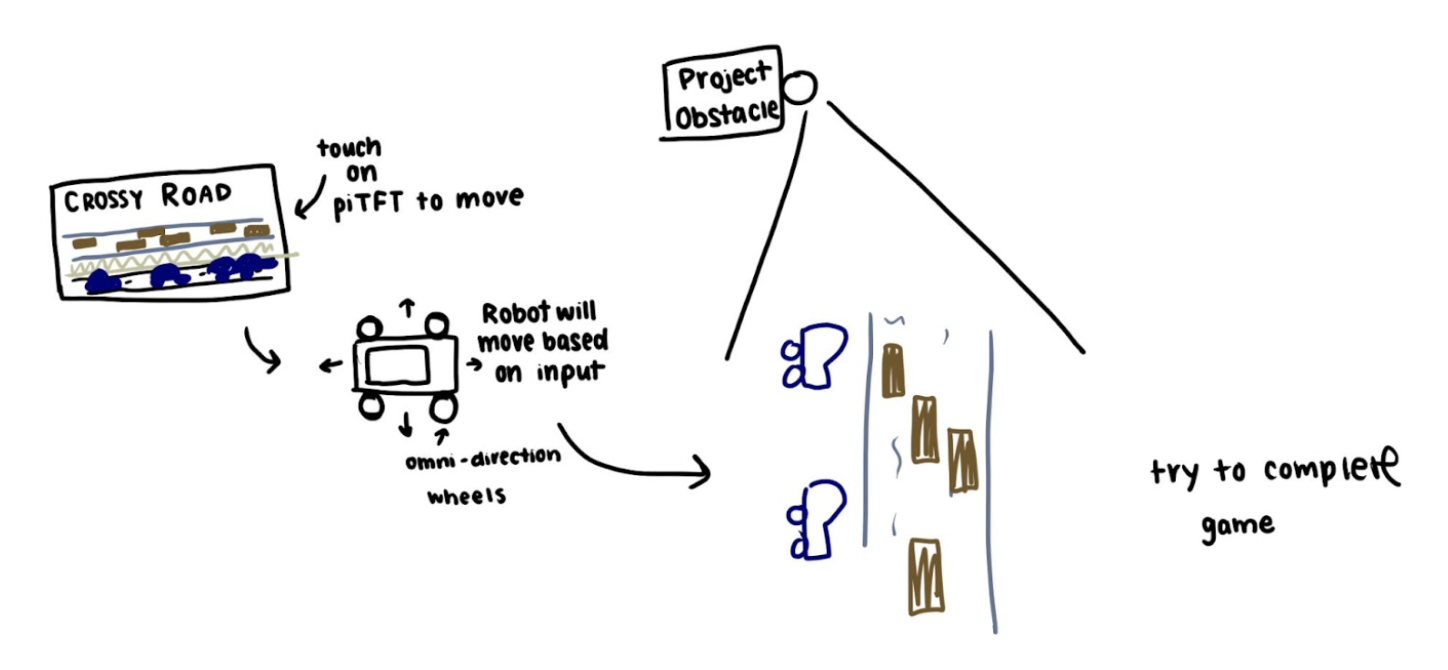
Initial design of Crossy Road
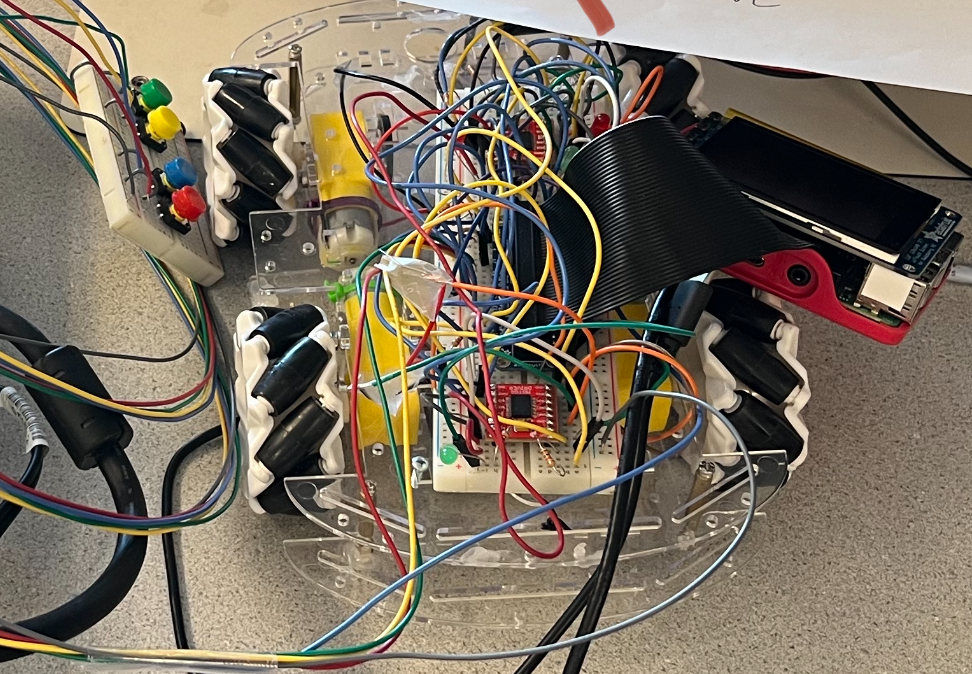
Wiring of Motors and Rasp Pi
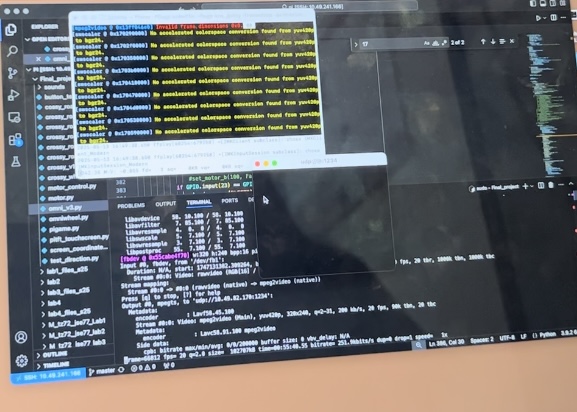
Pi to Computer ffplay Screen
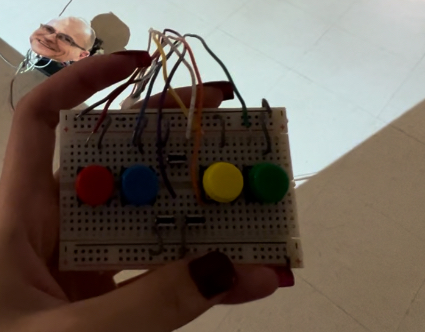
Game Controller