Raspberry Pi Mask Detection
David Wolfers (dsw247) & Tim Tran (tdt46)
Spring 2022
Project Video
Introduction
In this project we created a program that uses machine learning, specifically a Convolution Neural Network, to detect whether people are wearing face masks correctly or not. We used the Raspberry Pi to display a GUI that allows users to take photos of people using the Raspberry Pi Camera. Then an OpenCV program is used to detect the person's face. An image of the face is run through the neural network, and its result is then displayed back on the GUI.
Objective
With the ongoing (and seemingly neverending) Covid-19 pandemic, we thought it would be useful for a computer program to automatically detect whether a person is wearing a facemask correctly, incorrectly, or not at all. We decided that the best approach to this problem would be to use a trained convolutional neural network that can perform image classification as well as an OpenCV model that can automatically detect human faces in images. We hope that this kind of program can be used to help limit the spread of such pandemics or airborne illnesses in the future.
Design
Initially, this was the block diagram of our system. We planned to implement a machine learning model that predicts what a person's face looks like underneath their mask. Eventually, we abandoned the idea after realizing that the work required is out of scope for a class project. Turns out reconstructing people's faces is really hard!
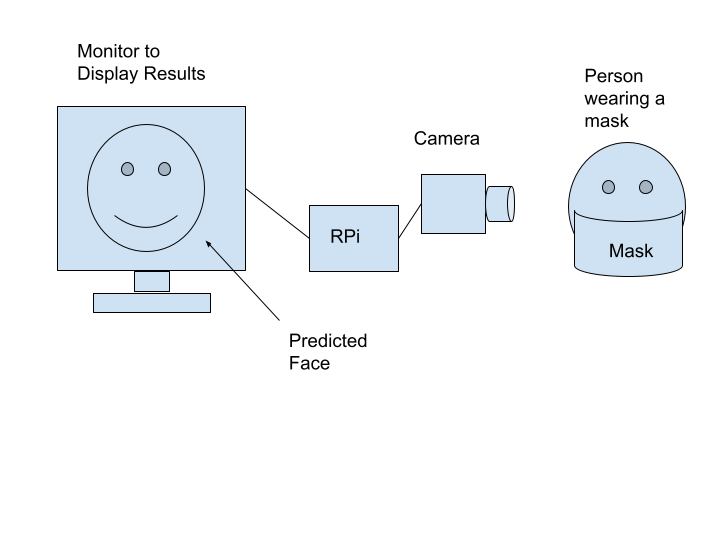
This is the final block diagram of our system. Instead of reconstructing people's faces, we now do a classification of whether they are wearing their masks correctly.

During the first week of the project, we mostly researched about our approach. We knew we needed to use maching learning for this problem, but not a specific method. After doing some research, we realized that the best approach would be to use a Convolutional Neural Network (CNN) because of its ability to perform image classification. We then found the PyTorch would most likely be the best tool for creating the neural network model. We also decided that it would be best to use the OpenCV library to detect faces using the camera attached to the Raspberry Pi. We were also able to find a dataset of images of people wearing masks that we eventually used to train our neural network. Each image had multiple faces along with labels. The labels contained bounding boxes for each face in the image along with one of 3 labels: Wearing mask correctly, wearing mask incorrectly, or not wearing a mask.
During the second week, we began setting up the neural model training code. It was easiest to
use Google Colab for this and to have our dataset's images in our shared Google Drive folder. Our
model consisted of a convolution, followd by a Relu function, then another convolution and Relu, and
finally a Max Pooling layer. This sequence was repeated three times (on different size inputs because
of the convlutions of course) and then a finally sequence of 3 linear functions with Relu functions in
between. Each convolution used a kernel size of 3, a stride of 1, and a padding of 1. We chose these
types of convolutions and this particular sequence because it was foudn to be good on other image
classification tasks that we found in our research. However, to use our dataset with our model, we
needed to isolate the faces from each image. Our model could only make a prediction on one face at a
time. So, we started developing code that would use the labels provided with the dataset, the bounding
boxes in particular, to save new images of just the cropped faces to a different folder in the Google
Drive. This code looped over images in the dataset and used PIL python functions to crop each image
based on the box given in its associated label. At the same time, the labels were saved into a new
array of all the labels, so that the correct classifications were saved with the correct image.
Additionally this week, OpenCV was installed on the RaspberryPi using the very simple guide provided
by Professor Skovira on the course Canvas page.
During the third week, we finished developing the code described above that created new images
of just faces to use in training the network. However, we ran into some issues where the neural
network did not take in the various photos. This was because we were trying to group the images in
batches to input them to the network to train. This was an issue because the images were all different
sizes since they were cropped faces. Pytorch does not allow batching of different size images. To
solve this, we resized each cropped face image to be 150 by 150 pixels. After converting each image to
a tensor (needed by PyTorch for training), the neural network was able to begin training. However,
training was not actually done this week. Also during this week, we began testing the Raspberry Pi
camera and discovering how it works. We setup a file to first learn how to use the Picamera,
camera_test.py, which simply displayed the camera preview, took a photo after a couple
seconds, and saved the image to a folder on the Raspberry Pi. After being comfortable with how the
camera worked, we also began developing the file detect_faces.py to use a pre-trained OpenCV
model to detect faces in an image. Specically, we used one of OpenCV's Haar Cascade classifiers to
accomplish this. The program would pass an image in a folder on the Raspberry Pi, the image taken by
the camera from the camera testing file, through the classifier to get the dimensions and top left
corner of a bounding box around the face in the image. Then, the program, would draw this bounding box
on the image, which could be seen when the image was opened using the image previewer on the Raspberry
Pi desktop. We ended this week with a program that could successfully detect faces in images.
During the fourth week when testing detect_faces.py, we realized that the
classifier could not detect faces that were wearing a face mask. This was a big issue, because our
program needed to see faces regardless of whether they were wearing a mask or not. Fortunately, a
different Haar Cascade classifier provided by OpenCV is able to detect a person's eyes, which are
still visible even if they are wearing a mask. So, the program was edited to still detect faces.
However if no face is detected, then the program looks for eyes and tries to estimate a box that can
surround their face. If there is only one eye detected, we look at whether it would be the right or
left eye and draw the bounding box accordingly. If two eyes are predicted, we always use the eye that
is closer to the left side of the image to draw the bounding box. Because the program often predicts
false positives for eyes, we compare the relative heights of the prediction boxes if there are three
eyes detected. This program assumes that the two eyes will have a similar y value in the image while
the false eye will have a different height further away. After the false eye is eliminated, the
program does the same thing as if there were two eyes and finds the eye on the left to estimate the
bounding box. After the program was able to detect faces that were also wearing face masks, we added
lines that would save a new image of just the area within the bounding box. This cropped face would be
the image sent to the torch neural network model to make the prediction. Because of this adjustment
that would detect faces wearing masks, the OpenCV program worked better, but still not great. Using a
person's eyes was not the most reliable, but worked often enough that we decided to use it. However,
it would often have trouble detecting people's eyes if they were wearing eye glasses. Although
inconvenient, we asked people we tested on to remove their glasses while taking the photo, which
caused the program to work much more consistently.
The fifth week of the project saw the development of the GUI. We used the wxPython package
because of it's ability to easily load photos. It also seemed relatively easy to integrate the
Picamera features into it. The GUI first loads an image to its window. We initially used the image
taken by the PiCamera previously without any boxes drawn on it. It then has three buttons. The first,
labeled Capture, took a photo using the Picamera. The second labeled Analyze ran the
OpenCV model to detect a person's face. The final button labeled Open/Hide Preview would
display and close the Picamera preview so that a person could see what they were taking a picture of.
The preview is displayed right next to the GUI as it was not possible to put it inside the GUI window.
The GUI keeps track of whether the preview is open or closed by using an indicator variable that is
either 1 or 0. The GUI boots with the preview off and always closes the preview when the GUI program
is terminated. We planned to later add a fourth button that would run the image through the torch
model, but instead the button functions of the first two buttons were changed by the end of
this
week. The Capture button was changed to take the image using the camera and automatically run
the OpenCV program to detect the face. The image with the bounding box drawn on the face was then
displayed back on the GUI. This was found to work much more efficiently because users could repeatedly
take photos unti their face was correcly identified. The Analyze button was then changed to
run the the CNN model on the face that in the bounding box currently displayed in the GUI. During this
time, the image was not actually run through the model. Instead, the GUI was setup to display the
prediction text at the top of the screen. If the GUI is run multiple times to get different
predictions, it would change the text at the top of the screen. This was done by defining this
button's callback function within the GUI's initialization function, allowing the textbox at the top
to be changed.
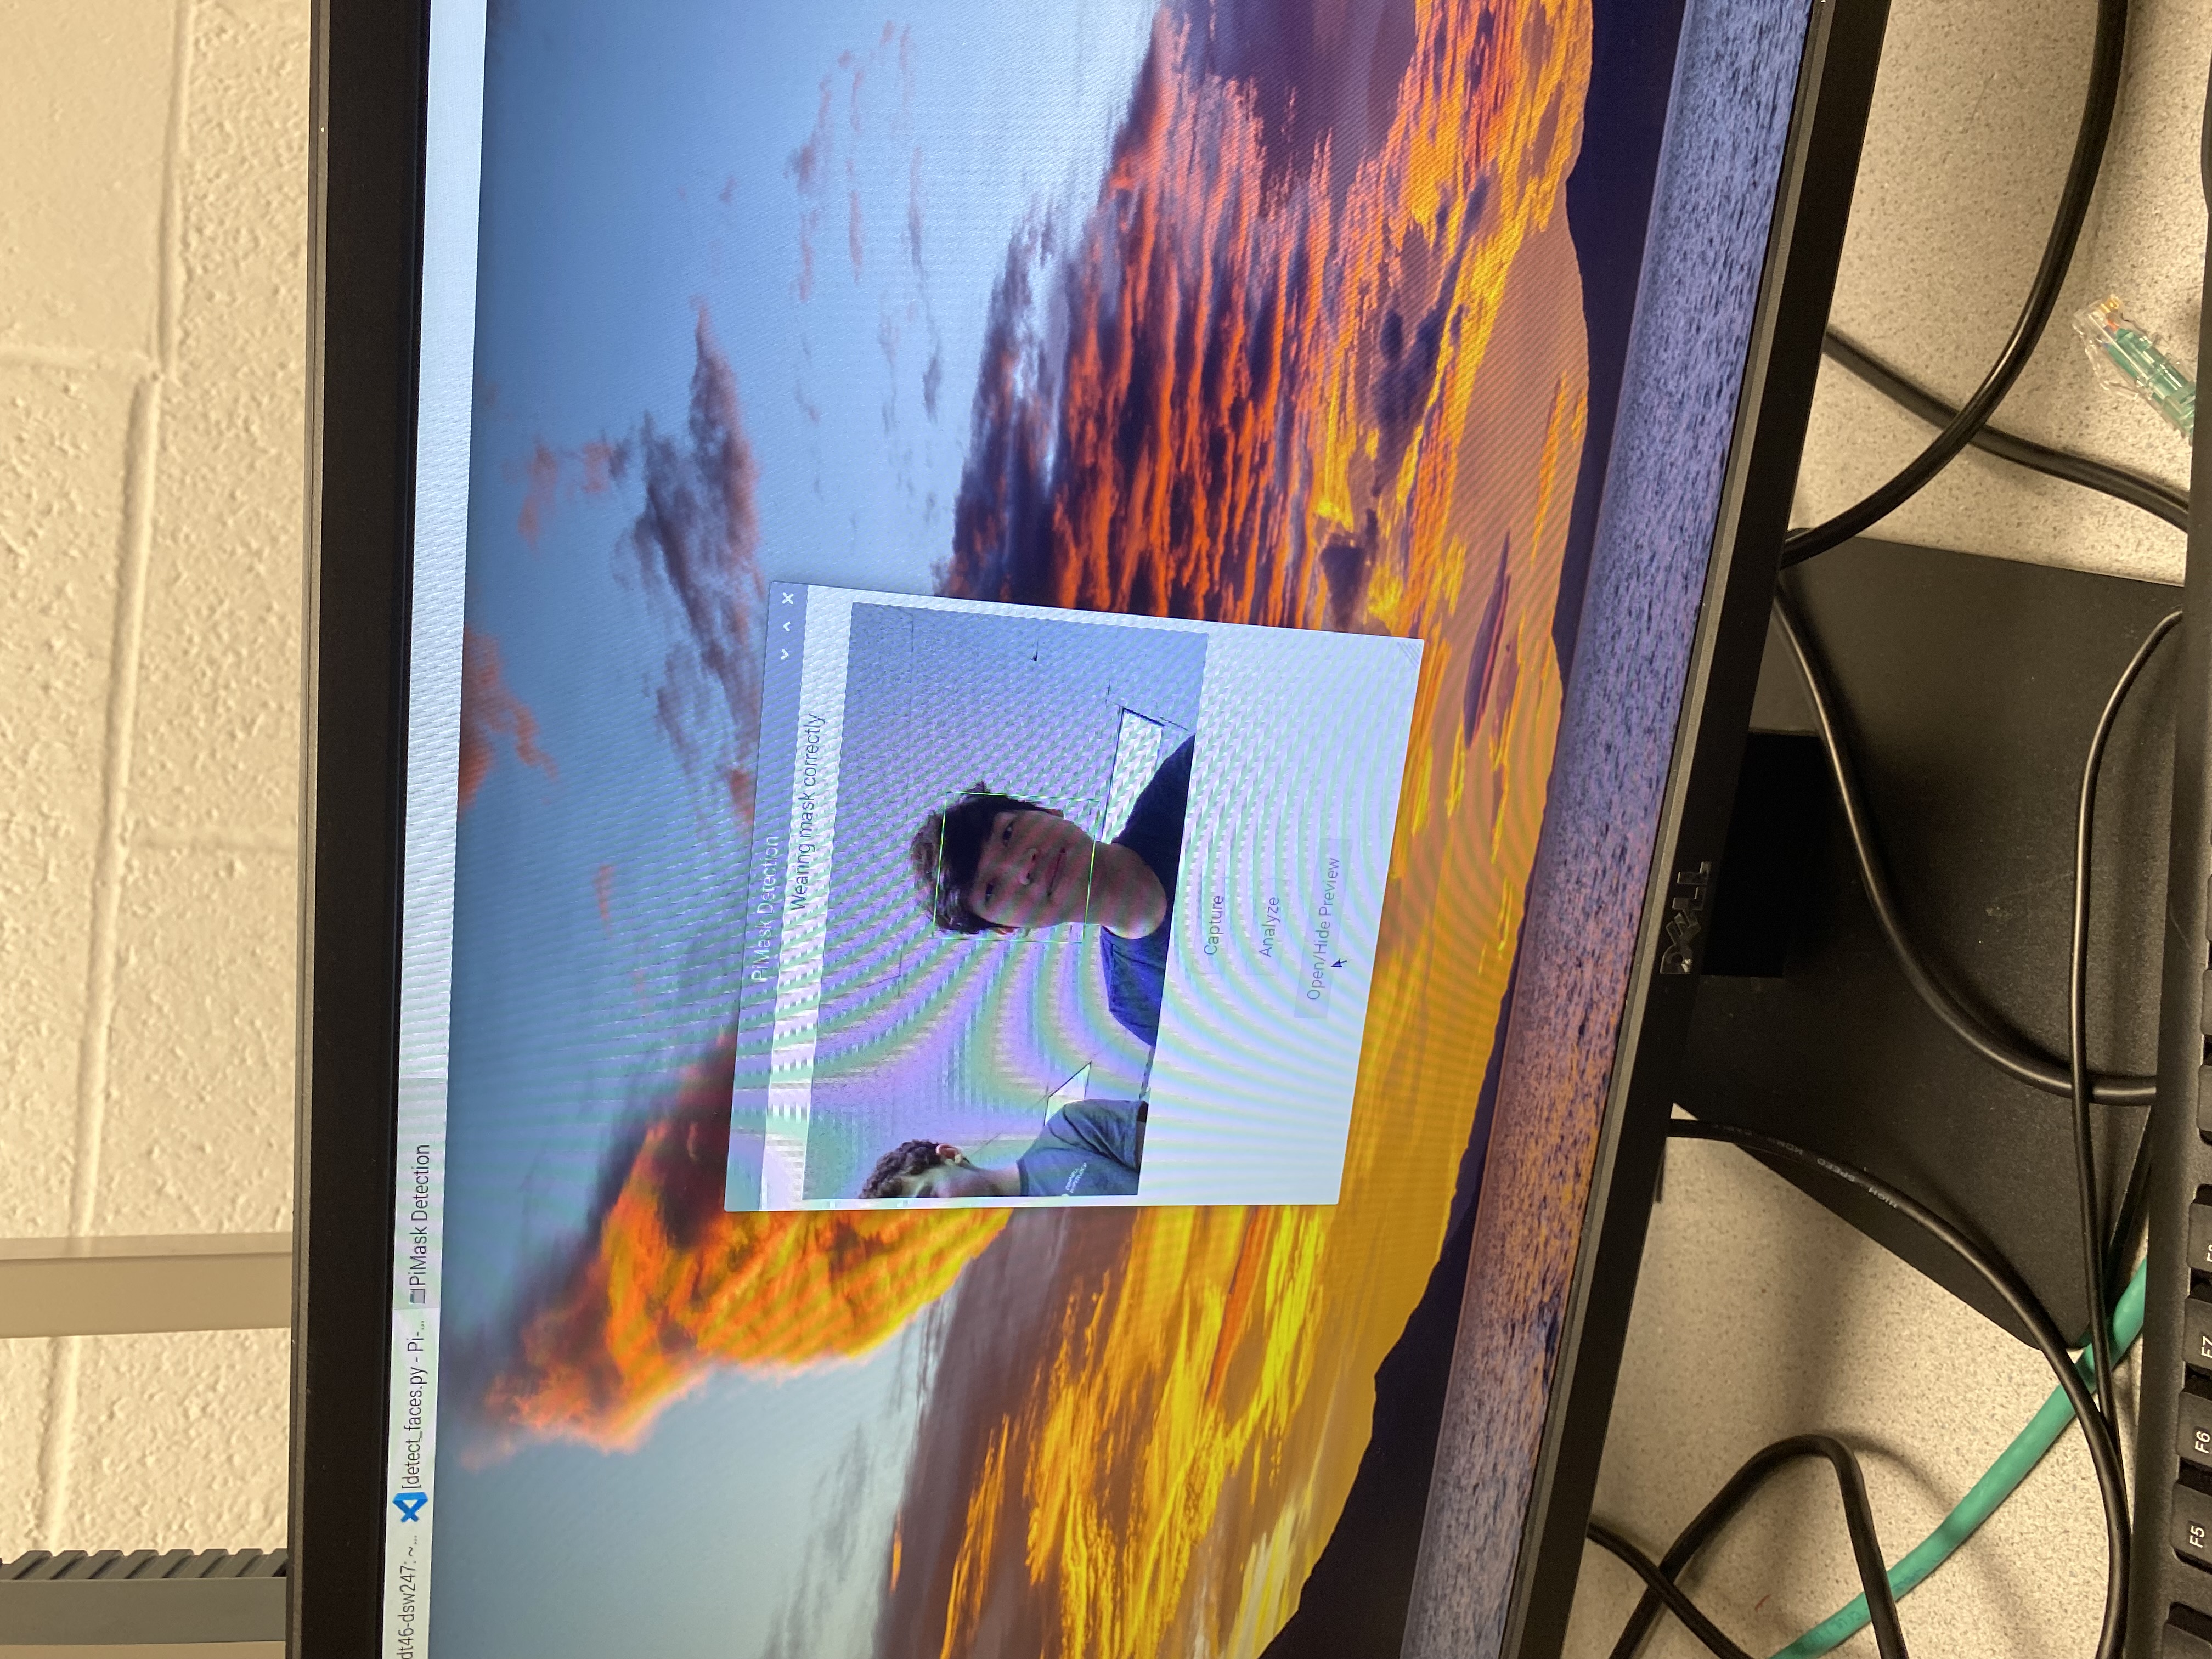
The GUI without the camera preview is shown below:
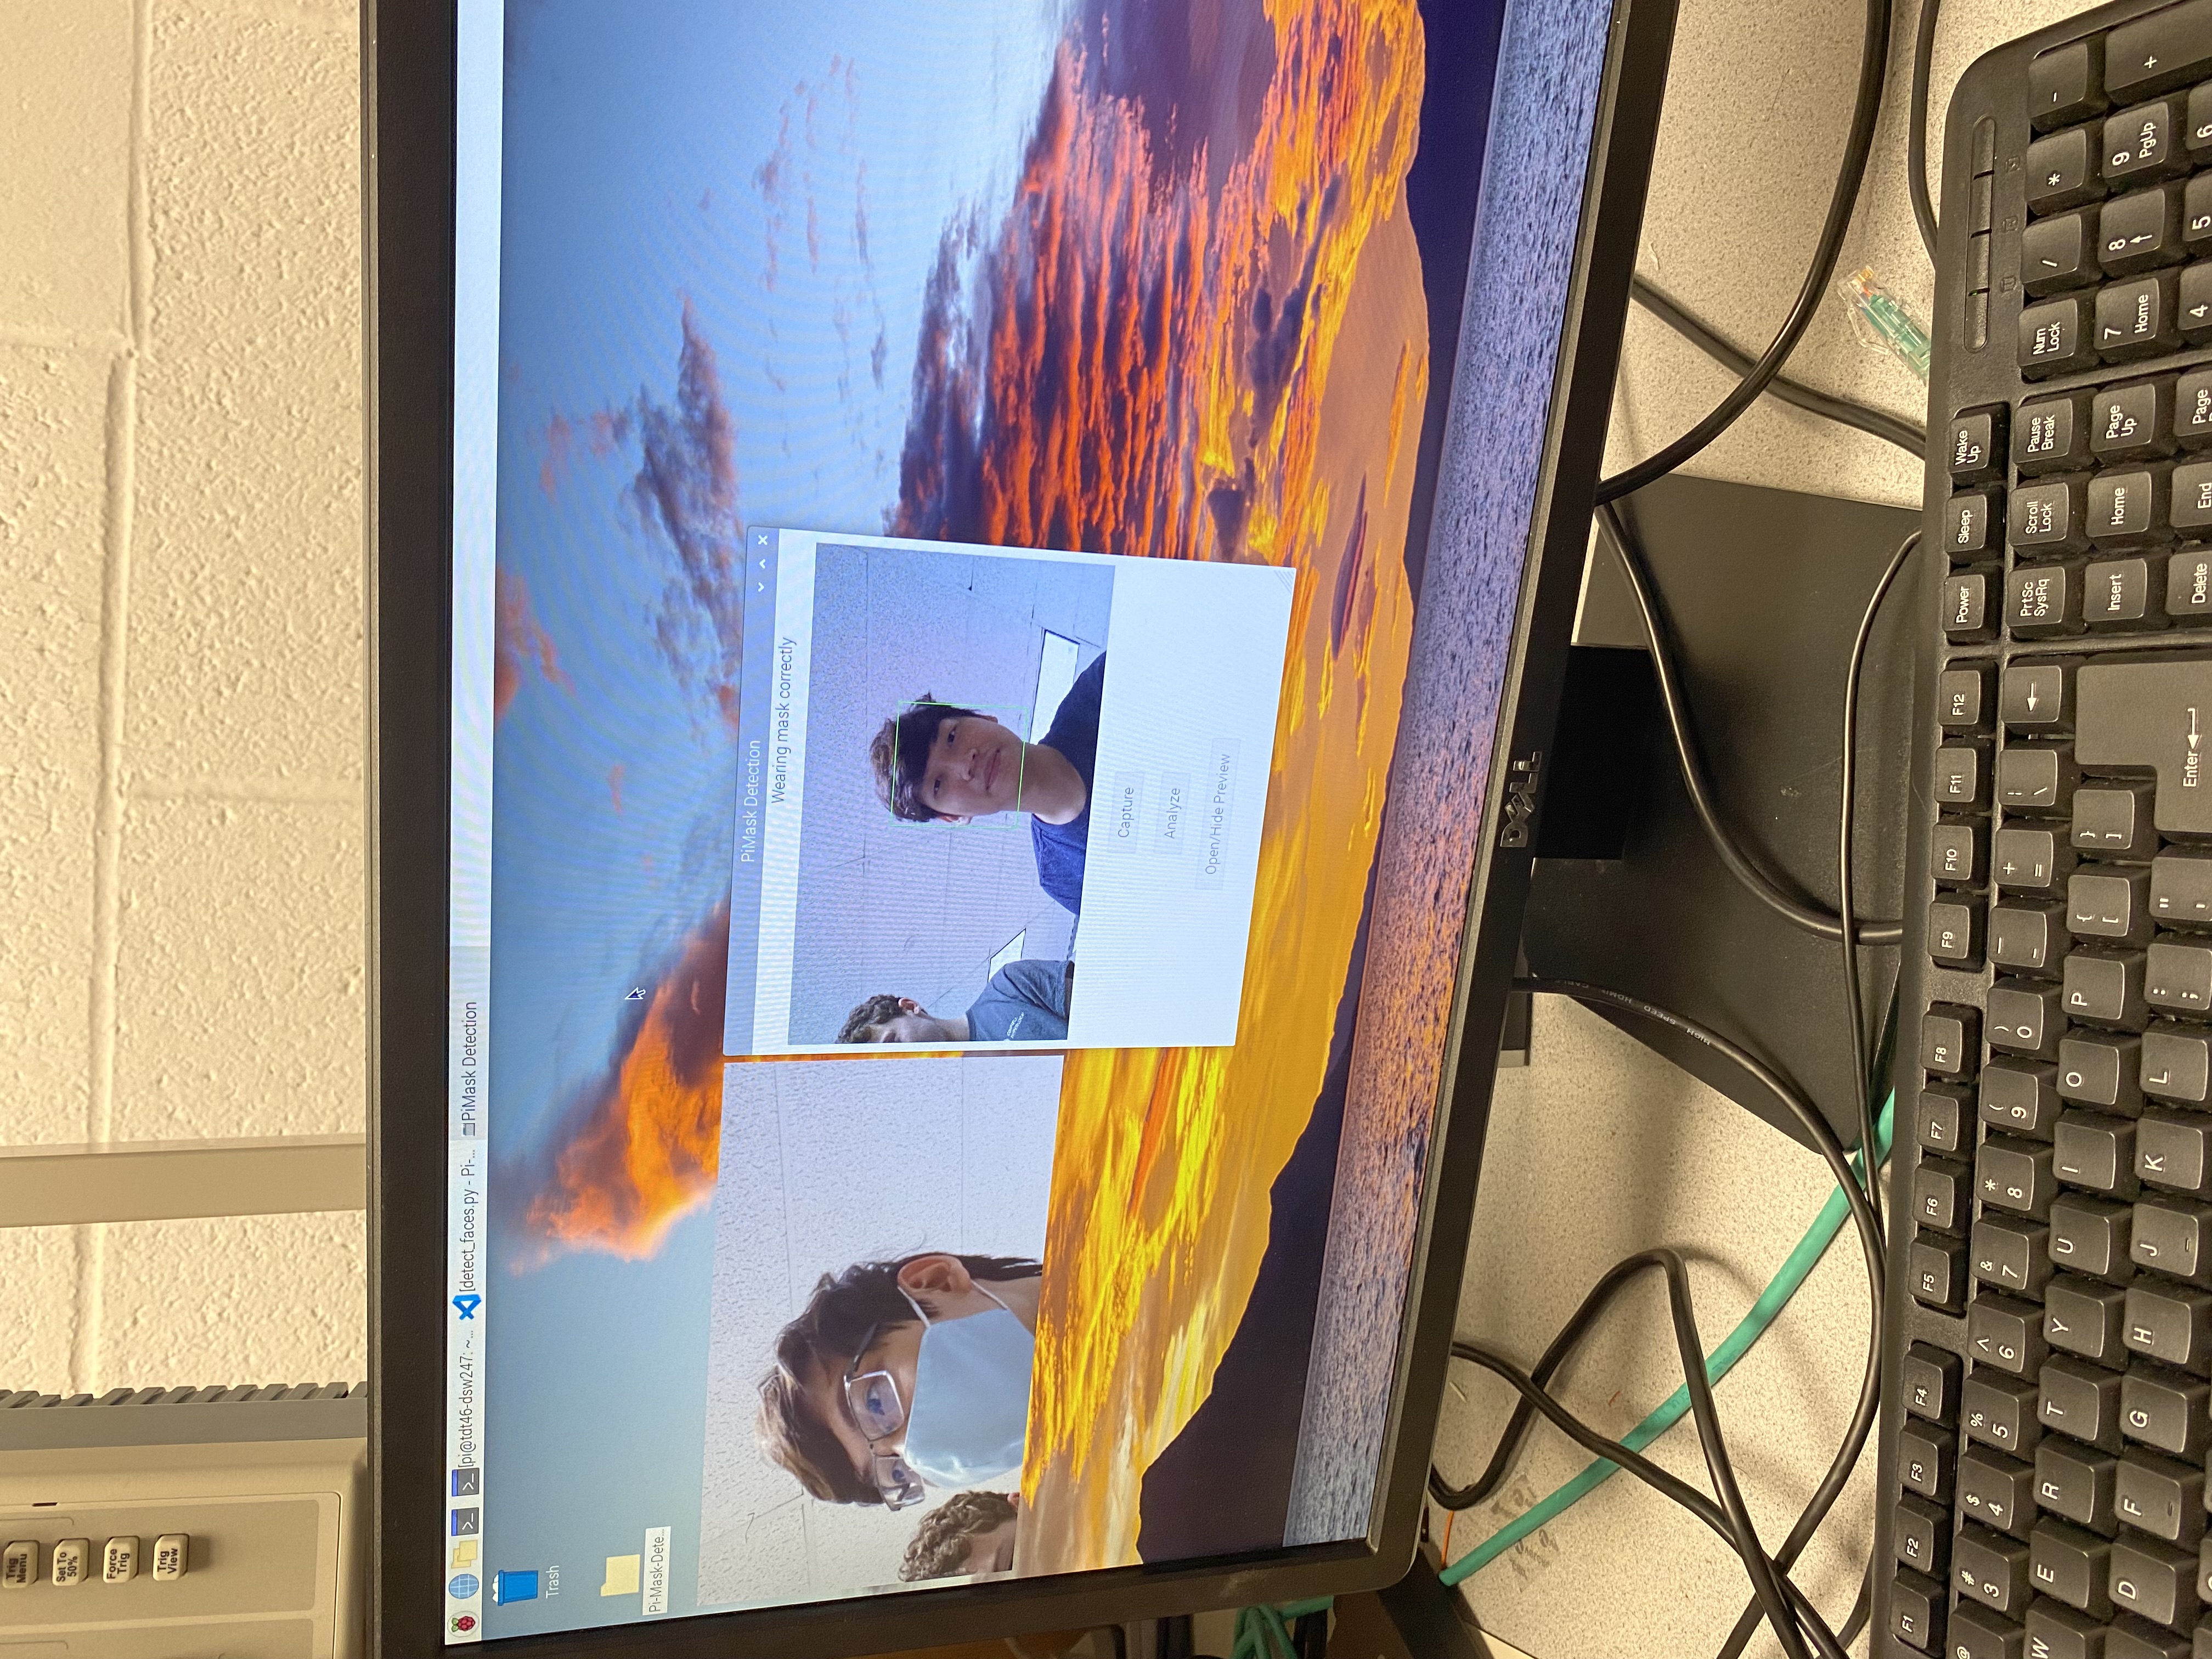
The GUI with the camera preview is shown below:
During the final week of this project we planned to fully integrate the neural network and the
GUI. First, we trained our neural network in our Google Colab notebook. We trained it on close to 2500
total faces using a learning rate of 0.001 and for 30 epochs. This resulted in a close to 94%
validation accuracy. The model was saved to the file and put on the RaspberryPi. We then tried to
install pytorch on the RaspberryPi only to find out that it was not compatible with our operating
system. Torch only works on a 64-bit operating system, but our Pi used a 32-bit operating system.
Because of this big roadblock, we decided to download a 64-bit operating system on a separate SD card
and try to use that. Once we were able to install OpenCV and pyTorch on this new operating system, we
had a lot of trouble installing wxPython. Because of this, we decided to make a new GUI using Tkinter.
Once we had developed quite a bit of this GUI we then found out that the piCamera did not work on the
64-bit operating system. There were some sources that offered some fixes, but they did not seem to
work for us when attempted. Because of this we decided to go back to the 32-bit operating system and
to have the torch model run on a separate laptop that would communicate with the Raspberry Pi via SSH.
The solution was to use the scp linux command to copy the cropped face image from the Pi to
the laptop computer when the Analyze button was pressed on the GUI. Then, the torch model had
to be manually run on the laptop using the make_prediction.py file. This program loaded the
torch model from the saved .pth file and input the cropped face image to it to get a prediction of 0
for no mask, 1 for wearing a mask correctly, and 2 for wearing a mask incorrectly. The program then
write this integer result to a file called prediction.txt which is then sent back to the Pi
using the scp linux command. While the torch program is being run, the GUI program busy waits
until the prediciton file exists in its folder. It then reads the integer result and decodes it to
ouput the correct result to the GUI. It then deletes its prediction text file so that it can properly
wait until a new prediction is sent. Initially, this setup required us to input each computer's
password everytime we wanted to send the data to the other. To make it more efficient, we used SSH
keys to prevent the need for entering passwords. This made the process much more efficient and easier
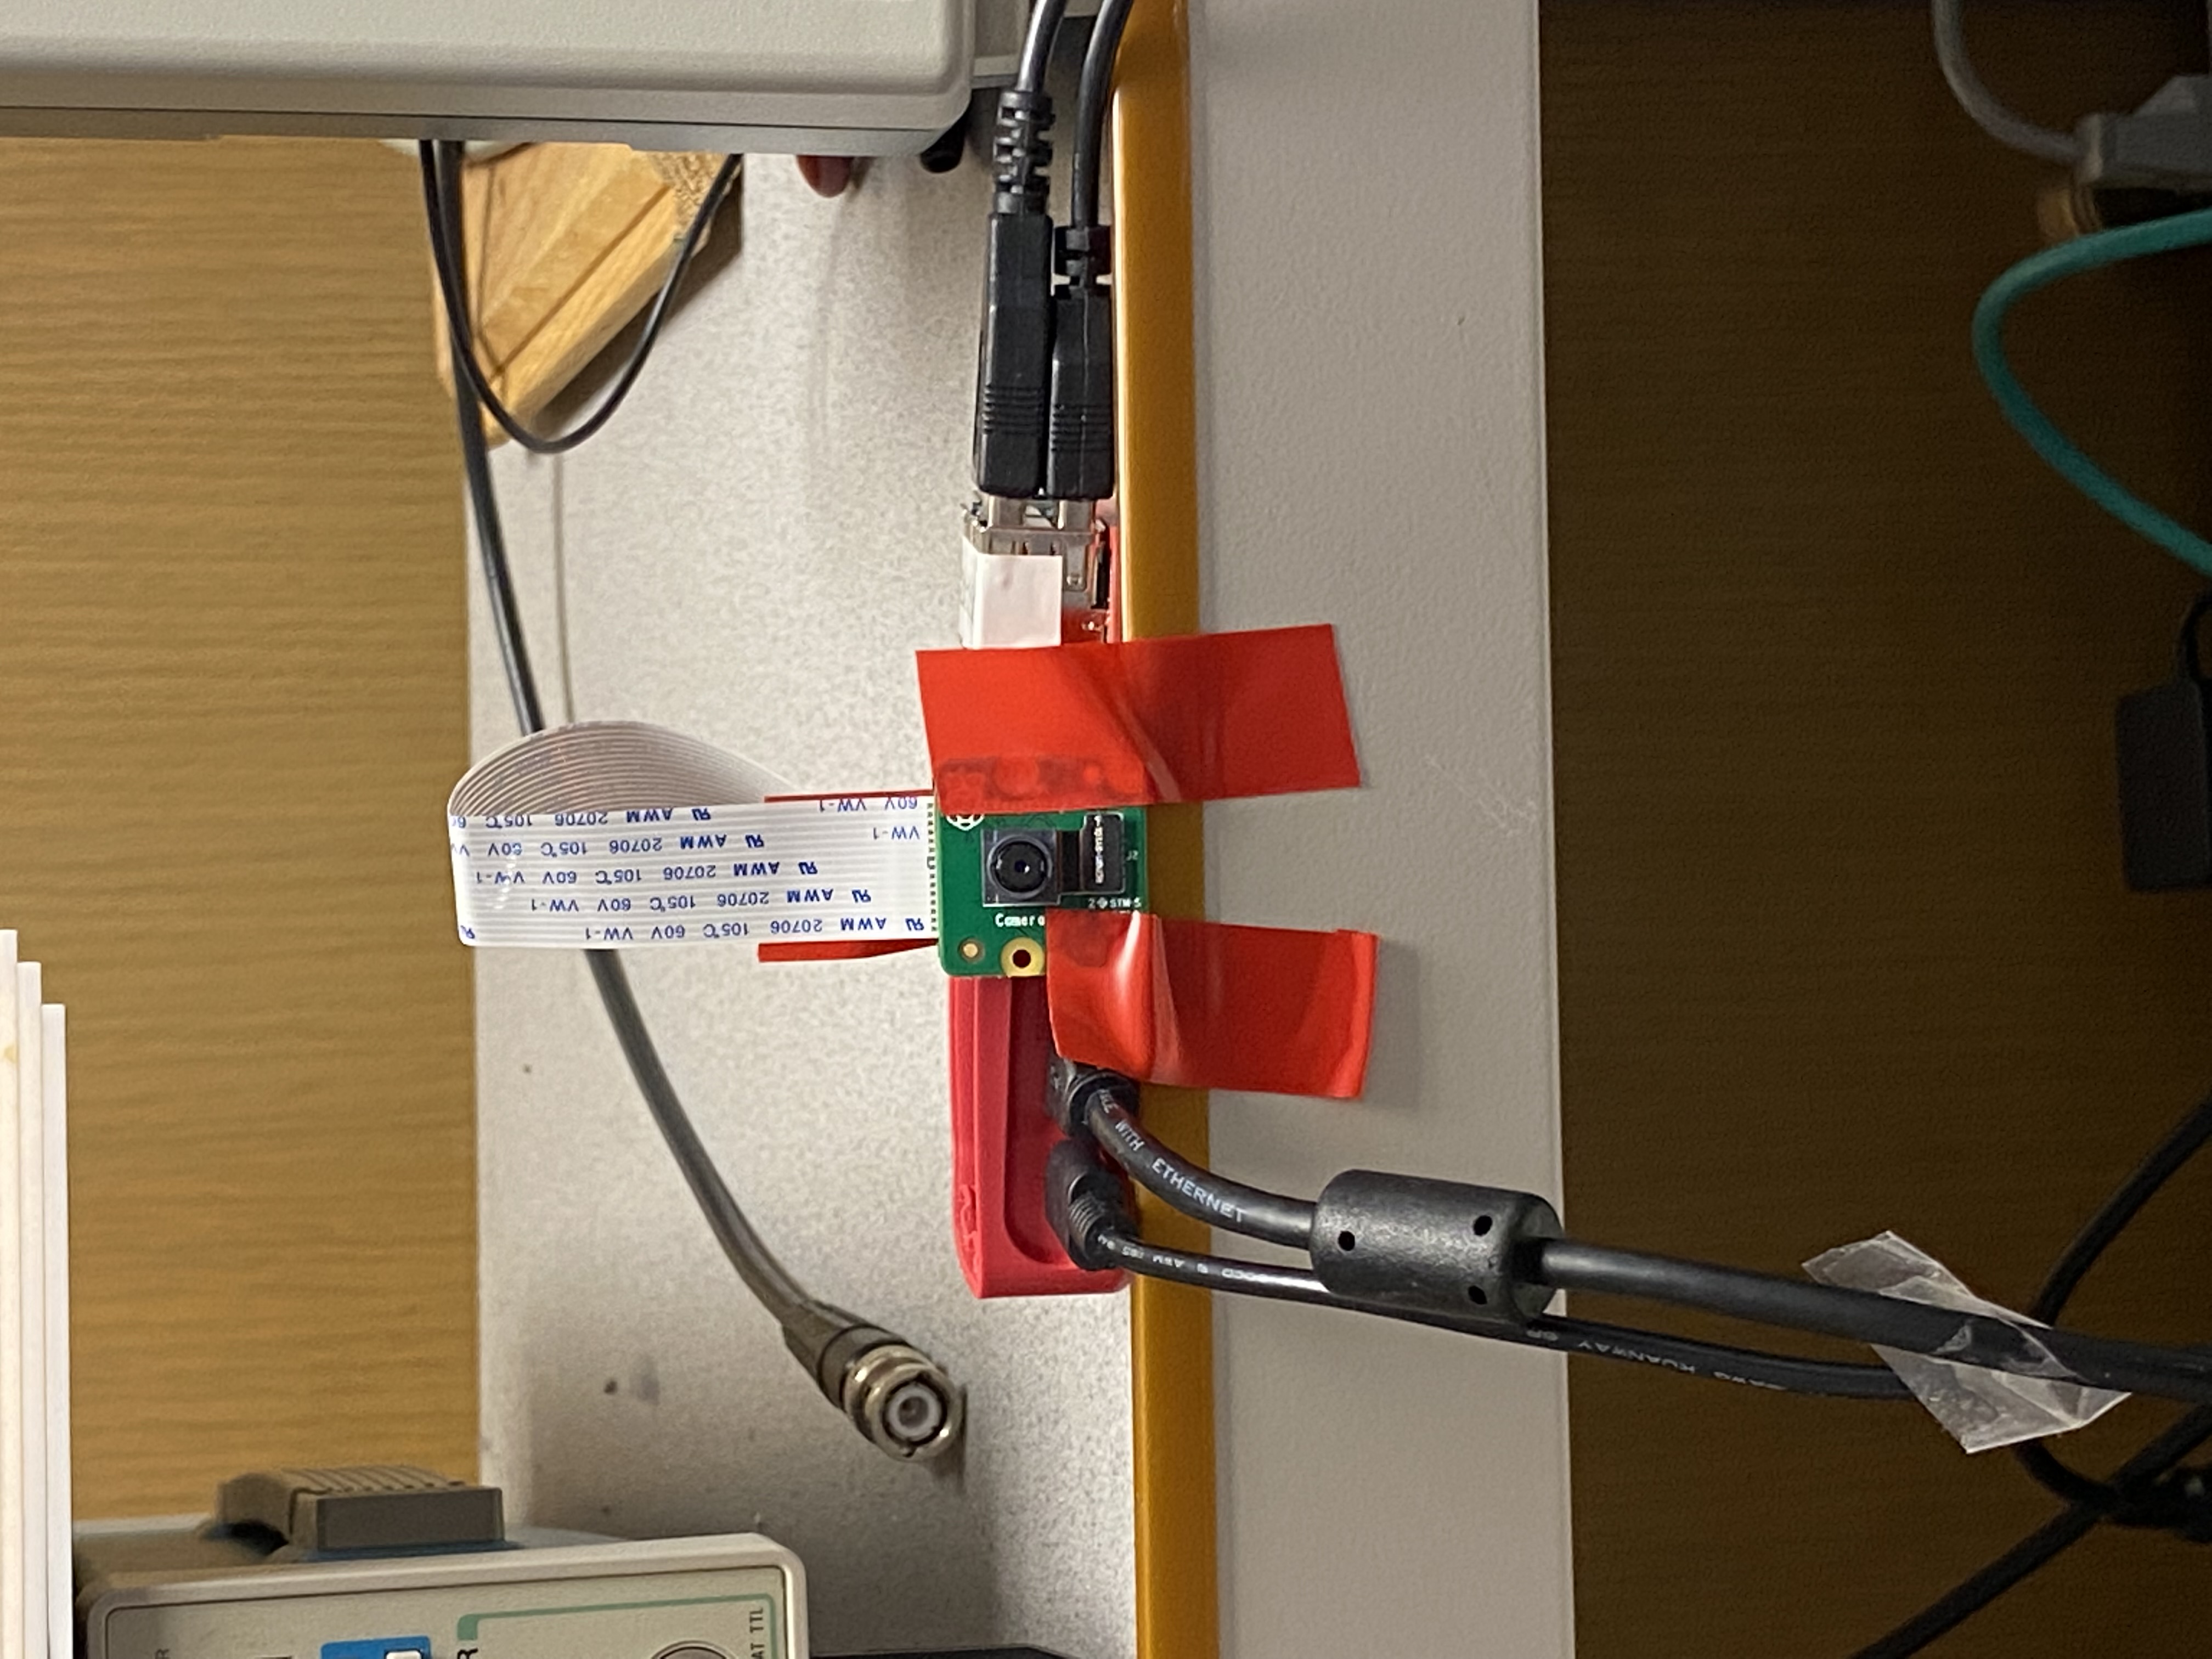
to carry out. After completely this setup, the system was fully functional. We also set up our camera
in a stationary position in order to produce consistent pictures of test subjects:
Testing
To develop this project, we had to continually test our code to make sure it was working as expected. For developing the CNN, we first had to test the code that would save new images of cropped faces from our dataset. For this we ran the code on one image that had multiple images and looked at the new images to see if they correctly cropped the faces. We also printed out the labels to see if they corresponded to the correct face. Then to train the CNN, we used a validation set to see the accuracy of the model on images it has not seen before. We also took some images of ourselves using the Picamera and OpenCV face detection program that we put through the model ourselves to see if it predicted correctly.
To write the facial detection program, we used the camera testing file to take pictures and
then run the program on those images. We developed the bashs script take_pic_and_get_face.sh
to do this quickly. We looked at the resulting image to see if the bounding box was drawn in the
correct place.
To test the GUI, we repeatedly ran it to see if it displayed as expected. When developing the
callback for the Analyze button, we had to make sure that the textbox could be overwritten to
write a new prediction correctly. However, we had to test this before the GUI was integrated with the
CNN model. We tested this by temporarily including a random number generator that would allow for
different predicitons to be output in consecutive attempts. The program successfully changed the text
at the top of the GUI, so this test was successful.
To test the integration of the CNN model with the GUI, we took many pictures of ourselves and
other people in lab to see if the model could successfully take the image, and send it to the laptop
computer over SSH. We could check the image on the laptop to see if it matched the face in the box on
the GUI. Then, we checked the prediction displayed on the GUI by looking at the number in the
prediction.txt file to see if they matched.
Future Work
This project could be improved significantly in the future with added features. First, we would hope to make the SSH connection between the Pi and the laptop more automated. Instead of having someone manually run the CNN model code on the laptop, it would be done automatically when the Pi sends the cropped face image. However, it would be better to have the CNN model and GUI running on the same computer and not need to use SSH at all. To do this it may be better to use a different type of camera that works on a 64-bit operating system so that the torch model can also run on the Raspberry Pi. Getting a better camera may also improve the quality of the images and possible improve the accuracy of the CNN model. We would also want to improve the quality of the GUI. We would want to format the parts of the GUI better and improve how it looks. We also would like to have a live video feed that uses the OpenCV classifier to detect faces in real time instead of taking individual photos until the face is detected correctly. This way, users can take an image from the video once their face is identified correctly, which would allow the process to be much more efficient. We can also significantly improve our CNN classifier. We could do this by getting a better training dataset. The dataset we used had mostly images of people wearing their masks correctly or not wearing them at all, so it would be better to have more images of people wearing masks incorrectly. Our classifier had trouble predicting this aspect correctly, so hopefully it would improve it. The dataset also consisted of images that were mostly of white and Asian people. So, we would like to find a new dataset that has a more diverse group of people in its images. It would also be better to train our model for longer on more images or to alter the model's hyperparameters to find the best model. Finally, a big improvement would be in the facial detection program. We want to find a new model or make one oursevles that can detect faces even when wearing masks. This would prevent the need to estimate face bounding boxes using a person's eyes.
Results
We will first evaluate the performance of the OpenCV face detection algorithm, then the mask detection model.
- The OpenCV algorithm sometimes have trouble detecting people's faces. These difficulties come up in two cases: When someone is wearing glasses, and when someone is wearing a mask. Empirical testing shows that people wearing glasses are more likely to have their face ignored by the algorithm. These failures could arise because of two reasons. The first is that available OpenCV models that detect faces only work well on ones that don't have masks. The second is that the glare from glasses could interfere with the vision of the camera. For the first issue, we resolved it by having the model detect people's eyes instead, as depicted in Design. For the second issue, we had people remove their glasses in testing when taking their pictures. Overall, however, empirical testing shows that the OpenCV model works about 80% of the time.
- The mask detection model works very well on certain faces, and not too well on others. The first issue is that it works well on people with Asian or Caucasian origins. The second issue is that it works well in detecting whether people are wearing their masks or not, but not too well in detecting whether people are wearing their masks correctly. An explanation for the first issue is that the training set mostly included Asians and Caucasians, and not other races. This resulted in the algorithm working better on certain races than others (a potential danger of AIs). An explanation for the second issue is that the training set did not include many examples of people wearing their masks incorrectly, and thus creating a bias for the algorithm to guess one of the other two options. Overall, the algorithm works well enough, with empirical accuracy of around 80%.
Overall, we met the goals outlined in Objective, which was to create a program that detects whether people are wearing their masks correctly or not.
Conclusion
This project culminated in a program that mostly gets whether people are wearing their masks correctly or not. The goal was also achieved with minimal use of hardware and therefore a minimal budget. The project showed the power of using open source tools (PyTorch, Google Colab) as well as the abundance of public data. It also allowed us to learn about the ethical limitations of AIs (racial bias) as well as its technical limitations (regenerating people's faces from incomplete information is hard). We also discovered how much trouble putting a 64-bit OS onto an embedded platform is (which is why we ended up using one of our own laptops).
Overall, this project was a valuable learning experience for the two of us, who never had any formal experience on building and training our own machine learning models.
Budget
PiCam ($40)
Rasperry Pi 4 ($60)
References
Code Appendix
Our code is located on GitHub. Below is explanation of what each file does:
camera_test.py: This file starts a preview of the PiCam, then captures an image and closes the preview
detect_faces.py: This file contains the algorithm that detects the face of a person.
eye_glass.xml: This file is the pretrained parameters for OpenCV Haar Cascade Classifiers that we use to detect eyes
face_trained_classifier.xml: This file is the pretrained parameters for the classifier that we use to detect faces
gui.py: This file contains the main GUI. This is the file that you should run
make_prediction.py: This file contains the script to build the pickled model, then writes the results to a text file. This file should be run after "Analyize" has been run on the GUI
take_pic_and_get_face.py: A simple script that does what it says
training_notebook.ipynb: The notebook that contains the code to load the dataset, initialize, then train the mask detection model.
Work Distribution
David worked on the GUI for this project and created the OpenCV face detection code. For the report, he wrote the Introduciton, Objective, Design, Testing, and Future Work sections.
Tim worked on the code to extract cropped faces from the dataset and setting up the CNN model.
For the report, he wrote the Results, Conclusions, Budget, Code Appendix, and created the final system
diagram.
