Robot Navigation
ECE 5725
A Project By George and Nei-Chun.
Introduction
The goal of the Robotic Navigation project is to create an adaptive robot tour guide that can change its behavior based on the user to navigate around a known map. The inspiration for this project comes from a robot tour guide that can guide a human to selected locations within a predetermined map. The robot extends the applications from Lab 3 of ECE 5725 by adding additional sensors and functionality to the autonomous robot. Wall collision is prevented by using ultrasonic distance sensors to detect the walls of a hallway to allow for direction correction. Adaptive behavior is implemented by utilizing a camera to track a user’s distance from the robot itself.. The distance calculated is then utilized to modify the PWM signal to the robot’s tires. Additionally, a GUI was designed to allow the user to select a predetermined destination. The robot then uses a shortest path Dijkstra's algorithm to plan a path between points. The robot travels to known locations in the hallway utilizing beacons and bluetooth beacon scanners.
Project Objective
The objective for this project is to create a GUI for a human user to select predetermined locations and calculate a shortest path to that destination. The robot will be able to adapt its speed to either speed up, slow down, or maintain its speed based on the distance from the user using a camera and computer vision. The robot's sensing capabilities will also be upgraded with distance sensors and bluetooth to allow the robot to maneuver autonomously and avoid wall collision.
Design
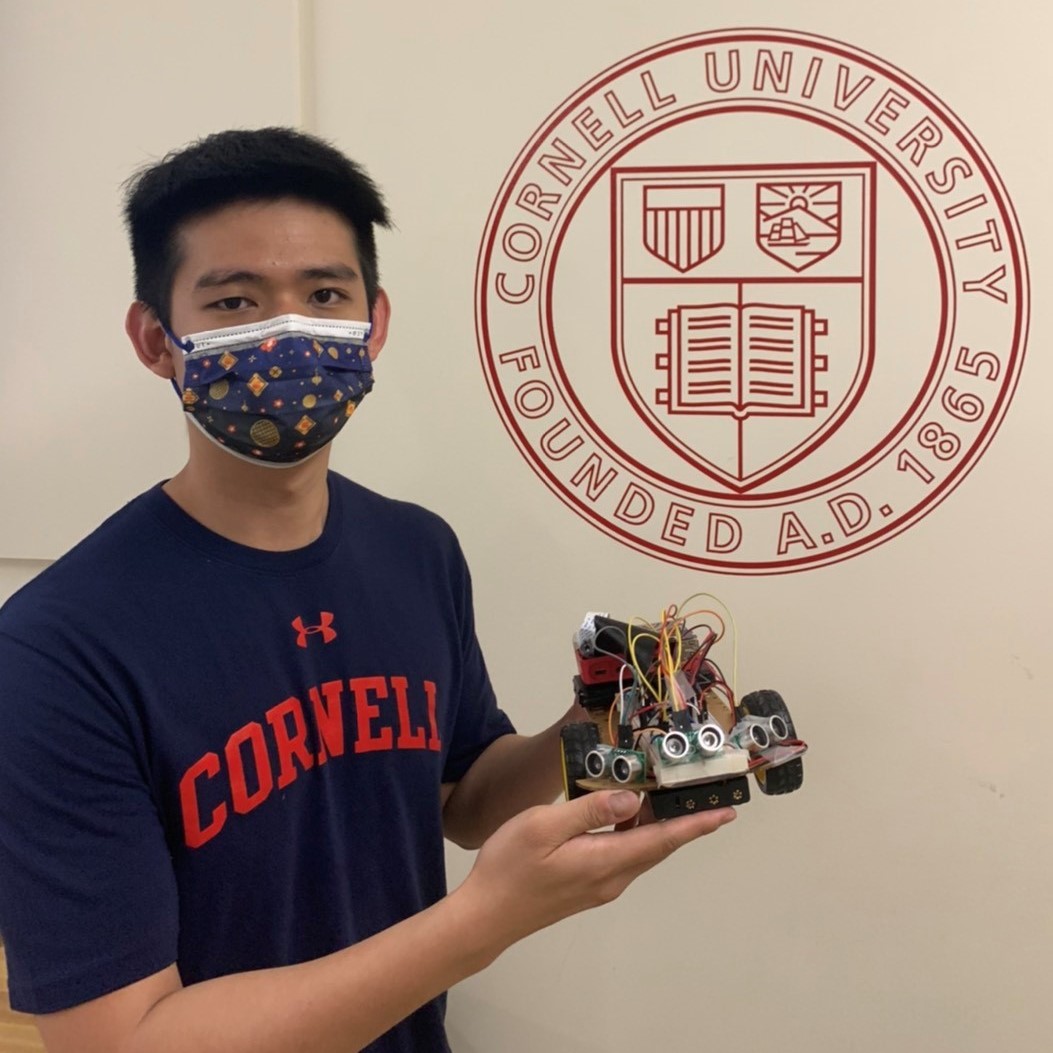
The robot utilized for this project is the robot developed in Lab 3. The robot is driven by two motors which are controlled by a SparkFun Motor Driver. A Raspberry Pi Camera V2 is attached to the back of the robot to constantly view a user following the robot. Three ultrasonic distance sensors are used to detect walls to the left, right, and in front of the robot. The final robot has the three sensors pointed ahead as this provided better performance. The robot previously has the left and right sensors on the sides of the robot.
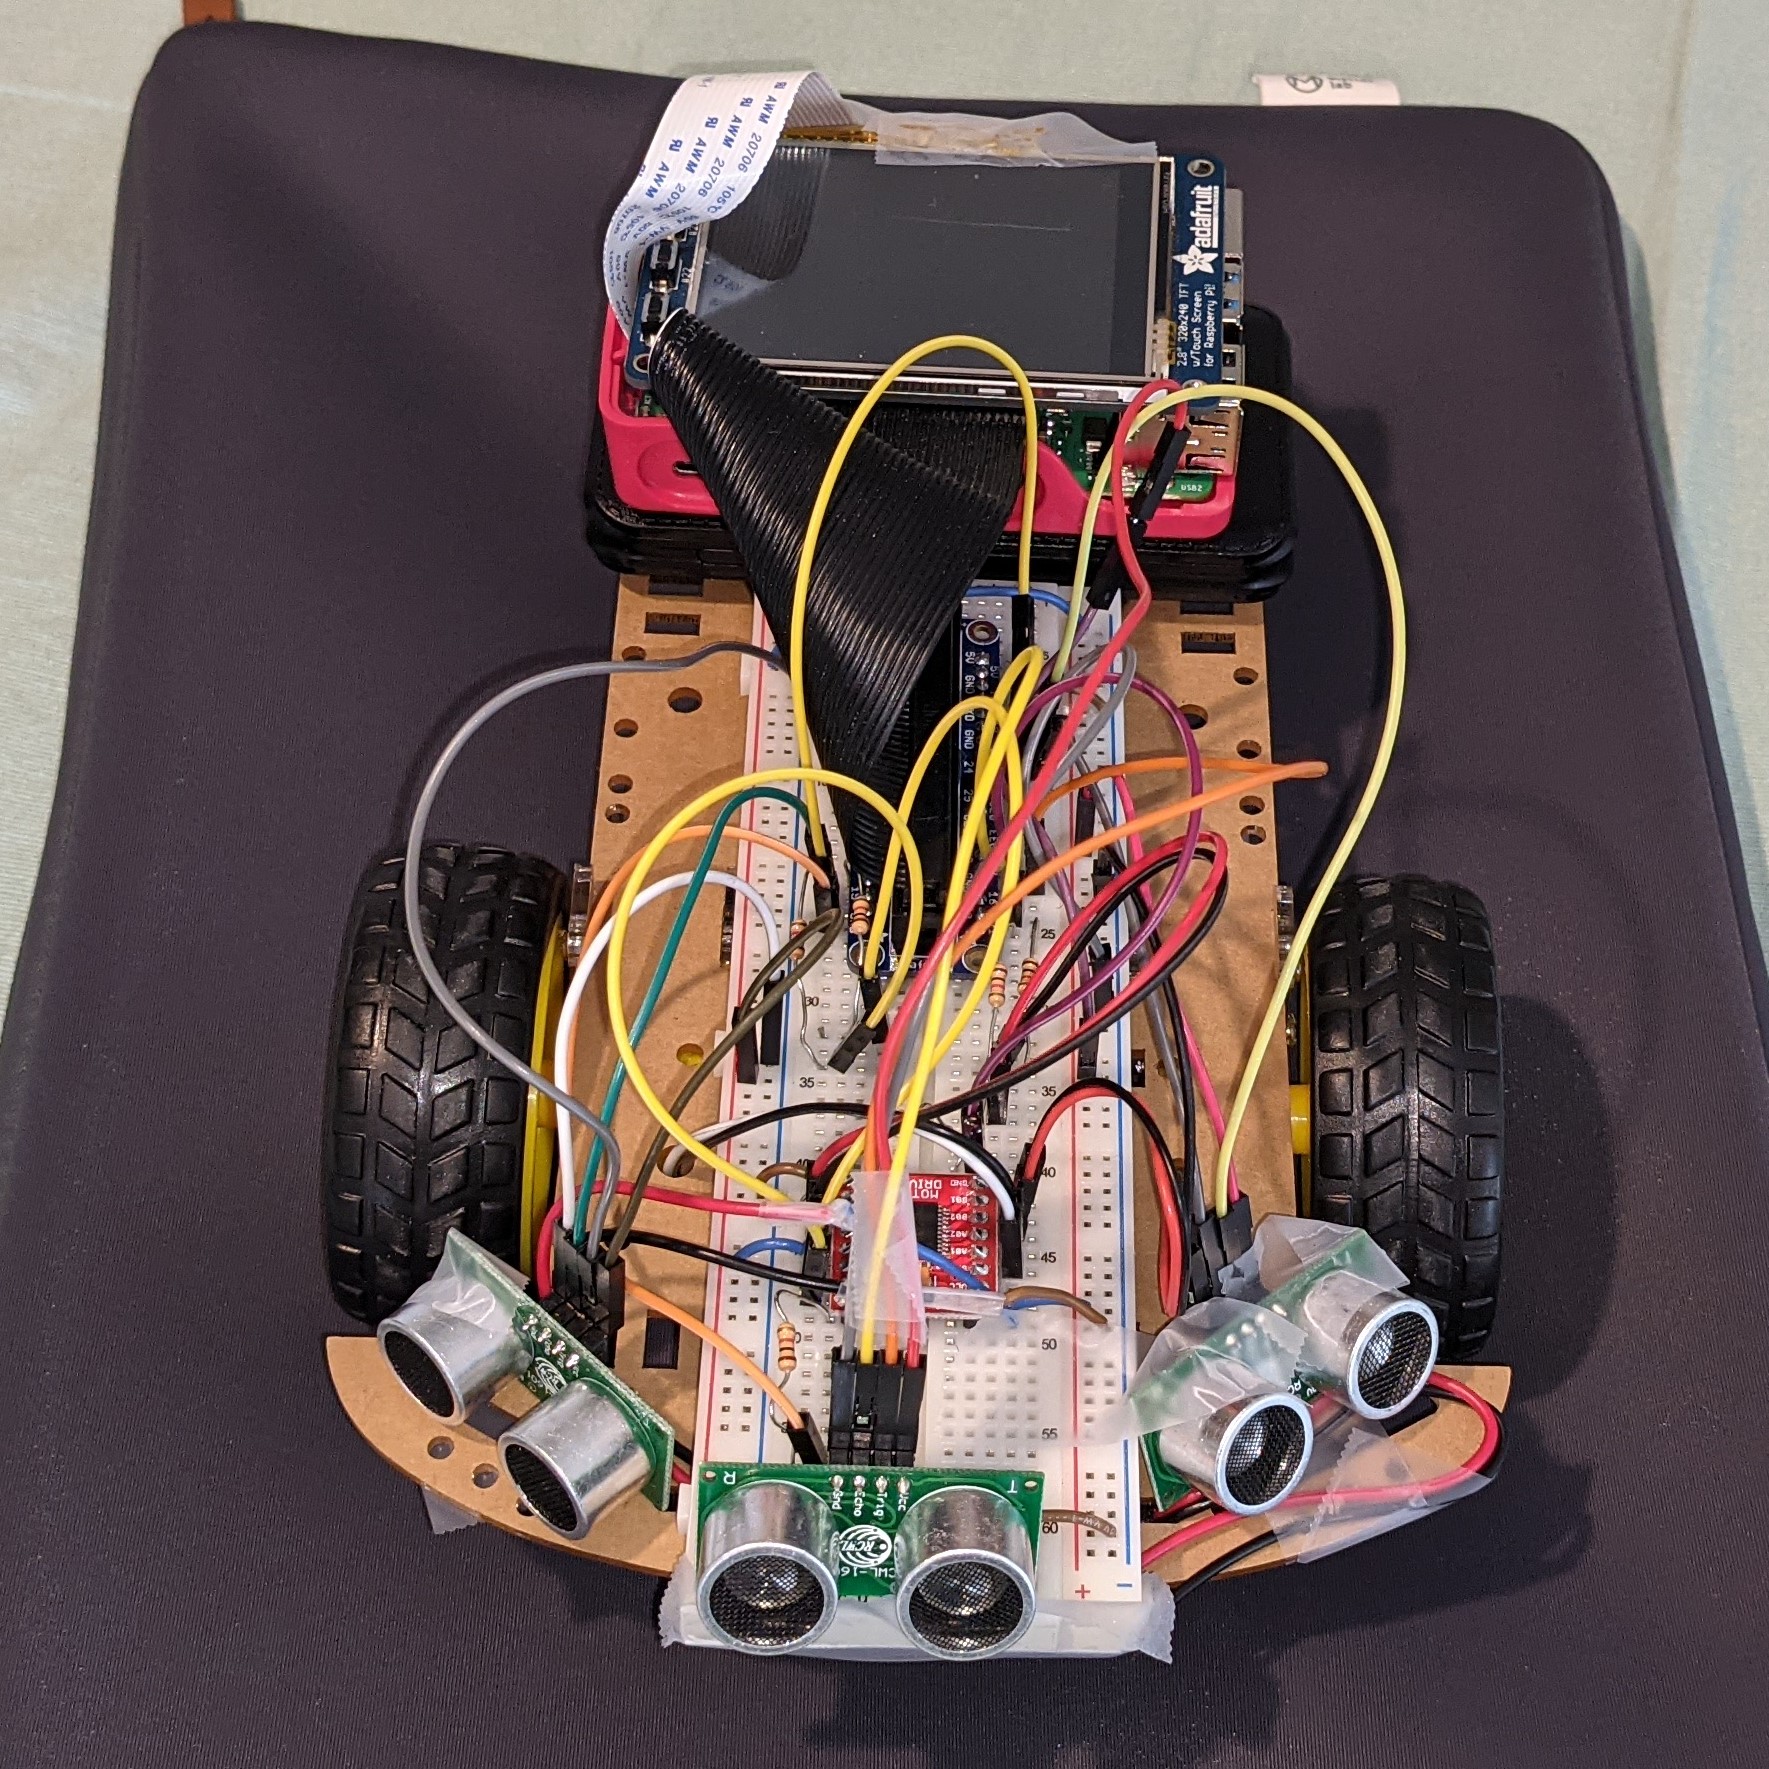
Robot View #1
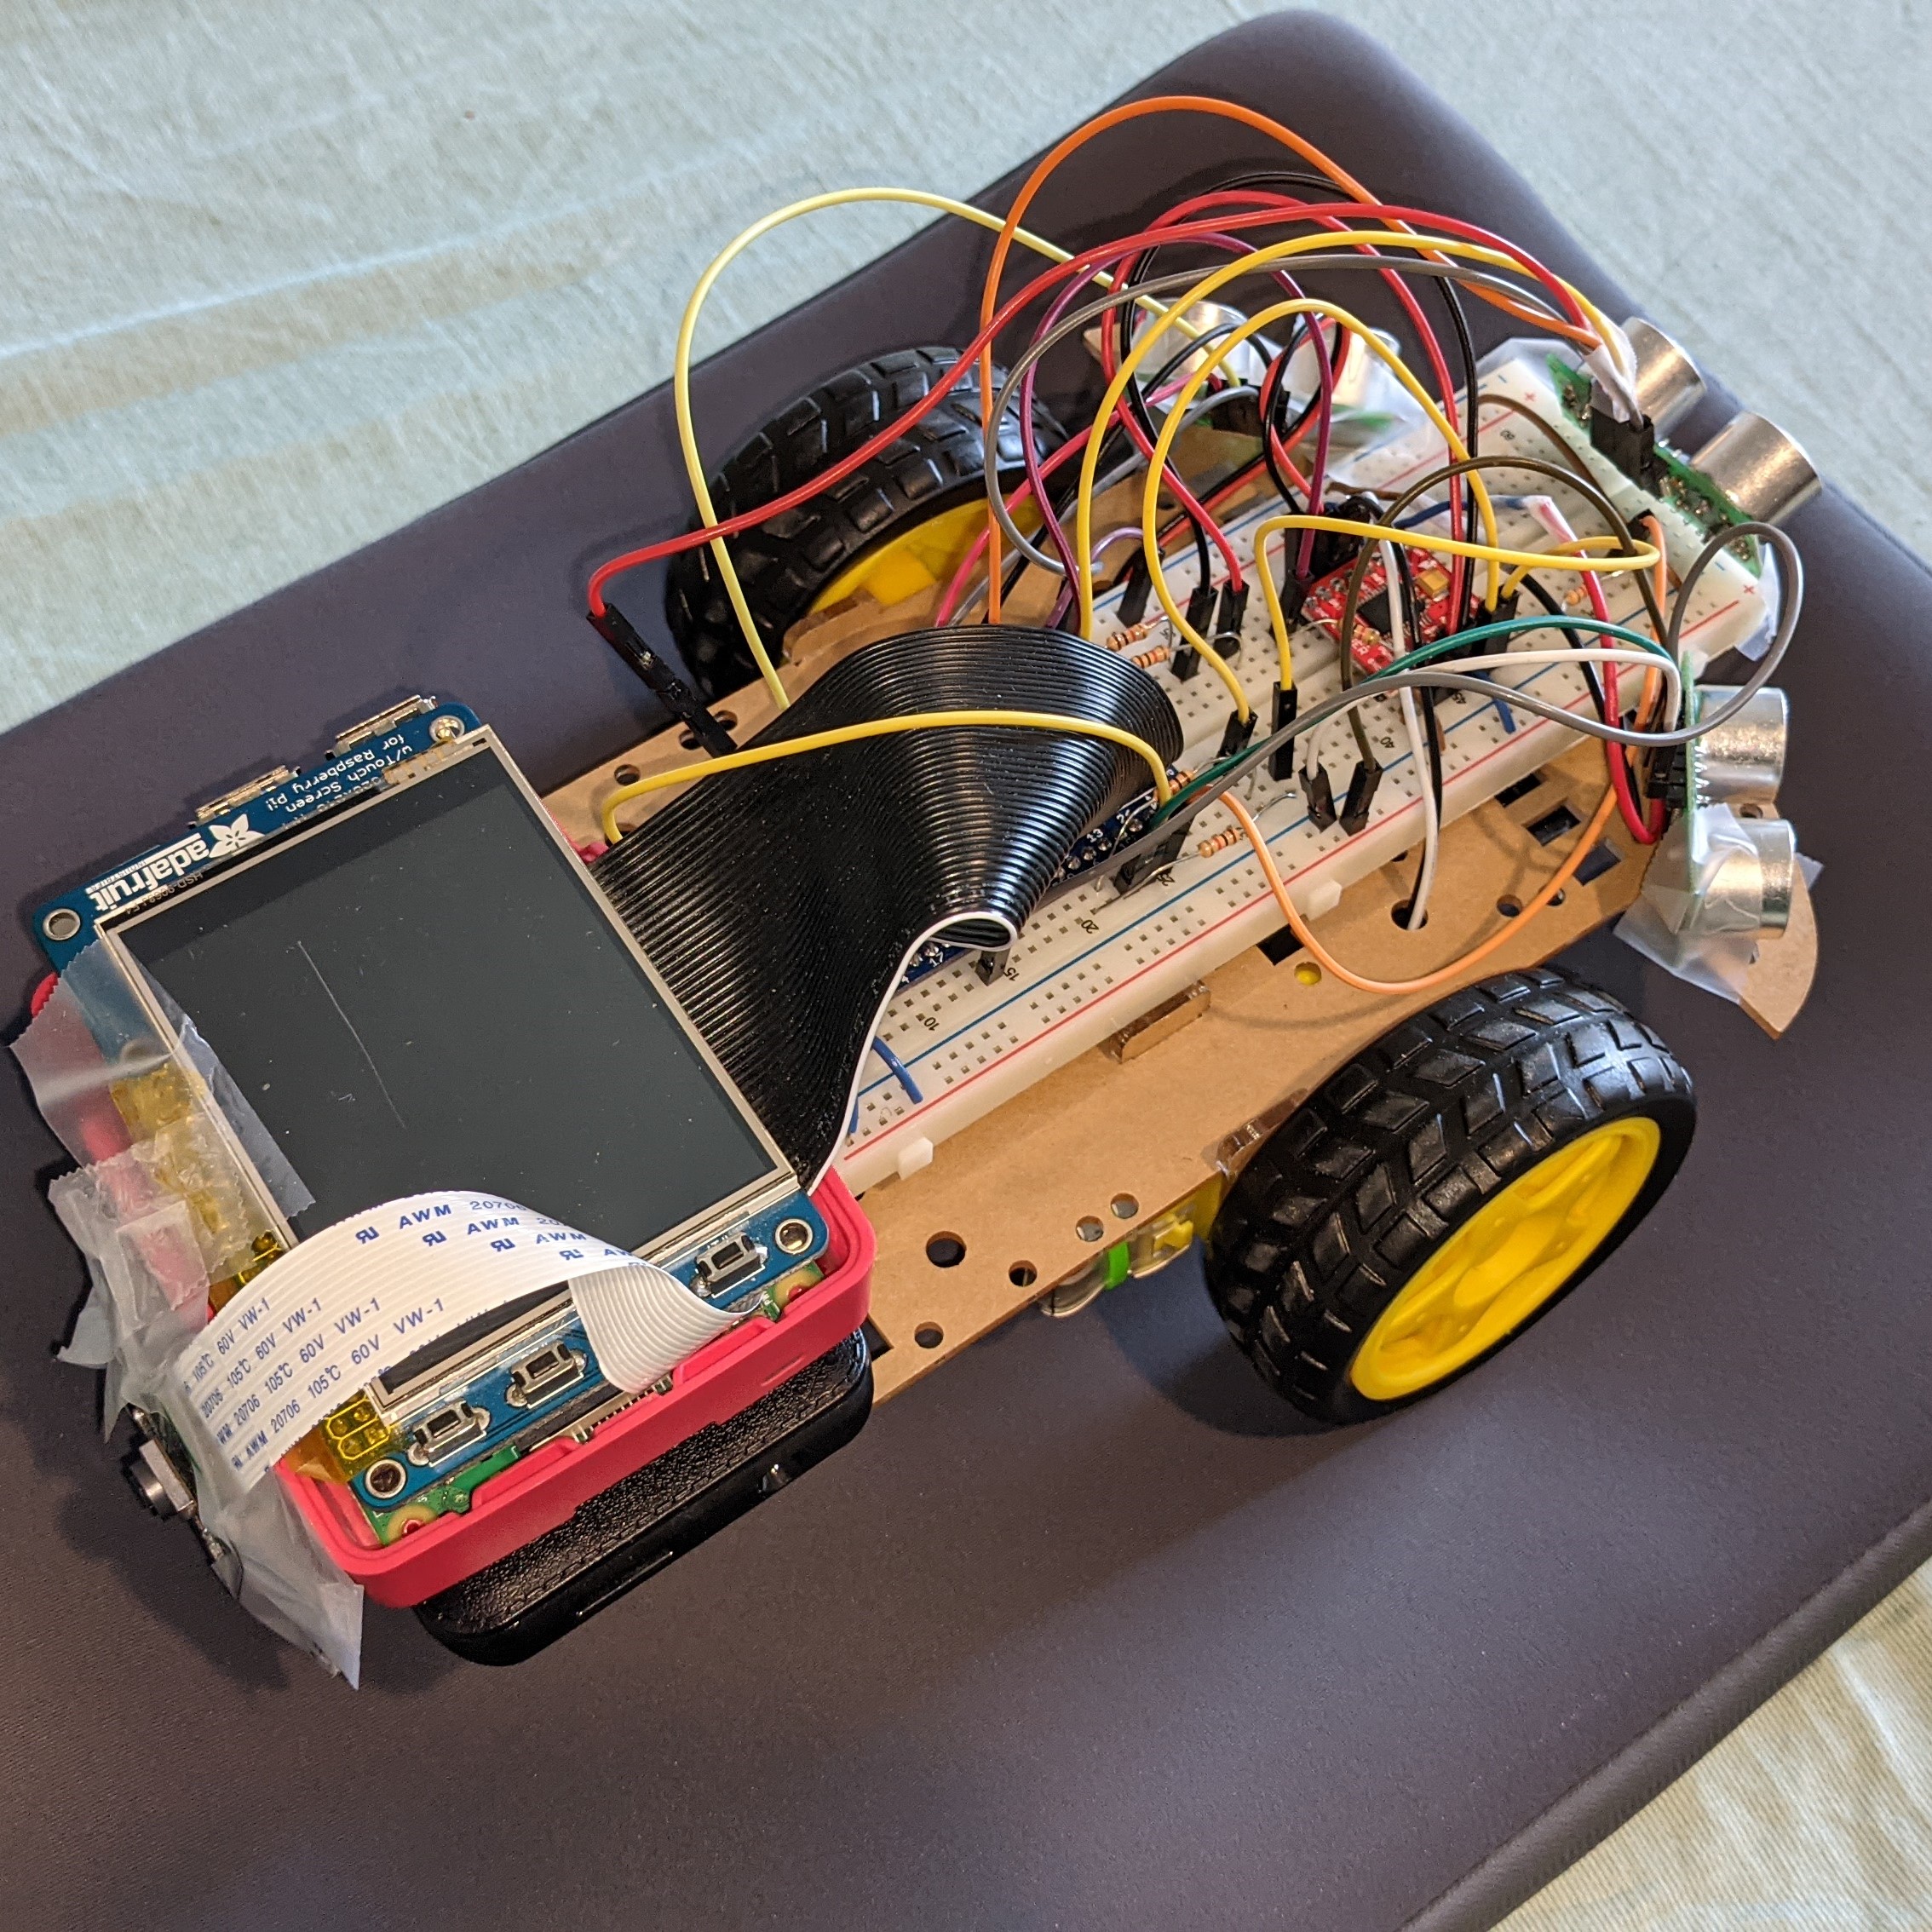
Robot View #2
We have multiple functions in our project, including additional three thread functions. The main.py serves as the primary Python3 script that controls all robot operations. In the main script, we initialize the robot control function, Dijkstra's algorithm function, camera detect function, Bluetooth beacon scanner function, ultrasonic distance sensor function and the PyGame. This decision was made as it allowed for seamless integration of different functions onto the robot due to the nature of Spring 2021 and working remotely.

Process Flow for Robot Navigation
Two classes were created, robot_control and shortestPath. In robot_control.py, we set up PWM and input GPIO pins for the tires of the robot. Functions to command clockwise, counter-clockwise, and stopping for each wheel were developed to allow for saving the state that the robot should be functioning in. To easily manipulate the robot speed and direction (straight, turning), we decided to create two additional functions for each operation. Each of them will record the distance from the previous mode, so it won’t affect the movement when we call these functions. For the shortest path function, we decided to use Dijkstra's algorithm. This is because our paths do not have negative values since a premade map is utilized, thus the Dijkstra's algorithm will be the easiest algorithm to implement. In this algorithm, we made our graph by using an adjacency matrix to represent our desired map. When we get the shortest path from each vertex, we will use a backtracking method to find the route of the shortest path. To initialize this algorithm, the input should be the coordinates of the location and the adjacent point. The shortest path from the algorithm can be derived from just the given source point and destination point. Then the output will be an array of the shortest path.
Additionally, three thread functions control three kinds of sensors separately. First, the ultrasonic distance sensor thread detects the distance between the robot and the wall. The three ultrasonic sensors are activated one second apart, and the three sensors are activated separately to prevent them from interfering with each other. Since they all use sound waves to detect the distance, it is easy for each signal to interfere with each other. When the distance measured by the front sensor is less than 20 cm, the car will stop. In addition, when the left and right sensors’ values are less than 50 cm, we will speed up the PWM of a wheel to adjust the direction of the car so that the car can go straight and go forward.
GUI #1
GUI #2
The second thread will be the beacon scanner.The PyBluez library was installed for the Bluetooth and open-source code was used for the beacon scanner. The beacons could not operate in separate functions, so their code was merged together to get the code to work smoothly. At the beginning of the thread, we need to continuously detect all nearby Bluetooth signals and collect all the signals. Next, we need to identify the ID to get the data from the beacons we specify. When we found the beacons we were looking for, we began to analyze the signal strength (Measured Power) it transmitted and the signal strength (RSSI) when we received it. Then we use a formula Distance = 10((Measured Power - RSSI)/10N)) to convert the distance. Because the signals obtained by beacons often have large errors, we used a deque and averaged the values obtained from the last ten. We should use the triangulation method to get the current position of the robot car, but this is a bit too complicated, so we decided to put the beacon directly at all our designated corners. When our car is very close to that beacon, we tell the car has reached this position. Next, we calculate which direction the robot car should turn.
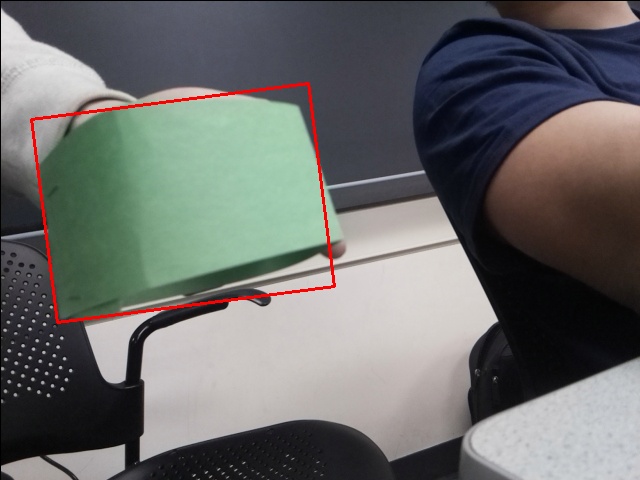
Adaptive behavior was implemented by mounting a camera to the back of the camera to track the movements of the user. The primary function of the camera is to calculate the distance from the robot to the user. A commonly used method for classifying a human utilizes the histogram of gradient functions in the OpenCV package was proven to be unreliable at close ranges, thus making it wrong for our application. Instead, we opted to use color sensing to measure the distance between the robot and user. The video feed is initialized and a predetermined length from the robot and width of the sensors are calculated. A green band was selected as it proved the best range for color detection in the HSV color scale. A mask was created to highlight areas with a common color, green in our case, and use that region to draw a rectangle over that region.
OpenCV functionality was then used to calculate the area of the bounding box that encapsulates the area. This area is then saved and used to modify the PWM signal sent to each tire. The initial area of the color band is proportional to the detected area for the band and can be used to scale the distance according to the area of the color band. This calculated distance is then read by the colorDetector.py function to modify the PWM signal.
Process Flow for Robot Navigation
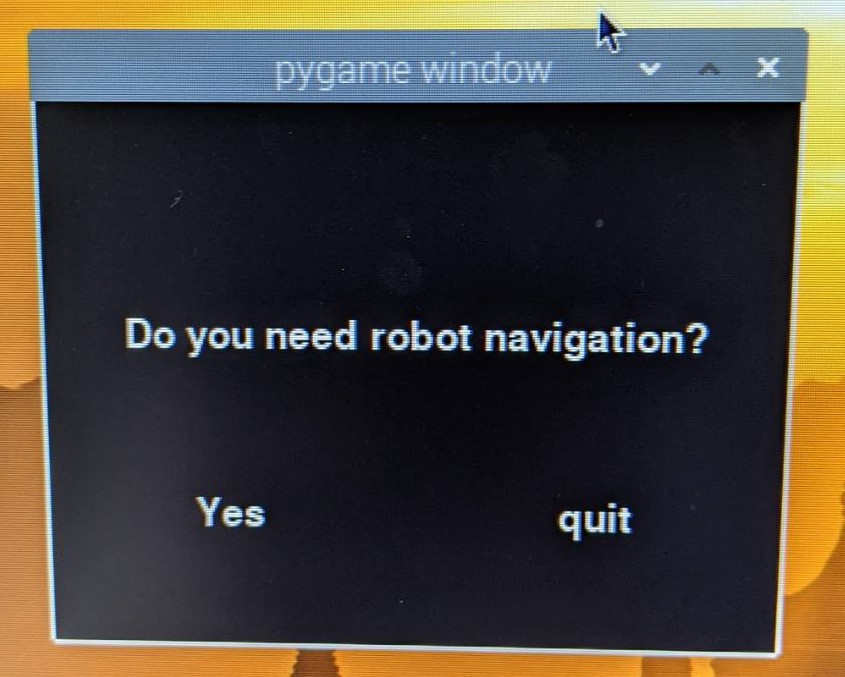
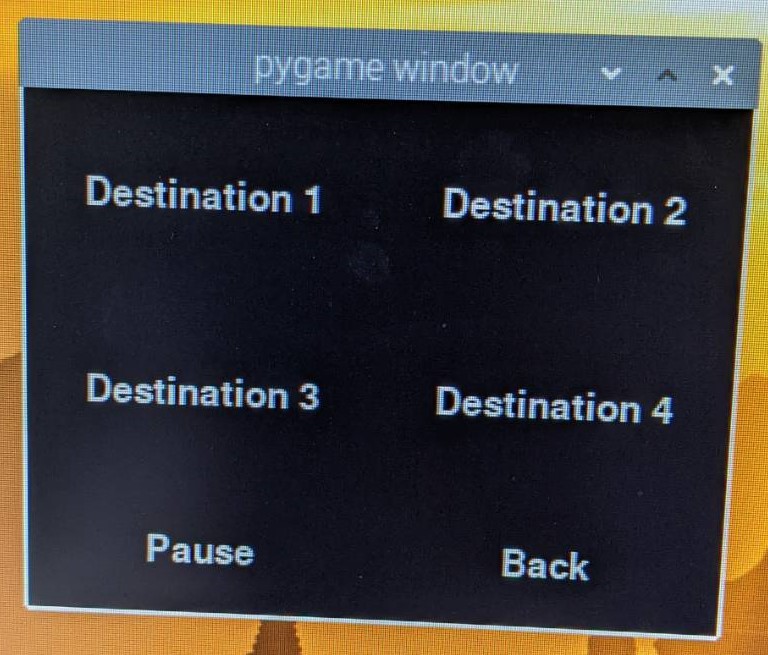
Lastly, we have a main while loop to keep doing all the functions and also the display of the PyGame. In the PyGame, we divided it into four stages. At the first stage, we will have a line of text asking “Do you need robot navigation?", the user clicks “Yes” to enter the second stage. In the second stage, it will allow the user to select the destination they want to reach. When the user presses on the destination they want, the robot car will start to use the shortest path algorithm to calculate the shortest route. Then it will enter to the third stage showing “Navigate to Destination” which means the robot car is currently navigating. After the robot arrives at the destination, it will enter the last stage showing “ARRIVED”.
Testing
Camera testing was done by using the live feed of the camera to test the ability to identify the color band for human tracking. This video feed also displayed the calculated distance of the camera to the robot. This method was used to test an initial human tracking implementation using histograms of gradients and demonstrated flaws in the performance of the implementation. At distances of a meter or less, the camera would fail to detect the human reliably, thus the color method was adopted for human detection. The included video demonstrates distance calculations and a sample of the performance of the detection feed.
Physical and behavioral testing was conducted in Phillips Hall with a specified layout to simulate the known map portion of our robot implementation. The initial test setup included three beacons that represented a starting point, a corner, and a target to reach. Beacons were originally placed on the ceilings of the hallway but later placed on the ground for improved performance. Prior to merging all code together, testing was completed on individual subsystems to understand performance of each system independently. This included using the mounted camera to test speed adaptation while traveling in a straight line and maneuvering from individual beacon to beacon. Additionally, distance sensors were tested for reliability using a ruler and wall to test whether the sensors would reliably return a correct distance. Beacons were tested for their reliability by testing if the beacon would be picked up by the Raspberry Pi.
Results
Results for this project met some goals outlined from our initial plan. Certain subsystems functioned properly when tested individually, such as the camera operations and onboard sensing, but merging all subsystems together resulted in unexpected behavior in onboard sensing. Issues such as spikes in ultrasonic distance sensing and unreliability in the beacon results in unexpected behaviors when maneuvering. Since the distance sensors were meant to avoid collisions and steer the vehicle straight, the robot’s wheels would differ in performance, causing the robot to steer into the wall or veer off its path. Individual subsystems worked independently but combining all the subsystems resulted in unexpected results.
In conclusion, this project showed limitations but achieved some goals for the robot. A GUI, reliable camera operations, and sensing were achieved and verified individually. However, combining these components proved to be more challenging in terms of debugging than expected. A possible solution to the issues in performance could be solved using multi-threading to prioritize certain threads during different times of operation. One thing that did not work was using the distance sensors to control the vehicles direction and prevent wall collisions. The reliability of the sensors when testing was satisfactory but unreliable when other processes were also running, thus limiting the robot’s controls. Additionally, the beacons proved to be sem-reliable when testing individually, as the robot would not detect the beacon at the same range consistently. This resulted in collisions when testing as the robot would either turn into a wall or not turn at all since the beacon was not identified.
Future Works
Given the issues of reliability with the ultrasonic sensors and bluetooth beacons, other methods for controlling the motion of the robot would be worth investigating. Primarily, experimenting with alternative control methods would allow for the robot to behave properly while operating autonomously. One example is implementing a PID controller for each tire based on feedback from a voltage or torque sensor. Each sensor could be used to measure the output towards each wheel and correct for proper behavior. Such an application would control and attempt to stabilize the output from each motor to correct issues with steering and direction. Additionally, committing one sensor to each tire would reduce onboard sensor count, allowing for the PiTFT to be operational.
Further testing with bluetooth beacons would also be conducted to investigate performance issues that arose during previous testing and demos. A high threshold for length to a beacon was utilized in an attempt to correct for unreliable signal, but this resulted in further issues with reliable location detection. Limitations in indoor sensing for positioning is a major topic to experiment in in order to create a reliable system for indoor robot localization. Alternative methods of localization could also be investigated, such as using a second camera to steer towards pre-determined markers. Initially, apriltags were considered for this application, however, issues and limitations in video processing created an unreliable system.
Once the issues previously discussed were addressed, possible extensions to this project are implementing a larger map, implementing human detection, and implementing human-robot interaction methodologies to make the experience more personable. For our implementation, we chose to experiment with two beacons as we wanted to scale down due to beacon performance. Once issues in beacon detection are resolved or another method is developed, implementing more beacon detectors would allow for a more practical robot. Human detection can be improved by initializing the robot to track the first human it sees, which should be the human standing behind it. Currently, a color detection system was implemented as the system was more reliable. A human-detection system was attempted utilizing histograms of gradients but was shown to be unreliable at distances less than a meter. A further investigation into initializing the system onto a single object and tracking it without a color indicator would be a valuable experiment. Finally, a robot tour guide would benefit from having some form of response to the user when it’s travelling to its destination to create a comfier experience. This may include displaying a face on the PiTFT or with audio cues to allow for the robot to communicate with the user when they’re too far away or if the destination has been reached.
Work Distribution
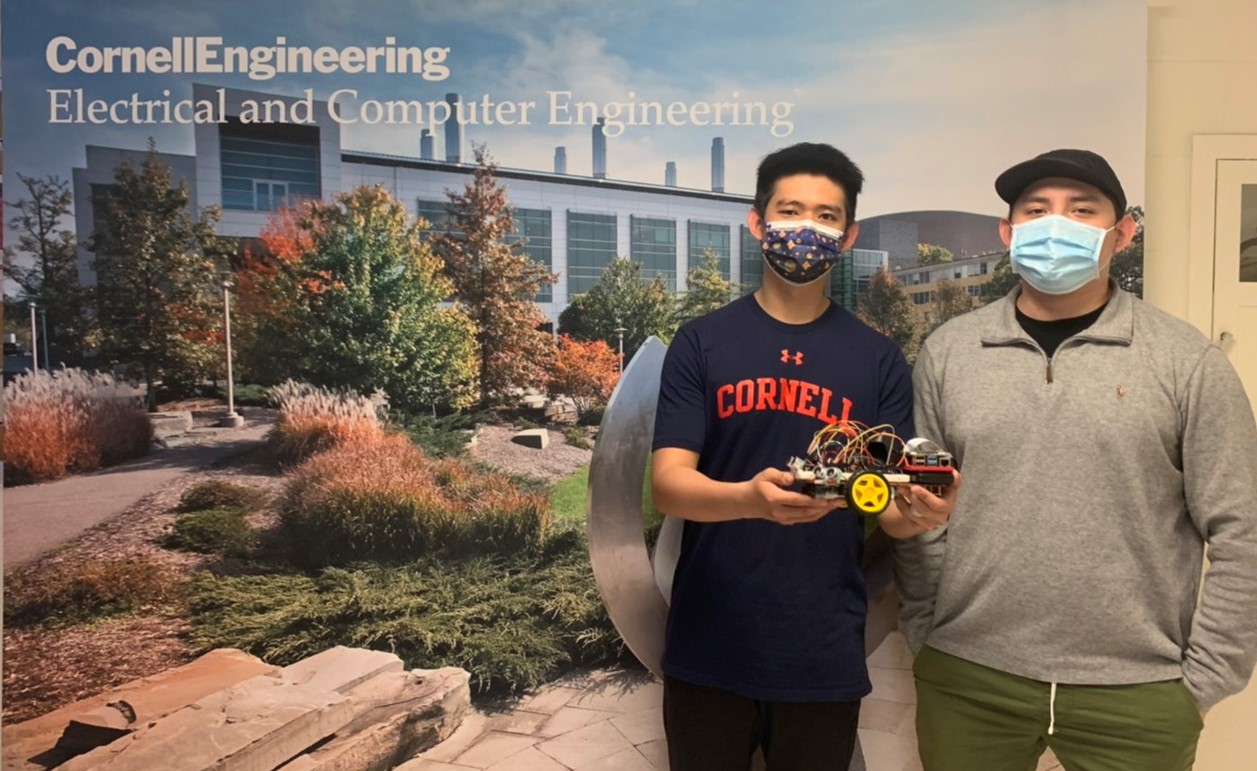
Project group picture
Nei-Chun Shao
ns948@cornell.edu
PyGame GUI, Bluetooth Beacons and Scanner, Motor Controls, Dijkstra's Algorithm Design
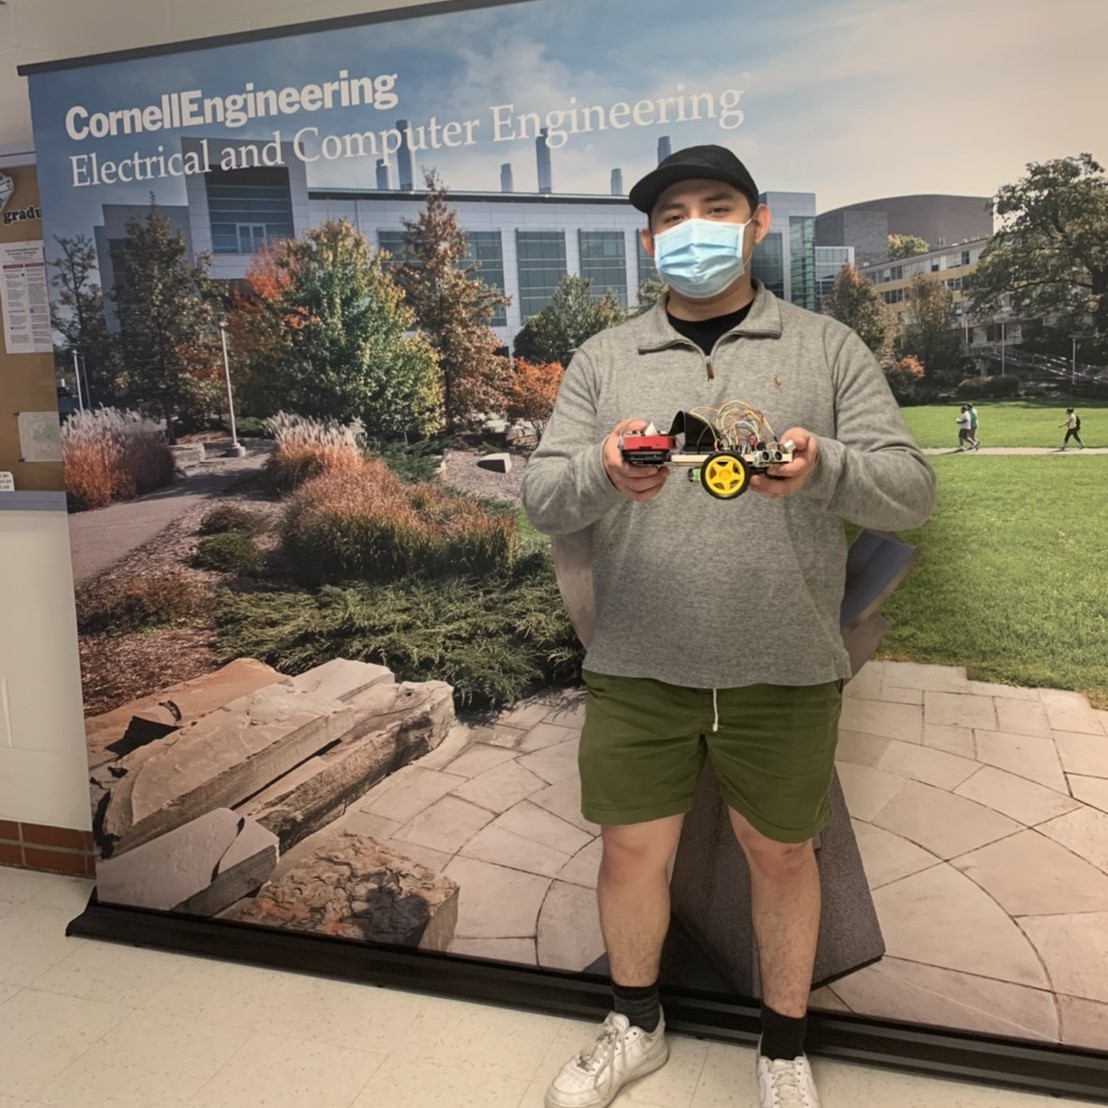
George Orellana
gao33@cornell.edu
Camera Operations, Physical Testing, Speed Controls
Parts List
- Raspberry Pi $35.00
- Raspberry Pi Camera V2 $29.95
- Resistors, Wires, Robot Frame - Provided in lab
- US-100 Ultrasonic Distance Sensor $6.95*3
- BLE 5.1 beacon $10.00*3
- SparkFun Motor Driver - Dual TB6612FNG (1A) $5
Total: $85.80
References
GitHub RepoPyGame-WIKI
Dijkstra’s Shortest Path Algorithm
Python3 BlueTooth Device Scanner
BLE iBeacon Scanner - iBeacon and Eddystone Beacons
Formula to convert the RSSI value of the BLE (Bluetooth Low Energy) Beacons to Meters
Ultrason Sonar Distance Sensors
OpenCV Video Feed Tutorial
Code Appendix
1
2
3
4
5
6
7
8
9
10
11
12
13
14
15
16
17
18
19
20
21
22
23
24
25
26
27
28
29
30
31
32
33
34
35
36
37
38
39
40
41
42
43
44
45
46
47
48
49
50
51
52
53
54
55
56
57
58
59
60
61
62
63
64
65
66
67
68
69
70
71
72
73
74
75
76
77
78
79
80
81
82
83
84
85
86
87
88
89
90
91
92
93
94
95
96
97
98
99
100
101
102
103
104
105
106
107
108
109
110
111
112
113
114
115
116
117
118
119
120
121
122
123
124
125
126
127
128
129
130
131
132
133
134
135
136
137
138
139
140
141
142
143
144
145
146
147
148
149
150
151
152
153
154
155
156
157
158
159
160
161
162
163
164
165
166
167
168
169
170
171
172
173
174
175
176
177
178
179
180
181
182
183
184
185
186
187
188
189
190
191
192
193
194
195
196
197
198
199
200
201
202
203
204
205
206
207
208
209
210
211
212
213
214
215
216
217
218
219
220
221
222
223
224
225
226
227
228
229
230
231
232
233
234
235
236
237
238
239
240
241
242
243
244
245
246
247
248
249
250
251
252
253
254
255
256
257
258
259
260
261
262
263
264
265
266
267
268
269
270
271
272
273
274
275
276
277
278
279
280
281
282
283
284
285
286
287
288
289
290
291
292
293
294
295
296
297
298
299
300
301
302
303
304
305
306
307
308
309
310
311
312
313
314
315
316
317
318
319
320
321
322
323
324
325
326
327
328
329
330
331
332
333
334
335
336
337
338
339
340
341
342
343
344
345
346
347
348
349
350
351
352
353
354
355
356
357
358
359
360
361
362
363
364
365
366
367
368
369
370
371
372
373
374
375
376
377
378
379
380
381
382
383
384
385
386
387
388
389
390
391
392
393
394
395
396
397
398
399
400
401
402
403
404
405
406
407
408
409
410
411
412
413
414
415
416
417
418
419
420
421
422
423
424
425
426
427
428
429
430
431
432
433
434
435
436
437
438
439
440
441
442
443
444
445
446
447
448
449
450
451
452
453
454
455
456
457
458
459
460
461
462
463
464
465
466
467
468
469
470
471
# Robotic Navigation
# Nei-Chun Shao (ns948), George Orellana (gao33)
# Final Project 05/19/2021
import pygame
from pygame.locals import * # for event MOUSE variables
import os
import RPi.GPIO as GPIO
import time
from shortestPath import Graph
from statistics import mean
import blescan # for beacon scanner
import sys
import bluetooth._bluetooth as bluez # for bluetooth
import threading
import robot_control
import collections
import numpy as np
import argparse
import cv2
import imutils
# for the main while loop and the T_beacon thread,
# false will end the thread and main while loop and clean_GPIO
run_code = True
# Initialize robot control
control_robot = robot_control.robot_move()
yellow_mean = 0
pink_mean = 0
purple_mean = 0
# check bluetooth
dev_id = 0
try:
sock = bluez.hci_open_dev(dev_id)
print ("ble thread started")
except:
print ("error accessing bluetooth device...")
sys.exit(1)
# Display on TFT, use touchscreen
os.putenv('SDL_VIDEODRIVER', 'fbcon') # Display on piTFT
os.putenv('SDL_FBDEV', '/dev/fb0')
os.putenv('SDL_MOUSEDRV', 'TSLIB') # Track mouse clicks on piTFT
os.putenv('SDL_MOUSEDEV', '/dev/input/touchscreen')
#set GPIO Pins
GPIO.setmode(GPIO.BCM)
GPIO.setup(17, GPIO.IN, pull_up_down=GPIO.PUD_UP)
GPIO_TRIGGER_left = 18
GPIO_ECHO_left = 23
GPIO_TRIGGER_right = 22
GPIO_ECHO_right = 13
GPIO_TRIGGER_front = 12
GPIO_ECHO_front = 19
distance_value_left = 0
distance_value_right = 0
distance_value_front = 0
GPIO.setup(GPIO_TRIGGER_left, GPIO.OUT)
GPIO.setup(GPIO_ECHO_left, GPIO.IN)
GPIO.setup(GPIO_TRIGGER_right, GPIO.OUT)
GPIO.setup(GPIO_ECHO_right, GPIO.IN)
GPIO.setup(GPIO_TRIGGER_front, GPIO.OUT)
GPIO.setup(GPIO_ECHO_front, GPIO.IN)
# ultrasonic distance sensor thread
def distance_merge():
global run_code
global control_robot
global GPIO_TRIGGER_left
global GPIO_ECHO_left
global distance_value_left
#set GPIO direction (IN / OUT)
global GPIO_TRIGGER_right
global GPIO_ECHO_right
global distance_value_right
#set GPIO direction (IN / OUT)
global GPIO_TRIGGER_front
global GPIO_ECHO_front
global distance_value_front
#set GPIO direction (IN / OUT)
while run_code:
# left distance sensor
GPIO.output(GPIO_TRIGGER_left, True)
time.sleep(0.00001)
GPIO.output(GPIO_TRIGGER_left, False)
StartTime = time.time()
StopTime = time.time()
while GPIO.input(GPIO_ECHO_left) == 0:
StartTime = time.time()
while GPIO.input(GPIO_ECHO_left) == 1:
StopTime = time.time()
TimeElapsed = StopTime - StartTime
distance_value_left = (TimeElapsed * 34300) / 2
time.sleep(1)
# right distance sensor
GPIO.output(GPIO_TRIGGER_right, True) # set Trigger to HIGH
time.sleep(0.00001)
GPIO.output(GPIO_TRIGGER_right, False) # set Trigger after 0.01ms to LOW
StartTime = time.time()
StopTime = time.time()
while GPIO.input(GPIO_ECHO_right) == 0: # save StartTime
StartTime = time.time()
while GPIO.input(GPIO_ECHO_right) == 1: # save time of arrival
StopTime = time.time()
TimeElapsed = StopTime - StartTime # time difference between start and arrival
distance_value_right = (TimeElapsed * 34300) / 2 # multiply with the sonic speed (34300 cm/s) and divide by 2, because there and back
time.sleep(1)
# front distance sensor
GPIO.output(GPIO_TRIGGER_front, True)
time.sleep(0.00001)
GPIO.output(GPIO_TRIGGER_front, False)
StartTime = time.time()
StopTime = time.time()
while GPIO.input(GPIO_ECHO_front) == 0:
StartTime = time.time()
while GPIO.input(GPIO_ECHO_front) == 1:
StopTime = time.time()
TimeElapsed = StopTime - StartTime
distance_value_front = (TimeElapsed * 34300) / 2
time.sleep(1)
def beacon_scanner():
global run_code
global yellow_mean
global pink_mean
global purple_mean
distance_list1 = collections.deque()
distance_list2 = collections.deque()
distance_list3 = collections.deque()
blescan.hci_le_set_scan_parameters(sock)
blescan.hci_enable_le_scan(sock)
while run_code:
returnedList = blescan.parse_events(sock, 10)
for beacon in returnedList:
temp_list = beacon.split(",")
id1 = temp_list[1]
major = temp_list[2]
power = temp_list[4]
rssi = temp_list[5]
# get the beacon distance from the yellow beacon
if id1 == "b9407f30f5f8466eaff925556b57feff" and major == "867":
distance = 10 ** ((int(power) - int(rssi)) / (10*2)) # distance function
distance_list1.append(distance)
if len(distance_list1) > 5: # average five distance value to avoid the extreme value
distance_list1.popleft()
yellow_mean = mean(distance_list1)
# get the beacon distance from the pink beacon
elif id1 == "b9407f30f5f8466eaff925556b57fe6d" and major == "19667":
distance = 10 ** ((int(power) - int(rssi)) / (10*2))
distance_list2.append(distance)
if len(distance_list2) > 5:
distance_list2.popleft()
pink_mean = mean(distance_list2)
# get the beacon distance from the purple beacon
elif id1 == "b9407f30f5f8466eaff925556b57feec" and major == "18354":
distance = 10 ** ((int(power) - int(rssi)) / (10*2))
distance_list3.append(distance)
if len(distance_list3) > 5:
distance_list3.popleft()
purple_mean = mean(distance_list3)
# the thread for detecting user behind the robot
def color_detect():
global control_robot
vid = cv2.VideoCapture(0) #Initiate video stream from RPi Camera
colorLow = (50,50,50) #Lower region of green color detection
colorHigh = (90, 255, 255) #Upper region of greeen color detection
startTime = time.time() #Initial launch time
picTime = 1.5 #Take a picture to analyze every 1.5 seconds
objectWidth = 2.5 #Object width in inches (of green bracelet)
initialDistance = 6 #Initial distance from robot in inches
initialImage = True #Use initial image to calculate focal length in terms of pixels
#control = robot_control.robot_move() #Initiate robot_control to send commands
while(vid.isOpened() and run_code):
ret, frame = vid.read() #Read video feed
frame = imutils.rotate(frame, angle=180)
vidColor = cv2.cvtColor(frame, cv2.COLOR_BGR2HSV) #Convert from RBG to HSV filters
color = cv2.inRange(vidColor, colorLow, colorHigh) #Set up mask to detect same color using low and high ranges
color = cv2.erode(color, None, iterations = 3)
color = cv2.dilate(color, None, iterations = 3) #Apply two filters to remove blots in mask
contour = cv2.findContours(color.copy(), cv2.RETR_EXTERNAL, cv2.CHAIN_APPROX_SIMPLE) #Identify contours that are defined by same color
contour = imutils.grab_contours(contour) #Save contour
if len(contour) > 0:
c = max(contour, key = cv2.contourArea) #Take contour of the largest area
area = cv2.minAreaRect(c) #Compute the rectangular area of the contour to calculate area
box = cv2.boxPoints(area) #Derive 4 points to draw contours onto frame
box = box.astype(np.int32) #Convert points to int32 for following command
cv2.drawContours(frame, [box], 0, (0,0,255), 2) #Draw contours onto the feed
if (time.time()-startTime>picTime): #Only advance after 1.5 secs
if initialImage:
focalLength = (area[1][0] * initialDistance)/objectWidth #Calculate focal length of camera in terms of pixels
cv2.imwrite("SamplePic.jpg", frame) #Take snap of video feed to calculate distance
pic = cv2.imread("SamplePic.jpg")
dist = (objectWidth * focalLength) / (area[1][0]) #Use focal length, object width, and pixel width to get distance from camera
cv2.putText(pic, "%.2fft" % (dist/12), (pic.shape[1] - 200, pic.shape[0] - 20), cv2.FONT_HERSHEY_SIMPLEX, 2.0, (0,255,0), 3)
cv2.imwrite("EditedPic.jpg", pic) #Save initial image
initialImage = False
startTime = time.time()
print(dist)
else:
cv2.imwrite("SamplePic.jpg", frame)
pic = cv2.imread("SamplePic.jpg")
dist = (objectWidth * focalLength)/(area[1][0])
startTime = time.time()
print(dist)
#print(area)
if (dist < 12) :
control_robot.Change_speed(30,80,30, 80) #Speed up if follower is close by
elif (dist > 12) & (dist < 22):
control_robot.Change_speed(30,50,30,50) #Maintain half speed when at a medium length from follow
elif (dist > 22) & (dist < 34):
control_robot.Change_speed(30,20,30,20) #Slow down if user is far behind
else:
control_robot.Change_speed(30,0,30,0) #COmpletely stop if too far
cv2.imshow("Frame", frame) #Display drawn rectangle to feed
key = cv2.waitKey(1) & 0xFF #Use q key to exit out of video feed
if key == ord('q'): #Use q key to exit out of feed
break
vid.release() #Shut down properly
cv2.destroyAllWindows()
# calling beacon scanner as a thread
T_beacon_scanner = threading.Thread(target = beacon_scanner)
T_beacon_scanner.start()
# camera detection thread
T_color_detect = threading.Thread(target = color_detect)
T_color_detect.start()
# start the ultrasonic distance sensors thread
T_distance_sensor = threading.Thread(target = distance_merge)
T_distance_sensor.start()
# create a graph of the map, use to calculate the shorest path
g = Graph(9) # total number of the point
g.add_coord([1, 7], [7]) # add_coord(coordinate, adjacent point)
g.add_coord([5, 0], [8])
g.add_coord([0, 5], [8])
g.add_coord([10, 9], [6])
g.add_coord([3, 15], [5])
g.add_coord([3, 9], [4, 6])
g.add_coord([5, 9], [3, 5, 7])
g.add_coord([5, 7], [0, 6, 8])
g.add_coord([5, 5], [1, 2, 7])
#g.dijkstra(source, destination) # source is the start point, destination is the destination point
# a quit button 17 on the PiTFT
def GPIO17_callback(channel):
print("detected on 17")
global run_code
run_code = False
GPIO.cleanup()
GPIO.add_event_detect(17, GPIO.FALLING, callback=GPIO17_callback, bouncetime=200)
# Initialize PiTFT
clock = pygame.time.Clock()
run_ball_collide = False
text_str = ""
level_1 = True # start level
level_2 = False # chosing destination level
level_3 = False # start navigation level
level_4 = False # arrive destination
source = 2 # the start point is 2
destination = 0 # destination will modify when we press the button on the screen
clock_speed = 10
clock.tick(clock_speed)
t1 = time.time()
path = [] # the shortest path from the algorithm
current_pos = 2 # record the position that the robot at
previous_pos = 2
future_pos = 2
k_pos = 0
change_dir = False # when meet the turning point
where_to_trun = 0 # the movement of the robot
start_turning = False #
# display variable
pygame.init()
pygame.mouse.set_visible(False)
WHITE = 255, 255, 255
BLACK = 0,0,0
size = width, height = 320,240
screen = pygame.display.set_mode((320, 240))
my_font = pygame.font.Font(None, 25)
my_buttons = { "quit":(240,180), "Yes" : (80, 180), "Do you need robot navigation?" : (160, 100)}
# main while loop
while run_code :
screen.fill(BLACK) # Erase the Work space
if level_1:
my_buttons = { "quit":(240,180), "Yes" : (80, 180), "Do you need robot navigation?" : (160, 100)}
if level_2:
my_buttons = {"Destination 1":(80, 45), "Destination 2":(240, 45), "Destination 3":(80, 135), "Destination 4":(240, 135), "Pause":(80,210), "Back" : (240, 210)}
if level_3:
my_buttons = {"Nevigate to Destination":(160, 120)}
if level_4:
my_buttons = {"ARRIVED":(160, 120)}
# show the buttons on the screen
for my_text, text_pos in my_buttons.items():
text_surface = my_font.render(my_text, True, WHITE)
rect = text_surface.get_rect(center=text_pos)
screen.blit(text_surface, rect)
# detecting the button press
for event in pygame.event.get():
if(event.type is MOUSEBUTTONDOWN):
pos = pygame.mouse.get_pos()
elif(event.type is MOUSEBUTTONUP):
pos = pygame.mouse.get_pos()
if level_1:
if pos[0] < 120 and pos[1] > 160:
level_1 = False
level_2 = True
elif pos[0] > 120 and pos[1] > 160:
run_code = False
elif level_2:
if pos[0] < 160:
if pos[1] < 90:
destination = 1
elif 90 < pos[1] < 180:
destination = 3
elif pos[0] > 160:
if pos[1] < 90:
destination = 2
elif 90 < pos[1] < 180:
destination = 4
level_2 = False
level_3 = True
# start calculate the path
path = g.dijkstra(source, destination)
where_to_trun = 1
time.sleep(2)
# start navigation
if level_3:
# update the current location
if k_pos == 0:
previous_pos = path[k_pos]
else:
previous_pos = path[k_pos-1]
current_pos = path[k_pos]
if k_pos >= len(path) - 1:
print("arrive destination")
where_to_trun = 0
level_4 = True
level_3 = False
else:
future_pos = path[k_pos+1]
if pink_mean < 0.8:
current_pos = 8
if current_pos == 8 and purple_mean < 0.8:
current_pos = 1
if current_pos == future_pos:
print("change direction")
k_pos += 1
if k_pos < (len(path)-1):
change_dir = True
# when meets the next location point and need to turn right or left
if change_dir == True:
difference = []
zip_object1 = zip(g.vertex_coord[path[1]], g.vertex_coord[path[0]])
for l1, l2 in zip_object1:
difference.append(l1 - l2)
zip_object2 = zip(g.vertex_coord[path[2]], g.vertex_coord[path[1]])
for l1, l2 in zip_object2:
difference.append(l1 - l2)
if difference[0] > 0 and difference[3] < 0:
where_to_trun = 2
print("turn right")
elif difference[0] > 0 and difference[3] > 0:
where_to_trun = 3
print("turn left")
elif difference[0] < 0 and difference[3] < 0:
where_to_trun = 3
print("turn left")
elif difference[0] < 0 and difference[3] > 0:
where_to_trun = 2
print("turn right")
elif difference[1] > 0 and difference[2] < 0:
where_to_trun = 3
print("turn left")
elif difference[1] > 0 and difference[2] > 0:
where_to_trun = 2
print("turn right")
elif difference[1] < 0 and difference[2] < 0:
where_to_trun = 2
print("turn right")
elif difference[1] < 0 and difference[2] > 0:
where_to_trun = 3
print("turn left")
change_dir = False
# control the robot movement
if where_to_trun == 2: # turn right
control_robot.robot_control(2)
start_turning = True
elif where_to_trun == 3: # turn left
control_robot.robot_control(3)
elif where_to_trun == 1: # go straight
control_robot.robot_control(1)
elif where_to_trun == 0: # stop
control_robot.robot_control(0)
# turning the robot direction
while start_turning:
if where_to_trun == 2:
time.sleep(2)
start_turning = False
where_to_trun = 1
# avoid the robot slide on the wall
if where_to_trun == 1:
if distance_value_front < 20:
control_robot.Change_speed(20, 0, 20, 0)
else:
if distance_value_right < 50:
control_robot.Change_speed(20, control_robot.dutycyl1, 20, control_robot.dutycyl1+5)
time.sleep(0.5)
elif distance_value_left < 50:
control_robot.Change_speed(20, 55, 20, 50)
time.sleep(0.5)
control_robot.Change_speed(20, min(control_robot.dutycyl1, control_robot.dutycyl2), 20, min(control_robot.dutycyl1, control_robot.dutycyl2))
clock.tick(clock_speed)
rect = text_surface.get_rect(center=text_pos)
pygame.display.flip()
GPIO.cleanup()
1
2
3
4
5
6
7
8
9
10
11
12
13
14
15
16
17
18
19
20
21
22
23
24
25
26
27
28
29
30
31
32
33
34
35
36
37
38
39
40
41
42
43
44
45
46
47
48
49
50
51
52
53
54
55
56
57
58
59
60
61
62
63
64
65
66
67
68
69
70
71
72
73
74
75
76
77
78
79
80
81
82
83
84
85
86
87
88
89
90
91
92
93
94
95
96
97
98
99
100
101
102
103
104
105
106
107
108
109
110
111
112
113
114
115
116
117
118
119
120
121
122
123
124
125
126
127
128
129
130
131
132
133
134
135
136
137
138
139
140
141
# Nei-Chun Shao (ns948), George Orellana (gao33)
# M_Lab 3, 3/22
import RPi.GPIO as GPIO
import time
import os
class robot_move():
def __init__(self):
# Set up GPIO
GPIO.setmode(GPIO.BCM)
self.a_pwm = 16
self.a_in1 = 20
self.a_in2 = 21
self.b_pwm = 26
self.b_in1 = 6
self.b_in2 = 5
GPIO.setup(self.a_pwm, GPIO.OUT) #A PWM
GPIO.setup(self.a_in1, GPIO.OUT) #A IN
GPIO.setup(self.a_in2, GPIO.OUT) #A IN
GPIO.setup(self.b_pwm, GPIO.OUT) #B PWM
GPIO.setup(self.b_in1, GPIO.OUT) #B IN
GPIO.setup(self.b_in2, GPIO.OUT) #B IN
GPIO.output(self.a_in1,GPIO.LOW)
GPIO.output(self.a_in2,GPIO.LOW)
GPIO.output(self.b_in1,GPIO.LOW)
GPIO.output(self.b_in2,GPIO.LOW)
self.freq1, self.dutycyl1 = 30, 50 # left wheel
self.freq2, self.dutycyl2 = 30, 60 # right wheel
self.status = [0, 0] # 0 = stop, 1 = clockwise, 2 = conter-clkwise
# Start pwm
self.Left_motor = GPIO.PWM(self.a_pwm, 50)
self.Left_motor.start(0)
self.Right_motor = GPIO.PWM(self.b_pwm, 50)
self.Right_motor.start(0)
self.pre_comm = 0
# when we change the speed, it will call the function again.
def Change_speed(self, f1, d1, f2, d2):
self.freq1, self.dutycyl1 = f1, d1 # left wheel
self.freq2, self.dutycyl2 = f2, d2 # right wheel
if self.status[0] == 0:
self.Left_stop()
elif self.status[0] == 1:
self.Left_Clockwise()
elif self.status[0] == 2:
self.Left_Counter_Clockwise()
if self.status[1] == 0:
self.Right_stop()
elif self.status[1] == 1:
self.Right_Clockwise()
elif self.status[1] == 2:
self.Right_Counter_Clockwise()
def Left_Clockwise(self):
self.Left_motor.ChangeFrequency(self.freq1)
self.Left_motor.ChangeDutyCycle(self.dutycyl1)
GPIO.output(self.a_in1,GPIO.HIGH)
GPIO.output(self.a_in2,GPIO.LOW)
self.status[0] = 1
def Left_Counter_Clockwise(self):
self.Left_motor.ChangeFrequency(self.freq1)
self.Left_motor.ChangeDutyCycle(self.dutycyl1)
GPIO.output(self.a_in1,GPIO.LOW)
GPIO.output(self.a_in2,GPIO.HIGH)
self.status[0] = 2
def Left_stop(self):
GPIO.output(self.a_in1,GPIO.LOW)
GPIO.output(self.a_in2,GPIO.LOW)
self.status[0] = 0
def Right_Clockwise(self):
self.Right_motor.ChangeFrequency(self.freq2)
self.Right_motor.ChangeDutyCycle(self.dutycyl2)
GPIO.output(self.b_in1,GPIO.HIGH)
GPIO.output(self.b_in2,GPIO.LOW)
self.status[1] = 1
def Right_Counter_Clockwise(self):
self.Right_motor.ChangeFrequency(self.freq2)
self.Right_motor.ChangeDutyCycle(self.dutycyl2)
GPIO.output(self.b_in1,GPIO.LOW)
GPIO.output(self.b_in2,GPIO.HIGH)
self.status[1] = 2
def Right_stop(self):
GPIO.output(self.b_in1,GPIO.LOW)
GPIO.output(self.b_in2,GPIO.LOW)
self.status[1] = 0
def robot_control(self, new_comm):
if new_comm != self.pre_comm: # get a new commend
# 1 = go straight
if new_comm == 1:
self.freq1, self.dutycyl1 = 50, 50 # left wheel
self.freq2, self.dutycyl2 = 50, 60 # right wheel
self.Left_Clockwise()
self.Right_Clockwise()
self.pre_comm = 1
# 2 = turn right
elif new_comm == 2:
self.freq1, self.dutycyl1 = 50, 60 # left wheel
self.freq2, self.dutycyl2 = 50, 30 # right wheel
self.Left_Clockwise()
self.Right_Clockwise()
self.pre_comm = 2
# 3 = turn left
elif new_comm == 3:
self.freq1, self.dutycyl1 = 50, 30 # left wheel
self.freq2, self.dutycyl2 = 50, 60 # right wheel
self.Left_Clockwise()
self.Right_Clockwise()
self.pre_comm = 3
# 0 = stop
elif new_comm == 0:
self.Left_stop()
self.Right_stop()
self.pre_comm = 0
'''
a = robot_move()
a.Left_Clockwise()
time.sleep(3)
a.Change_speed(20, 75)
time.sleep(3)
GPIO.cleanup()
GPIO.cleanup()
1
2
3
4
5
6
7
8
9
10
11
12
13
14
15
16
17
18
19
20
21
22
23
24
25
26
27
28
29
30
31
32
33
34
35
36
37
38
39
40
41
42
43
44
45
46
47
48
49
50
51
52
53
54
55
56
57
58
59
60
61
62
63
64
65
66
67
68
69
70
71
72
73
74
75
76
77
78
79
80
81
82
83
84
85
86
87
88
89
90
91
92
93
94
95
96
97
98
# Dijkstra's algorithm for finding the shortest path
import sys
class Graph():
def __init__(self, vertices):
self.V = vertices
self.graph = [[0 for column in range(vertices)] for row in range(vertices)]
self.backtrack = [0 for column in range(vertices)]
self.path = []
self.vertex_coord = [[0, 0] for column in range(vertices)]
self.adjacency = []
self.count = 0
def add_coord(self, coord, neighbor):
if self.count < self.V:
self.vertex_coord[self.count] = coord
self.count += 1
self.adjacency.append(neighbor)
def make_graph(self):
for i in range(self.V):
for j in self.adjacency[i]:
self.graph[i][j] = self.cal_distance(self.vertex_coord[i], self.vertex_coord[j])
def cal_distance(self, d1, d2):
distance = ((d2[0]-d1[0])** 2 + (d2[1]-d1[1])**2)**0.5
return distance
def printSolution(self, dist):
print ("Vertex \tDistance from Source")
for node in range(self.V):
print (node, "\t", dist[node])
# A helper function to find the vertex with
# minimum distance value
def minDistance(self, dist, sptSet):
# Initilaize minimum distance for next node
min = float('inf')
# Search not nearest vertex not in the
# shortest path tree
for v in range(self.V):
if dist[v] < min and sptSet[v] == False:
min = dist[v]
min_index = v
return min_index
# main function of the algorithm
def dijkstra(self, src, des):
self.path.clear()
self.make_graph()
dist = [float('inf')] * self.V
dist[src] = 0
sptSet = [False] * self.V
for cout in range(self.V):
# find the minimum distance vertex from the non calculate vertex.
u = self.minDistance(dist, sptSet)
# When the vertex was picked, we set it to True
sptSet[u] = True
# Update dist value if the original value greater than the new value
for v in range(self.V):
if self.graph[u][v] > 0 and sptSet[v] == False and dist[v] > dist[u] + self.graph[u][v]:
dist[v] = dist[u] + self.graph[u][v]
self.backtrack[v] = u
self.path.append(des)
while self.backtrack[des] != src:
des = self.backtrack[des]
self.path.append(des)
self.path.append(src)
self.path.reverse()
print(self.path)
return self.path
'''
# Driver program
g = Graph(9)
g.add_coord([1, 7], [7])
g.add_coord([5, 0], [8])
g.add_coord([0, 5], [8])
g.add_coord([10, 9], [6])
g.add_coord([3, 15], [5])
g.add_coord([3, 9], [4, 6])
g.add_coord([5, 9], [3, 5, 7])
g.add_coord([5, 7], [0, 6, 8])
g.add_coord([5, 5], [1, 2, 7])
g.dijkstra(0, 1)
'''