Design and Testing
Introduction
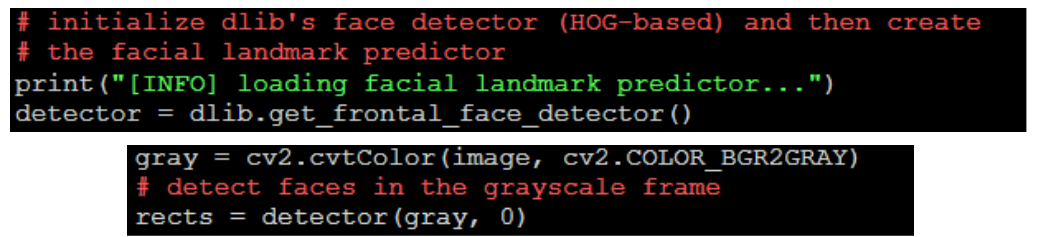
At a high level, the code uses OpenCV to detect a face in an image. If a face is detected we then use DLib and apply the facial landmark predictor.
OpenCV Installation
The first step in getting this section to work is the proper installation of OpenCV, there are many different tutorials available, however, we followed
this one. We would recommend not using a Virtual Environment as it makes the use of OpenCV much more difficult unless one has experience using a Virtual Environment. After installing OpenCV (our install took about an hour) make sure that it is properly installed by running the following commands:

This installation was chosen because we knew that it would meet the requirements of using DLib and had the libraries for OpenCV necessary for our installation. While there are a few other tutorials that use different and faster installations we would highly recommend this tutorial for this project. Any other libraries we used can be installed using pip install.
Using OpenCV and DLib
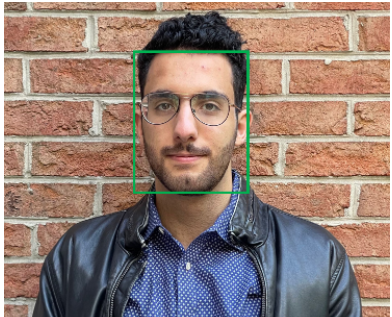
After installing OpenCV we need to use DLib in conjunction with it to properly find eyes. OpenCV is useful for determining the general location of the face using the facial recognition feature. This results in a bounding box similar to the one outline below:
After receiving this bounding box we use DLib’s facial landmark predictor:
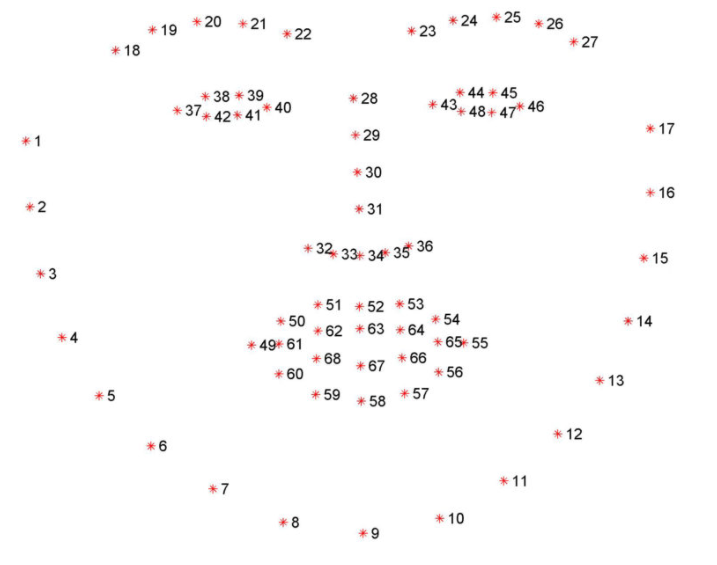
The facial landmark predictor takes the previous bounding box, and generates 68 different (x,y) coordinates that map to different facial features. We only wanted to look at the eyes so we only focused on points 37-42 for the right eye, and 43-48 for the left eye.
Using this we can then define distracted driving depending on the location of each point of the eye:
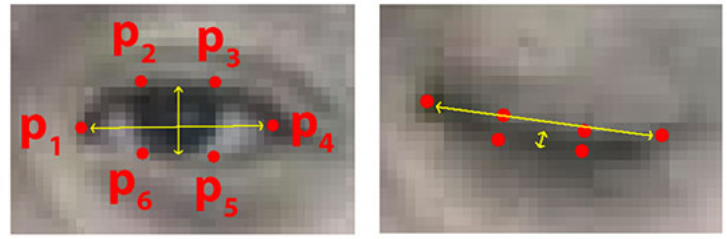
The idea is that when the eye is fully open the Eye Aspect Ratio (EAR) is of some value, when eyes are closed the eye aspect ratio drops to close to zero. This indicates that the eye is closed. We will be using this logic to determine whether the eye closes for a certain amount of time, indicating drowsiness.
The EAR can be calculated with the following formula:

Using this formula we have the following function in our code to calculate the EAR.
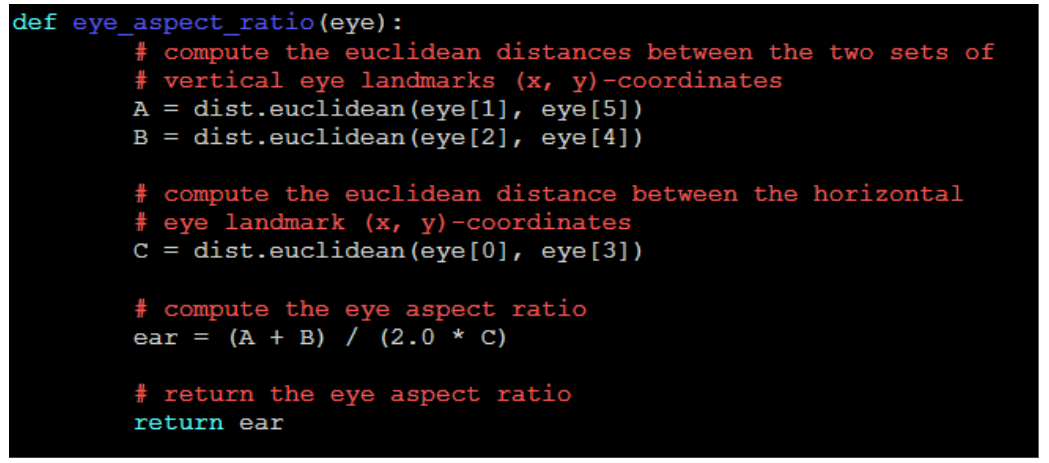
Where the eye locations are defined by DLib and the face_utils function:

The tutorial on GitHub helped us in laying out the code for this part, and getting a better grasp of how to use DLib.
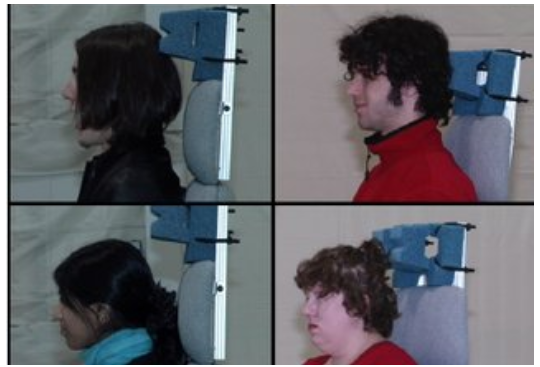
This process allowed for a few additional features. Most notably, look away detection -- if the driver looks away from the camera for an extended period of time then this means they are distracted and not looking at the road. Simply put, the idea here is that if the user is not looking relatively in the direction of the camera and is looking away the eyes will not be noticeable. Passing in a facial side profile to the DLib face detector will cause the algorithm to not detect a face or eyes. For example, the following images would not be detected as faces:
This means that the code will never enter the loop to check through all the faces detected. In other words, meaning the driver is not looking at the camera. We then will wait for 5 seconds, and if a face is not detected in that time that means the driver is not looking at the camera, and a distracted driving instance will be detected and sent to the manager.
Here is a closer look at the code which further explains what is happening at a core level:
Whenever the driver is looking close enough to directly at the camera such that both of their eyes are clearly in frame, the detector returns a list to the “rects” variable, on which the “ear” calculations discussed previously are run. If the driver’s eyes are not visible, then the length of the “rects” variable is zero. This condition is used to detect whether the driver is looking away. Because there are instances while driving in which looking away is appropriate (i.e. checking a blind spot before changing lanes), a distracted driving instance is not registered until the monitor has gone five seconds without detecting the driver’s eyes. This is accomplished by recording a time stamp on the first frame when a driver is looking away, and comparing the current time stamp on each consecutive frame until either five seconds have passed or the driver’s eyes can again be seen.
Using PiCamera
We had many options of cameras to use and we looked into a few different types. However, we ended up settling on the PiCamera. We chose this camera as it had the most support, and is cheap.
Generally working with the PiCamera was not too difficult; the one point of contention was when we were trying to create a constant video stream buffer along with another stream which is read by OpenCV. The PiCamera documentation only does one thing with the camera at once meaning it is only used with OpenCV or only used with a buffer and motion detection, very rarely do they use two instances in one location. This resulted in many different errors where the Camera refused to operate:
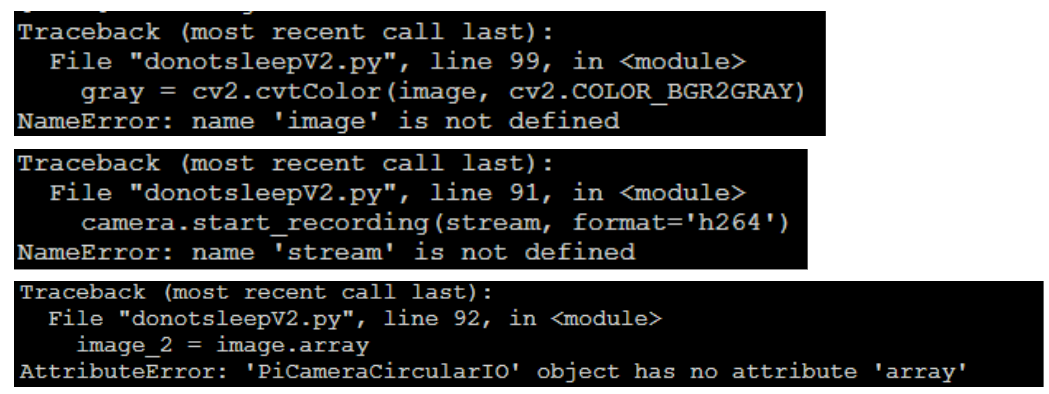
These and many more kept coming up as we were trying to get both a buffer of images to work and the OpenCV aspect to be read. Though not obvious solution was to create another instance of a stream:
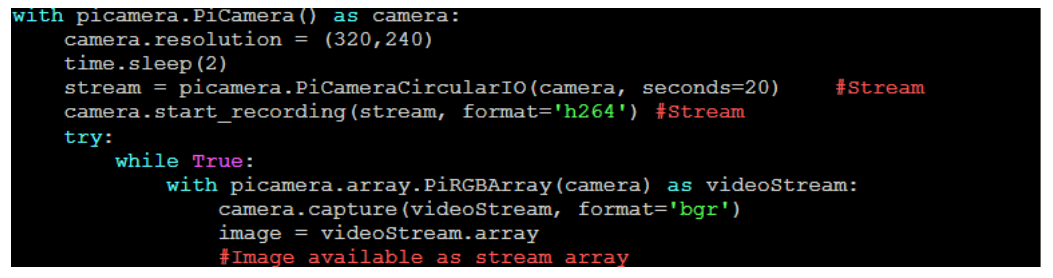
Basically, have two streams coming from the PiCamera, this will allow us to have one instance going to a buffer in the ram and another going to be processed by OpenCV and our facial detector.
Furthermore, we used the same buffer to write the buffered video to a file:
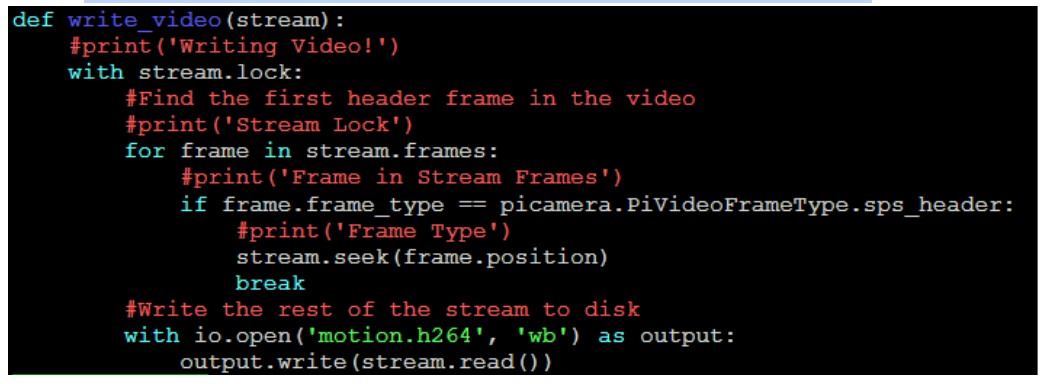
This process is better discussed in the PiCamera documentation
One large issue we had with this was that it causes the video to hang for the period of time in which it is writing -- meaning that we cannot be checking for distracted driving in the 10 seconds of video length. This was solved with multithreading, which will be discussed in more detail in a later section.
Emailing the File
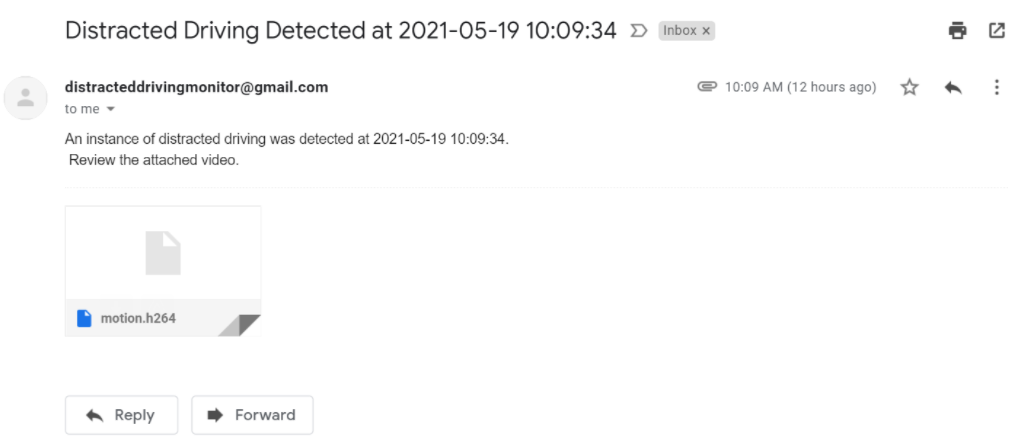
When a distracted driving instance is detected (either a calculation indicating the driver’s eyes are closed or looking down or five seconds of the driver looking away), an email is sent to an address passed in as an argument to the Python process for the distracted driving monitor. This was accomplished using a separate Python script which leverages Python’s built-in library support for email, SMTP, and SSL connections. In addition, the datetime library was used such that each email’s subject and/or text could include the date and time down to the second when a distracted driving instance was detected. In order to send emails, we set up a Gmail account specifically for the distracted driving monitor. Using Python’s email library, a “message” object was set up to include the sending address, destination address, subject line, and body text of the email. We could also use this structure to attach the .h264 video file recorded just before sending the email. With the message composed, it could then be encoded before instantiating a secure sockets layer (SSL) context. Using this SSL context, we could then access Gmail’s SMTP server with the prepared email. When connected to “smtp.gmail.com”, the script could log in to DistractedDrivingMonitor@gmail.com and send the composed, encoded email. Below is a screenshot of the message as it appeared in Brett’s inbox:
When a distracted driving instance was detected, the script as described above was spawned as an additional process using Python’s subprocess module. This allowed better code modularity while retaining the ability for the distracted driving monitor process to poll the email script’s return code and check for errors in sending the email.
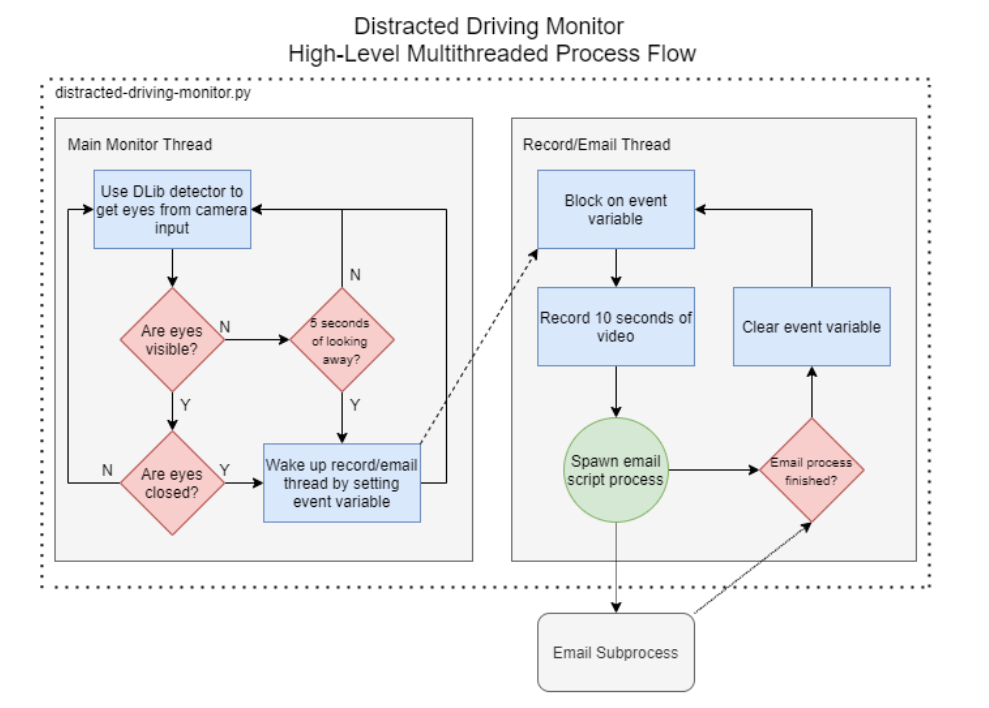
Multithreading
On a detected distracted driving instance, the monitor records 10 additional seconds of video (to be appended to the previous one second) and sends an email containing the video to a destination address. This brought rise to a key problem in the system - simply running a function for recording a 10-second video stream and writing it to a file would hang up the rest of the program for 10 seconds. This would take away from the application’s ability to continue checking for distractions or, in future possibilities for the application, process input from other cameras or sensors in the vehicle. To solve this problem, we transitioned from a single-threaded application to a multithreaded application using Python’s powerful threading API. While the algorithm for detecting distracted driving was still handled in the main thread, an additional thread was created to run the camera stream and send the email in parallel with the main thread whenever a distracted driving instance was detected. Our implementation involved creating the thread containing these tasks at the program’s start and having the record/email thread wait on an event variable. This would let the main thread run uninterrupted until a distraction was detected, as the record/email thread would block until the event variable was set. The main thread sets the event variable on a distracted driving instance, allowing the record/email thread to execute. At this point, both threads are running in parallel. When the email finishes sending, the record/wait thread clears the event variable and loops back to its start, again waiting on the event variable until the next instance is detected. Additionally, the main thread checks the event variable for setting it, as consecutive frames which detect a distraction would register a second instance before the first had finished. We made the decision to essentially ignore instances while the record/email thread is in the process of recording and sending, as those distractions would still be captured by the existing instance. This effectively “debounces” the program, preventing an unnecessary flood of emails from reaching the destination address. Below is a flowchart illustrating the application’s process flow: