Predator and Prey - Handheld Game
ECE 5725 Final Project, May 18th 2021
by Alga Peng (cp444) and Xiangyi Zhao (xz598).
Demonstration Video
Introduction
Pygame is a powerful gaming library that we learned to use throughout the semester. With the shared passion of games, we decided to create a handheld game that can be played on the monitor/piTFT. Our game is a double-player game called Predator and Prey, each player controlling four buttons to move upward, downward, leftward, and rightward. The game contains four levels - tutorial, easy, median, and hard - with the basic game mechanics being a catch-and-run game between the predator and prey, and more tools including trap, speed-up, portal, and hidden path added as the level goes up. Scoring system is also implemented.
Design and Testing
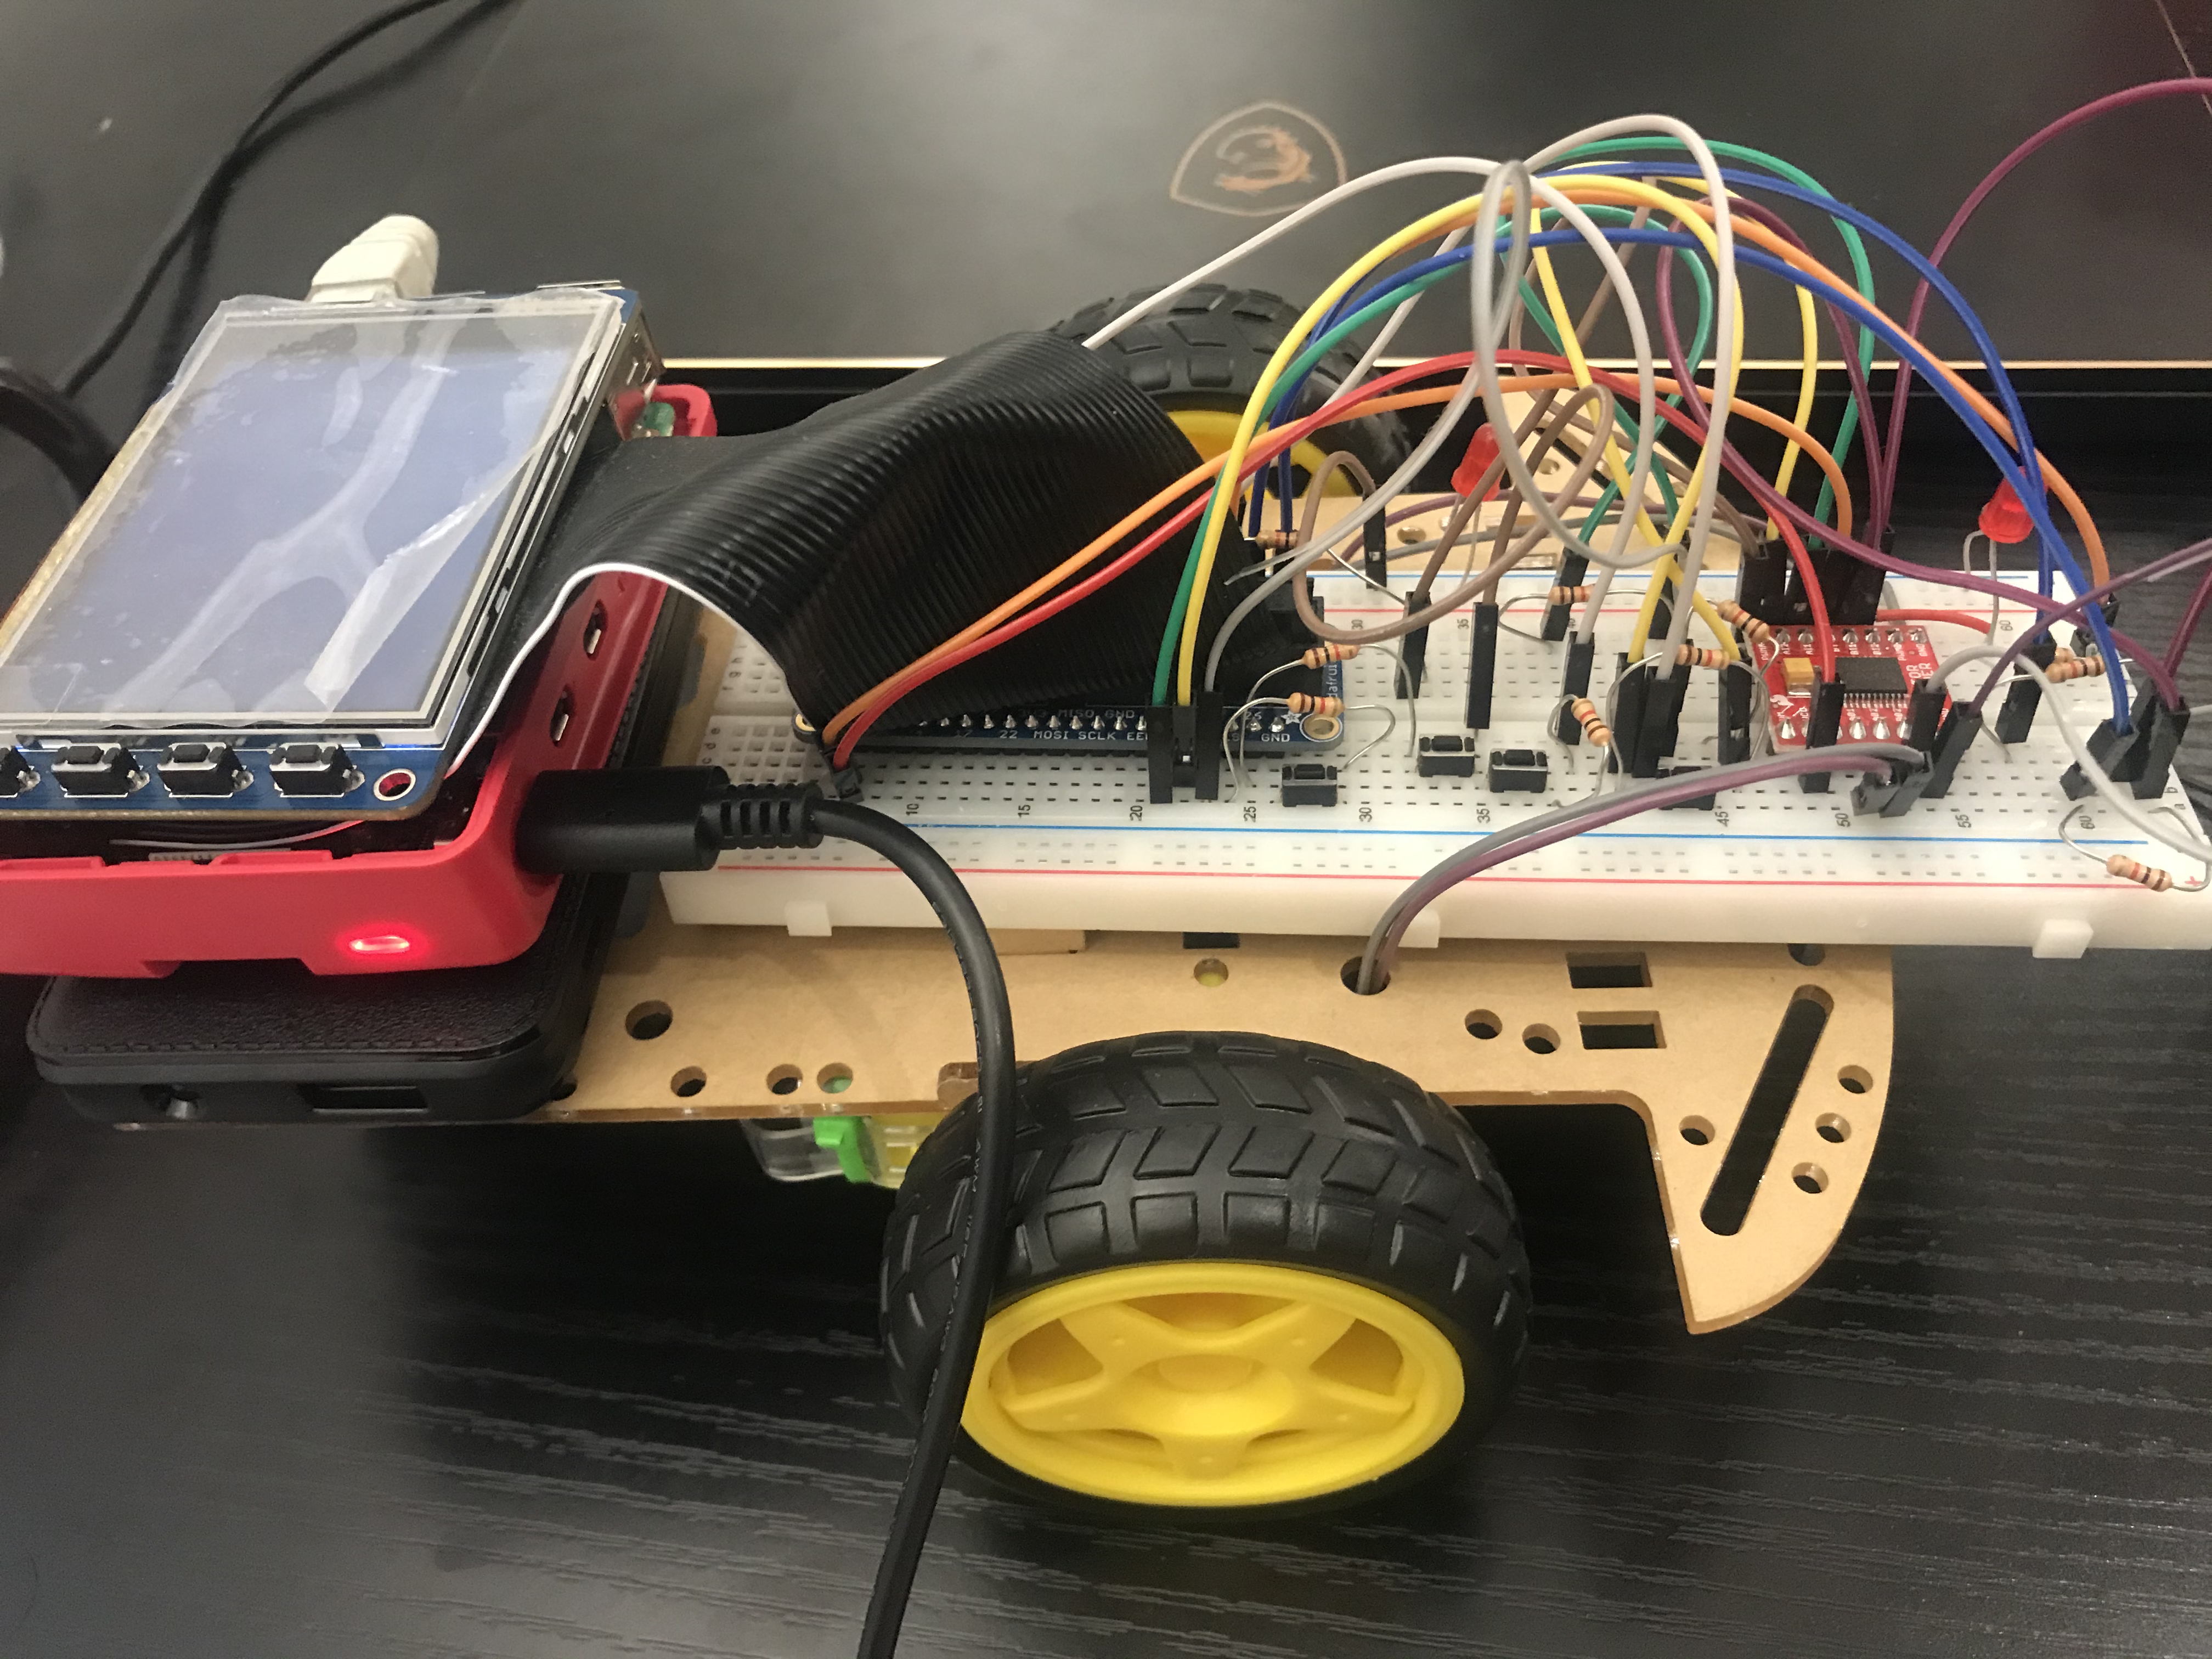
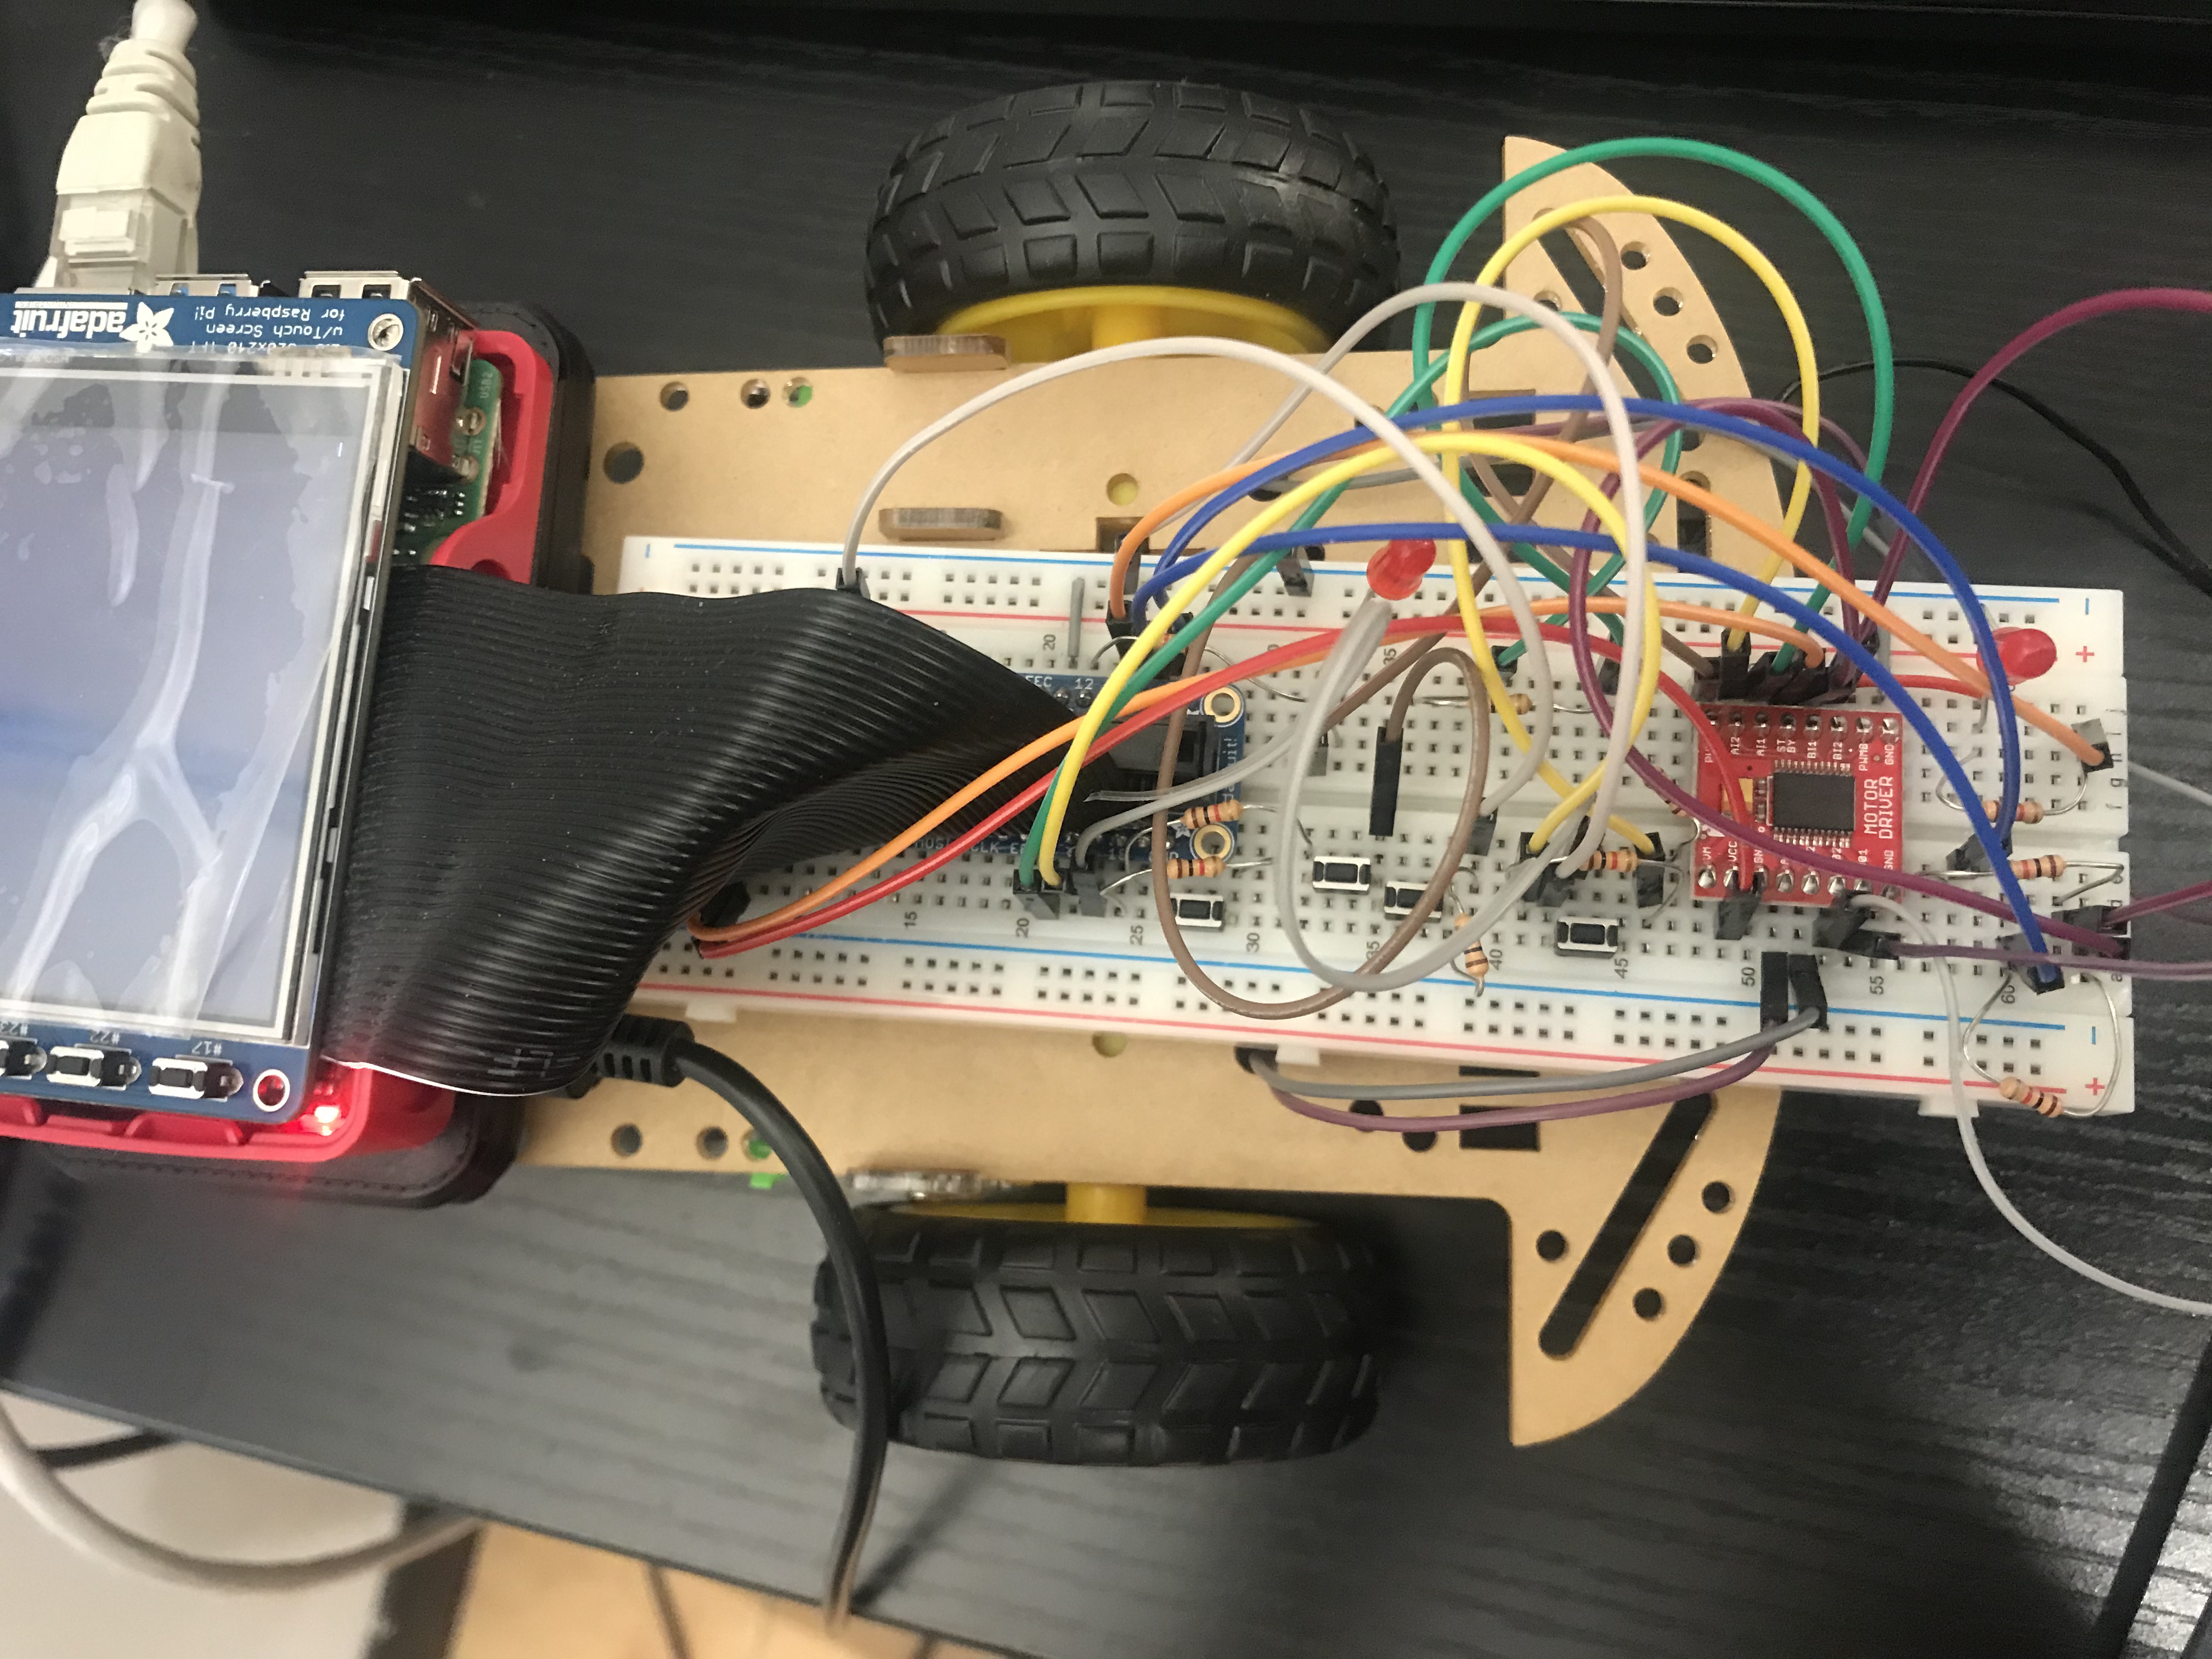
Circuit Build-up
The circuit design is simple. As in previous labs, we connected the external buttons to the GPIO pins of the raspberry pi with resistors and jumper wires. In this lab we used four of them for the predator to move in the four directions.
Coding
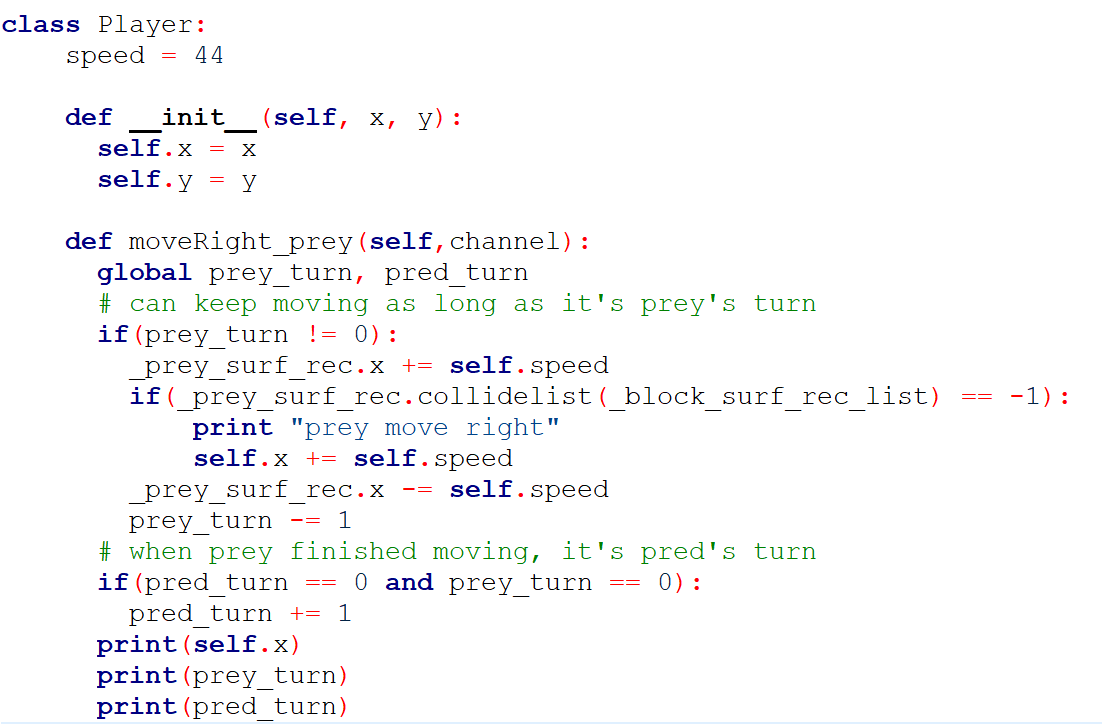
For the design part, we first make sure we three classes in total: a player class, a maze class, and a level class. Let's start from the player class. For the player class, we initialize x and y, then we have 8 callback functions for button presses. Four of them are for the prey and four of them are for the predator. We set up the GPIO event detection control for both player inside our main function and connect 4 callback functions for moving up, down, left, and right to 4 buttons for both players. These callback functions follow the same pattern: we have two global varaibles -- prey_turn and pred_turn -- to keep track of how many steps each player has at the moment, then we check if it will collide with the walls if their step number is not 0. In here we used a function from pygame to make our lives easier: rect.collidelist(list of rects). With that we could store the rect for all the walls that make up our maze inside a list and can know if the prey or the predator will run into them with their next movement. For that to happen we need to pretend the movement has been made and then check for collision. That's the reason why we have things like _prey_surf_rec.x += self.speed in front of the check for collidelist and _prey_surf_rec.x -= self.speed after it.
For the maze class, on the other hand, it is simply used to draw the layout for each level. We set the height and width in the beginning and take a list of that height and width as an input. This list will be consist of 1 and 0 for 1 indicating there will be a wall and 0 indicating that block is empty. Inside the helper function draw() we store the rects inside a list and blit each one of those wall rect to the surface for later display.
Last but not least we have our level class in which we perform all the checking and drawing. First we have several helper functions: on_init(), text_display(), on_loop(), on_render(), and on_execute(). On_execute() will be the one to be called to start everything. We check for on_init() first in which display mode is set for the display surface and boolean variables to keep track of the running process will be set True. So inside on_execute() we simply call on_loop() and on_render() if that boolean variable remains True. Inside on_loop() we check which level we are in using a global variable called level and check for mouse click. We take the position of the click and check where it is located on the screen to find out which button we pressed to switch between different levels. Then, we also change some tools' position since we have different layout for different levels. For on_render(), we first call text_display() which blit all the text we need and we then check which level we are in to determine what need to be shown and what not. First only display the maze, players, and tools if we are not at the menu level. Then we only have 'trap' and 'portal' for level medium and hard, while level hard also have 'speed-up' and 'hidden-path' implemented. Let's break down some of these implementation:
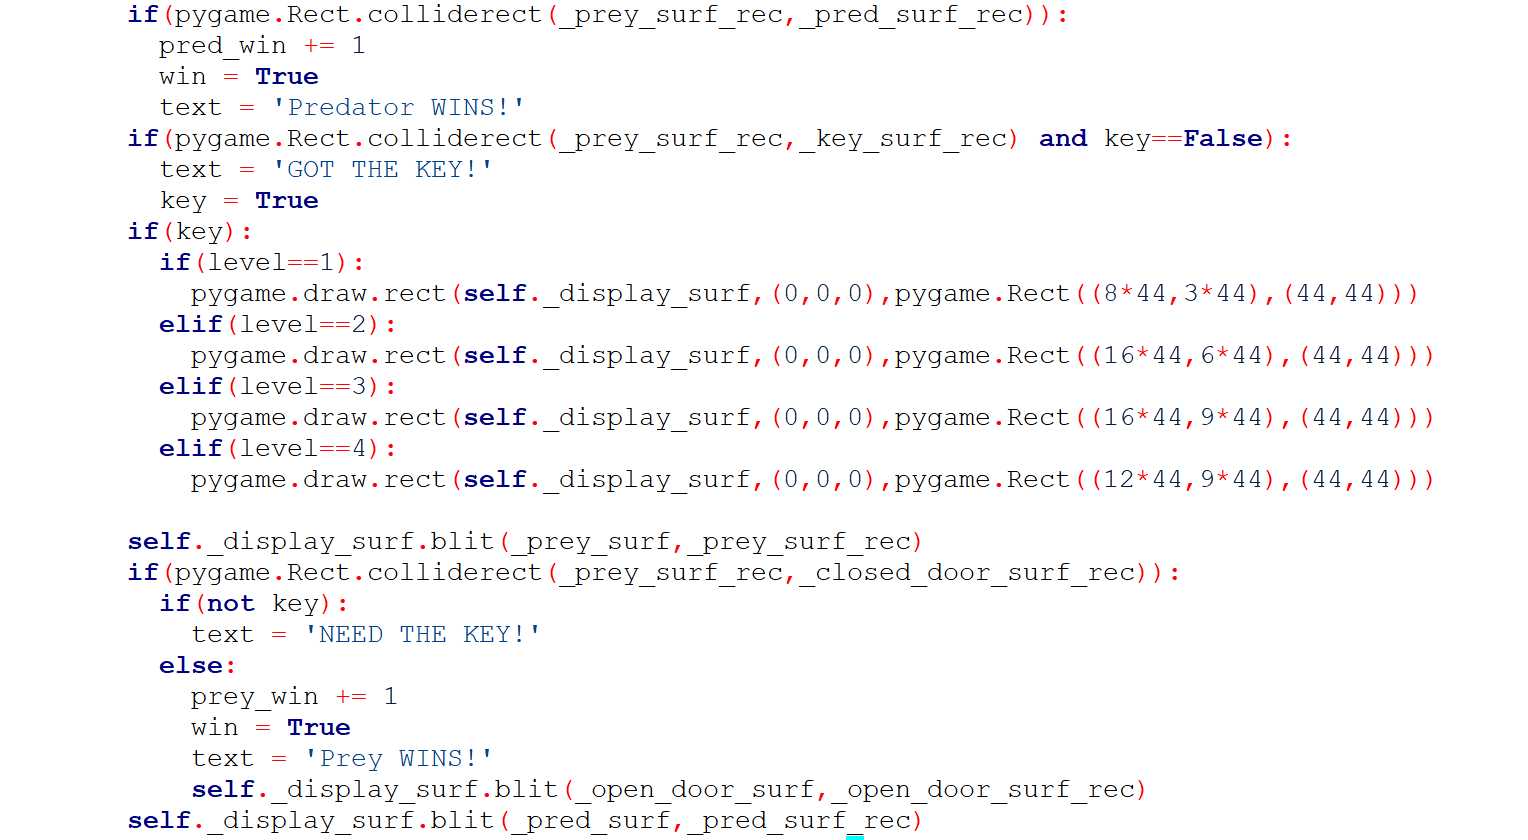
1. For all the tools, we hard coded the position so that we could use pygame.Rect.colliderect() function to check is one player has step on the tools or not. For 'key' and 'door' we need to make sure that only the prey can get the key and only can the door be opened when the prey step on it with the key in his hand. So we have some boolean variables to help check that. Here we actually encountered a problem of how to make the key disappear after it is picked up by the prey. We could not really find a way to delect it so we choose to draw another rect to cover the key. Picture below shows how we implement the key and door check.
2. For 'trap' we decided we want the player to stay for one round if it steps on it. So we will change the prey_turn and pred_turn and make sure the other player has one more move. Here we actually catch a mistake in our design. When we are trying this, we realize that the player is moving two steps at a time for one button press while we want it to move one step at a time for two times. So we try to debug it through printing out the intermediate result of their position. We then realize that the call back function is being called twice for each button press. We are not sure why until we actually see it increase to three times if we go to tutorial level first and then go to easy level. We then realized it might be something to do with the number of times the event detection functions have been called. So originally they are placed in on_init() which will be called everytime we get a level change. So the event will be detected as many times as we use level class. We get that fixed by putting the functions in main so that they are only called once.
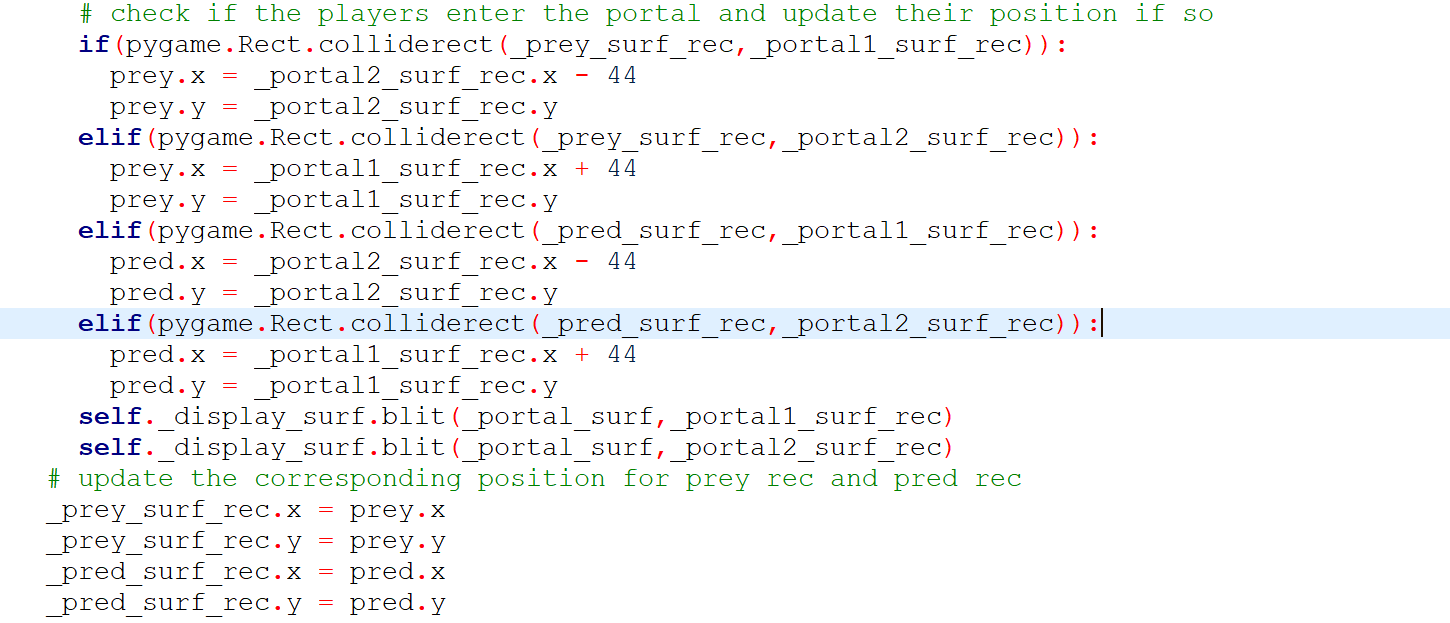
3. For protal we just make sure that if one player steps on it the position will change to where the other portal is. Here we also encounter some problems. We realize that the order for placing the blit function is actually really important because it determines which image will be on top and we always want the player to be on top so they are one of the last to be blit. We also update their position by setting their rect's x and y to their x and y from the player class so that the rect is actually moving. Picture below shows part of the logic for portal.
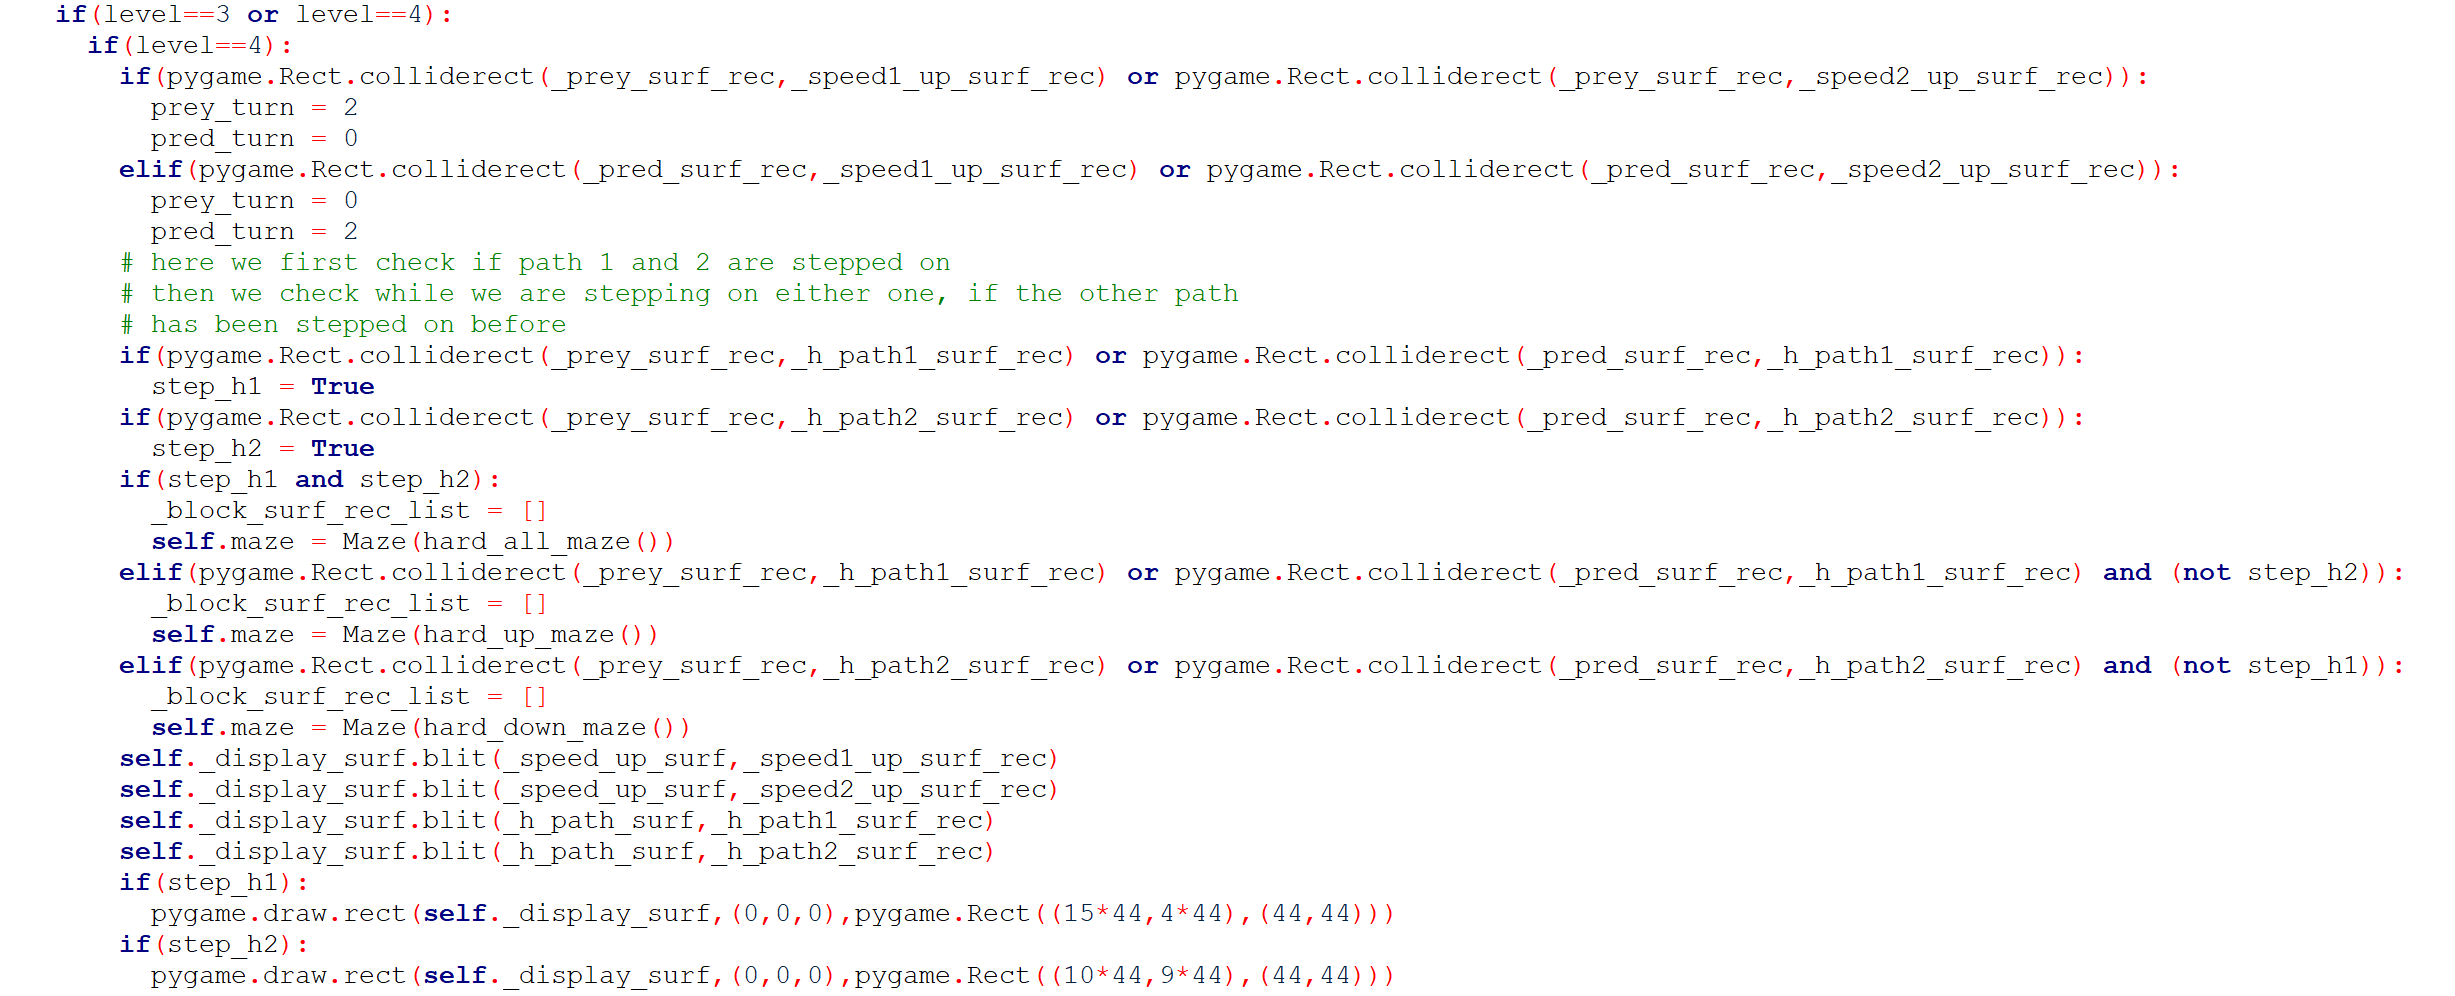
4. For 'speed-up' and 'hidden-path,' we make it so that the player gets to move two more times if it is triggered and we have different color for walls to show that there's hidden path and we hard coded the entrance as well. Picture below shows how we implement our speed up and hidden path.
With everything else implemented correctly, we choose our level inside the main function and we need to initialize every global variable back to what they are here also. This is because we run into the problem that if we open tutorial and then easy, and in level easy we will not see the walls for tutorial but they will be there and block our characters from moving. This is because we did not clean the list that stores all the rect for our wall and since it is a gloabl variable it stays even when the level changes. We get that one fixed and we choose which level to go to based and clean up at the end. Picture below shows part our main:

Result and Conclusion
We successfully completed the game that we proposed initially in our design. As a conclusion, our game includes the following features:
1. There are two players - the predator and the prey. The predator wins the game by catching the prey; and the prey wins by first getting the key and then entering the door;
2. The players start from the menu with four levels to be choosed from - tutorial, easy, medium, hard - and will return back to be menu to select again after finishing a level;
3. Tutorial is a small map with only the two players, the key, and the door, which aims to let the players to get familiar with the buttons and teach them the basic game mechanics. From the easy level, the map becomes more and more complex and the layout expands to cover the whole display window. Starting from the median level, the tools are gradually added, with the trap and portal added in median, and the speed-up and hidden path added in hard.
4. The player who wins in a level scores 1 point. A line to state which player wins is quickly displayed before the game returns to the menu. The cummulated scores are shown on the bottom of the interface respectively for the predator and prey.
The features that we didn't get time to implement are discussed in the Future Work section below.
Future Work
If we have more time, we would like to refine our design in the following directions:
1. Add some randomness. For now, all the walls and items in each level are carefully designed and hard-coded to ensure the level presents almost equal difficulty for both players. However, we think that it also makes sense to include some randomness in the map design, otherwise the players will soon lose interest after mastering all the levels. It may require some testing and playing before we decide the adequate amount of randomization (the whole map / the items / only certain types of the items like the hidden paths) to find a balance between randomness and equal difficulty for both players.
2. Indicate the winner more clearly after each round. For now, after a level is finished, there is a very short amount of time for us to display who wins. And after a flash of indication, the game returns to the menu and the players can't see their scores until they enter another level. We think it's reasonable to create a huge banner (maybe with some fireworks effect) which shows up in the middle of the interface after a player wins, and also indicate the scores after they return to the menu.
3. Add the save and load feature. It's reasonable for the players to save the game before quitting and reopen the game with the choice of starting a new game or continuing from where they left off. How to implement this requires more examination.
4. Control the characters using two piTFTs. Now we use the four embedded buttons on one piTFT to control the prey, and four external buttons connected by wires, resistors, and the breadboard to the raspberry pi to control the predator. This feels less similar to our everyday gaming experience - each player has his/her own console - so it's reasonable to use two piTFTs to control the two characters. However, the communication between the piTFTs also needs more examination.
5. Refine the level selection. We see from many games that the players can't choose more advanced levels if they have successfully completed the previous levels first. For now, our game allows the players to freely choose from all the levels as soon as they enter the game. It's better if we can modify the level selection process so that the player can only proceed to the next level after finishing the former.
Some other ideas that we discarded include the high-score system. We carefully thought about this proposal but considered it not meaningful enough to keep the shortest-time record in a strategy game, since this game emphasizes more on careful and thoughtful reactions rather than fast ones. We also don't think that the game needs a pause button, since there is no need to set a time limit in each level due to the exact same reason above. We like the ideas of our game and will be rejoiced to keep working on it.
Work Distribution

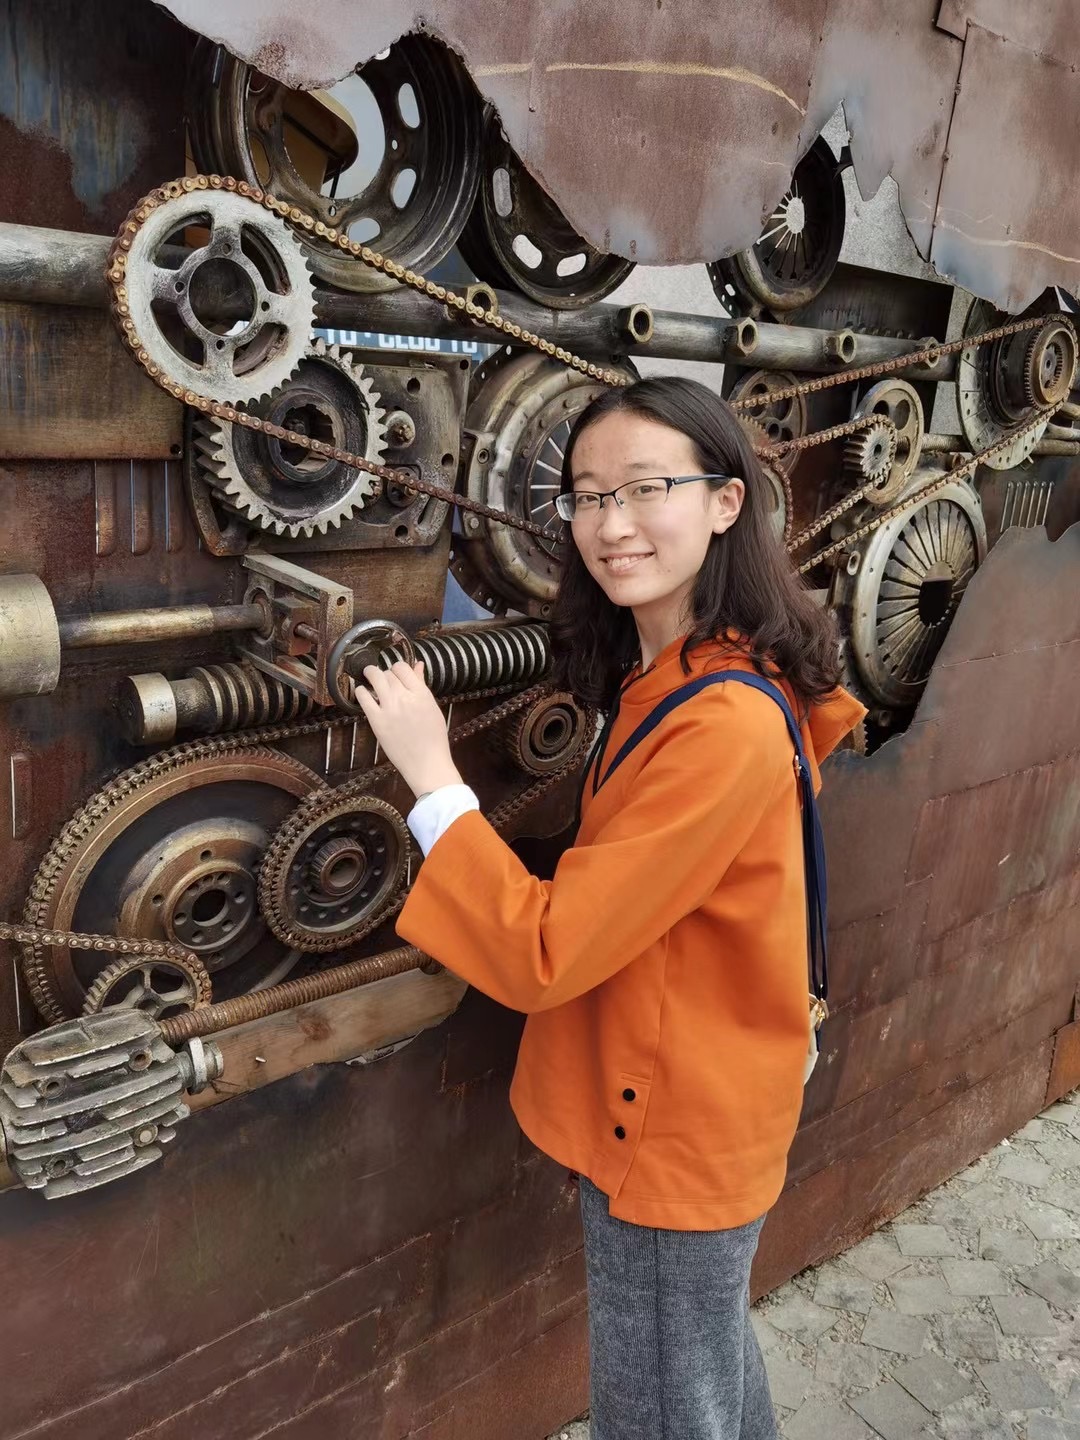
Project group picture

Alga Peng
cp444@cornell.edu
Implemented the core game mechanism and scoring system.
Xiangyi Zhao
xz598@cornell.edu
Implemented the tools.
Parts List
- Adafruit Raspberry Pi 4 : $35
- Adafruit PiTFT: $31.46
- LEDs, Resistors and Wires - Provided in lab
Total: $66.46
Code Appendix
The code of our project is included in the github repository
.