ECE5725: Security Box
Amanda Trang (at669) & Michael Rodriguez (mr2242)
May 16th, 2019

Figure 1: Completed system.
Project Objectives:
- Use the distance sensor to detect proximity of potential intruders, i.e. when an object remains in range for a certain set time, the verification system begins
- Use the NFC reader to verify and authenticate a user’s registered NFC-capable device
- Use the on-board camera for facial detection and recognition, allowing only recognized users to be authenticated
- Use the USB microphone for voice recognition, authenticating recognized passwords
- Develop a notification system for the security system to notify owner of potential intrusion through the use of SMS messages
Demonstration Video
Introduction
In this project, we designed a security box capable of facial recognition, voice recognition, and NFC detection. When something is detected by the PIR (passive infrared sensor), the alarm system goes off and only deactivates when the two-factor authentication is satisfied. In addition, we setup the security box to send out SMS notifications whenever the PIR detected something, the box was unlocked, or the box was relocked.
Design and Testing
Our system uses software on the Raspberry Pi to poll continuously from each of the authentication sensors once motion has been detected. Upon fulfilling two of these three authentication methods, sensor polling ends, and the internal servo spins. This servo is used as a locking crank system attached to the lid, which allows the box to be opened and closed. As the system is embedded, the sensors initialize upon startup and the program runs indefinitely. Additionally, as there is no screen for feedback, the speaker plays specific tones on authentication as well as the alarm tone. The figure below shows an overview of our system.
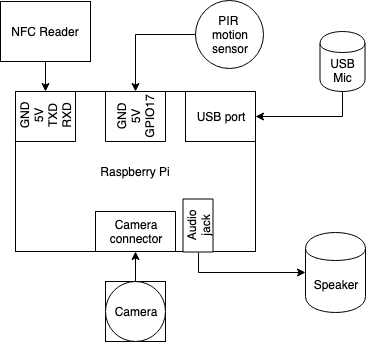
Figure 2: System block diagram.
These components are housed inside a laser-cut box, viewable when the box is unlocked.
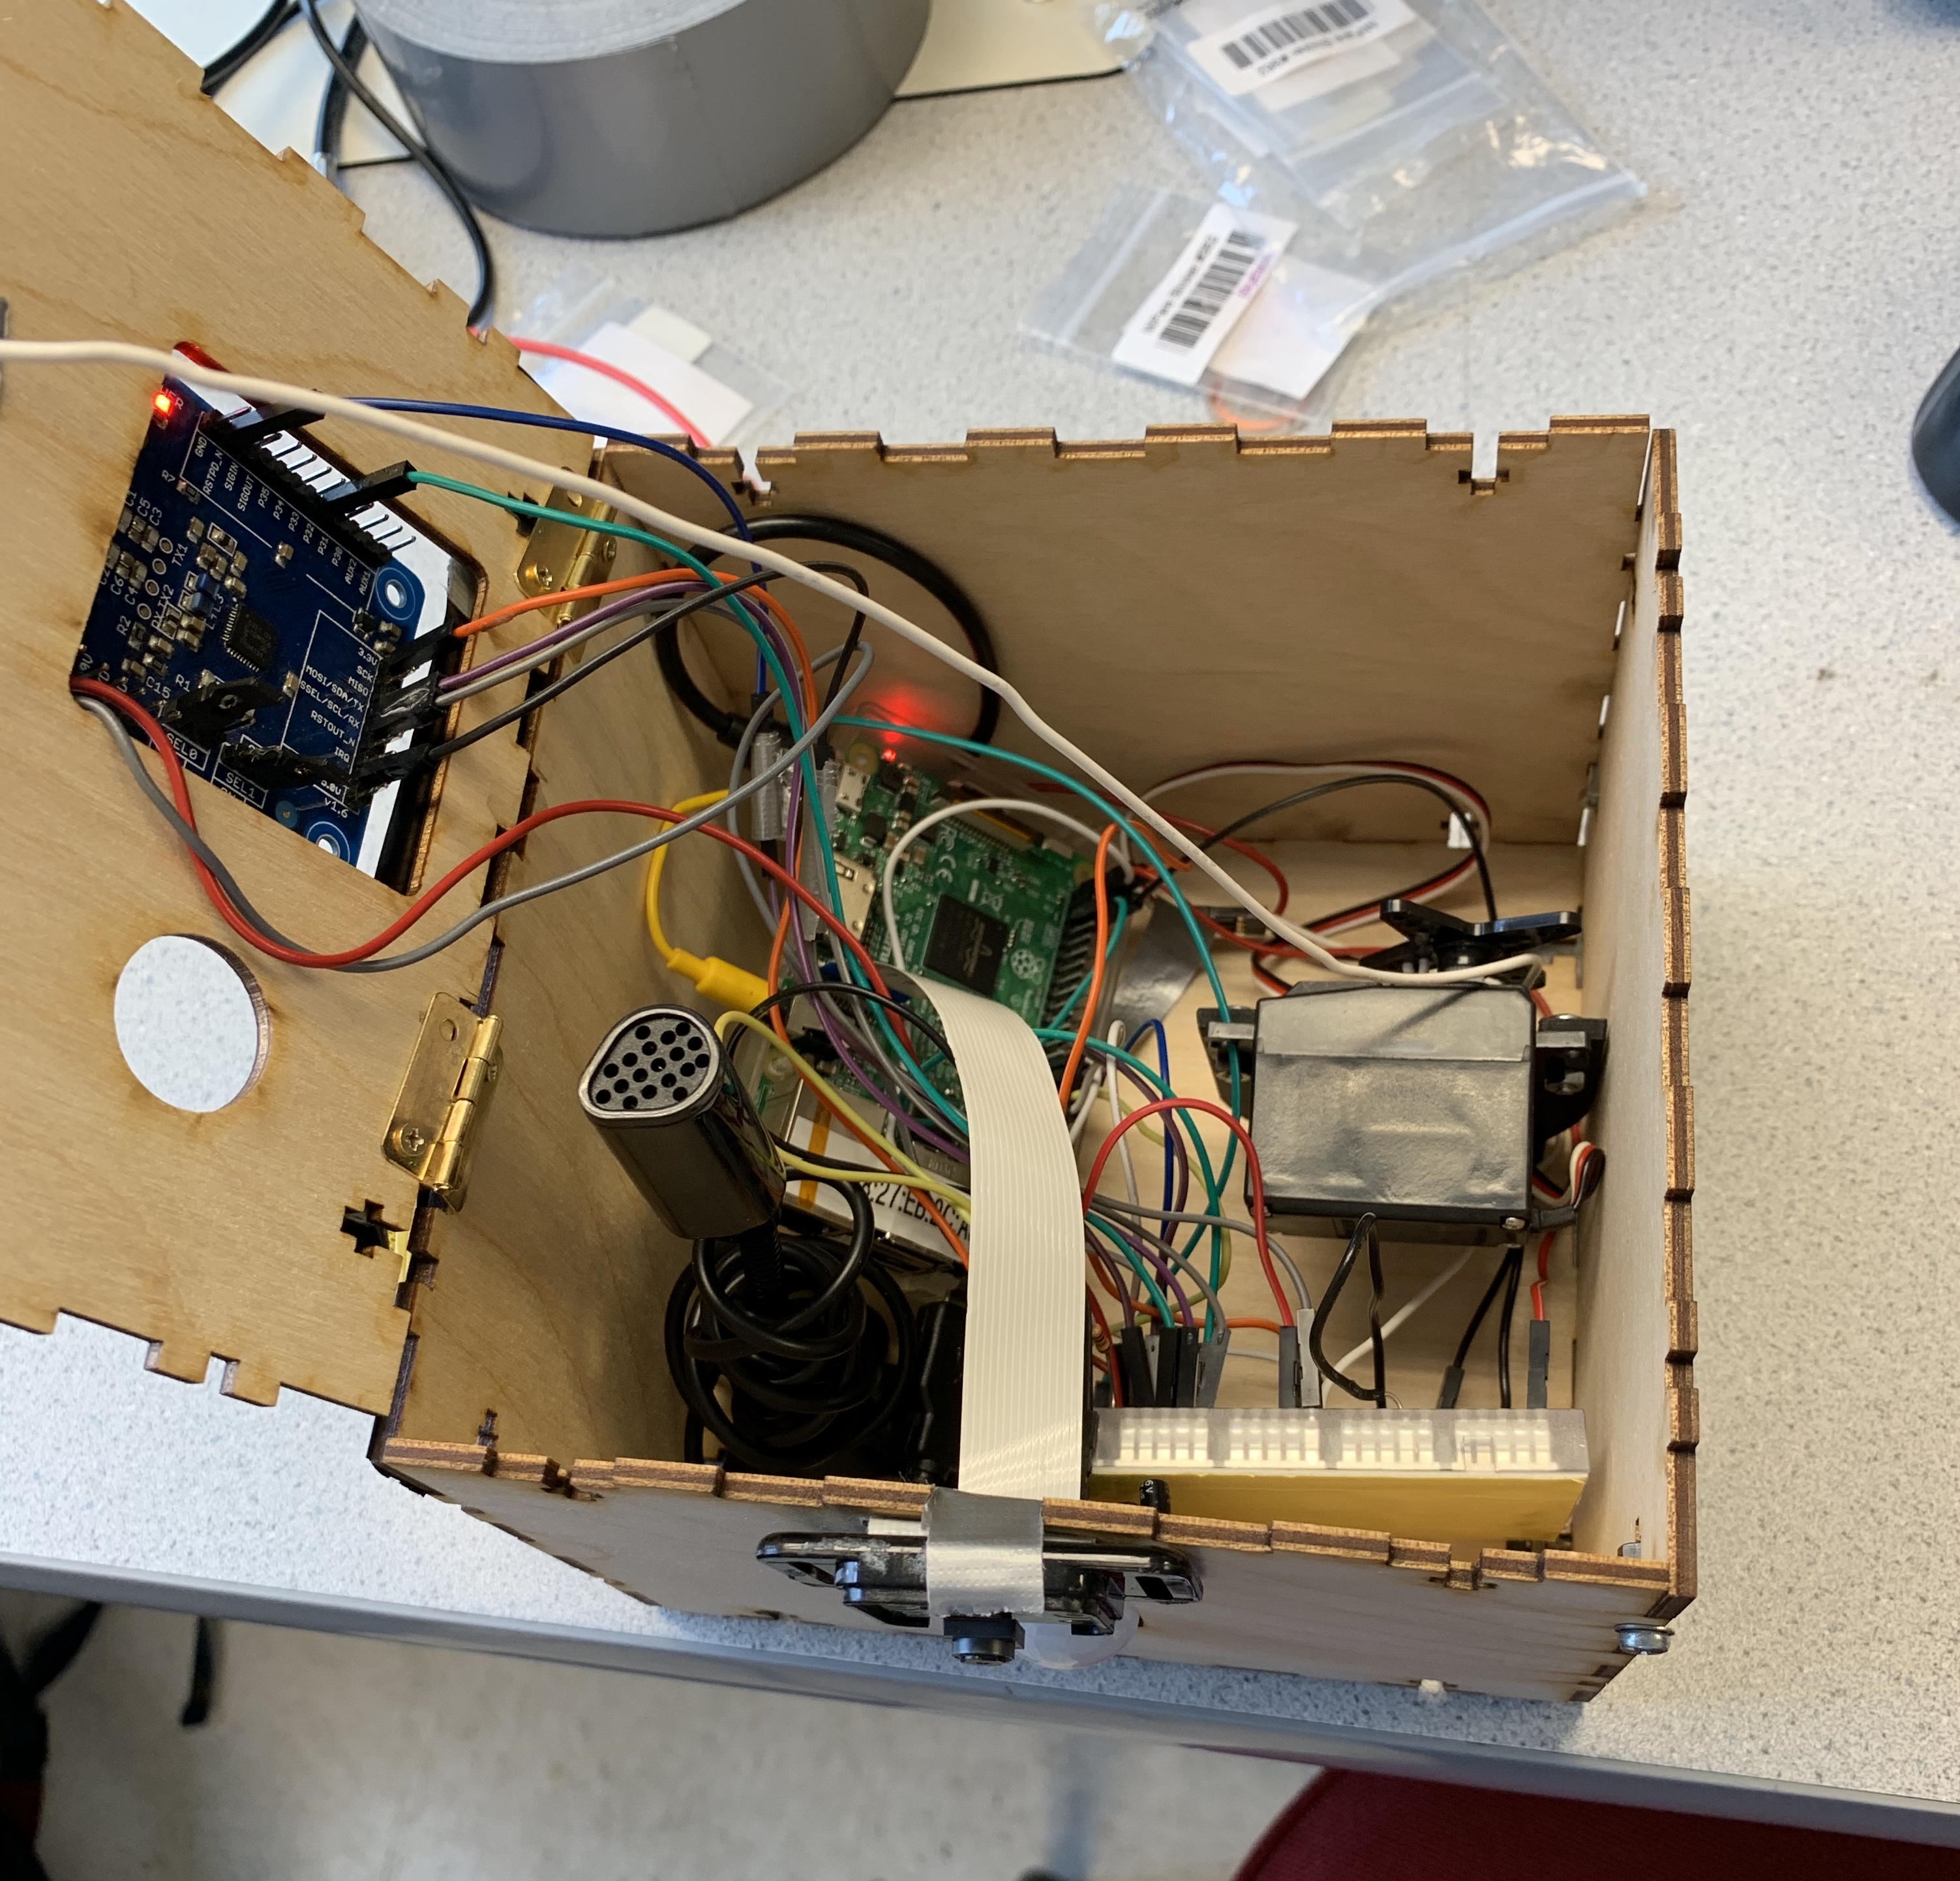
Figure 3: Open box.
The modular aspect of the sensors required modular testing. As discussed in the following sections, we designed the module, tested it individually, then merged it into the master program, and tested it again.
Motion Sensing
We had a relatively trivial solution for setting up the PIR sensor for motion detecting. We created a function that would return a 1 if the sensor had detected something and a 0 otherwise. Within our main loop, we had a loop that would constantly check for the value of the PIR sensor and would break when the value became a 1, meaning that motion had been detected. Through trial and error, we found that the best sleep time within this loop was 0.1 seconds for accurate results. Shorter than this time would make the sensor to sensitive while longer than 0.1 made the sensor not sensitive enough. It is also important to note that we manually set the sensitivity and time delay dials to the smallest values possible.
Motion testing was very easy to test. We simply checked if the PIR sensor was working properly by having a while loop that continuously polled and printed the values of the PIR sensor to the console.
Facial Recognition
For the facial recognition system, we used OpenCV with Adam Geitgey’s Facial Recognition module. On a high level, this module detects faces in a provided dataset, computes these facial encodings using a deep neural network, compares the camera image to the database, and detects a face, if valid. This module takes in any desired dataset size. Each subdirectory in the dataset corresponds to a person. For our project, we only needed two subdirectories, and each required only three photos for each face to be accurate on every captured frame.
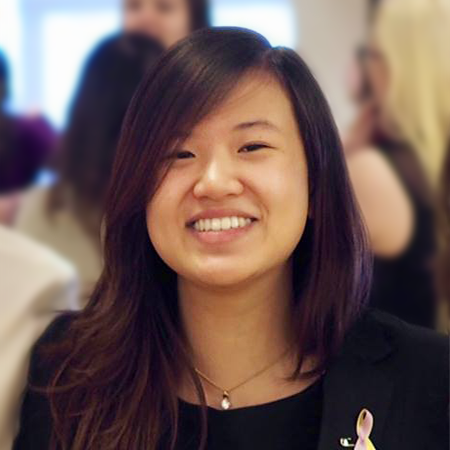


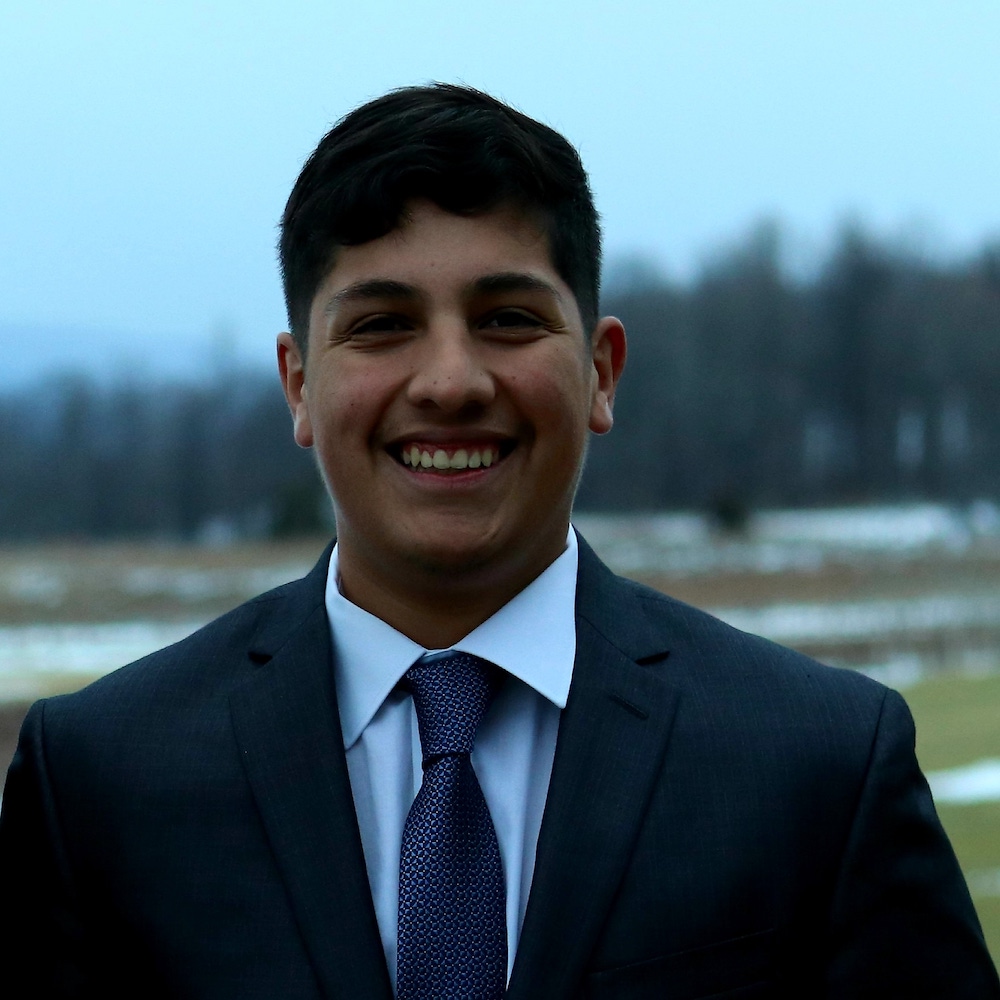


Figure 4: Facial recognition dataset.
Geitgey's module includes a script for creating the encodings file that is used for facial comparisons. This module computes a 128-d vector from detected faces (using the hog detection method). Then, we modified the code to only run the facial detection on one frame. This image is converted to greyscale, resized for processing efficiency, and is compared to each known facial encoding. After this check, the known encoding with the highest number of "votes" (i.e. highest probability of being correct) is returned. This value is used in the master program to determine if an authorized face has been detected on that loop.
To test this module, we first ran the example script with the initial image set--with Adrian, the author of the resource, and a few members of the Jurassic Park cast, with these images held in front of the Pi Camera from a phone. We could see the faces being outlined and labeled correctly, so Amanda's three images were added to the dataset. After running the test again and confirming its functionality, we added Michael's images, and modified the script. We chose not to display any of the images to a screen, as there was not a display in our design. We first ran tests with a display, to ensure that Michael's face could be accurately detected, before running the test again without a connected display. This modular test was a success. Once merged with the master program, while we found that each facial recognition frame test was significantly slower than all other sensors, it still functioned reliably.
NFC Authentication
For NFC authentication, we were able to setup the PN532 easily using Adafruit's CircuitPython module for the PN532. Two functions we created for NFC detection were an initialization function, init(), and a function to read the NFC shield once, read_nfc(). Within the initialization function, we established the i2c connection and setup the PN532 with the appropriate parameters. In addition, we configured the PN532 to be able to communicate with MiFare cards. On the other hand, the read_nfc() function simply checked once if a card is available to read. If a card was available to read, we would check if the card’s UID (unique identifier) was one of the predetermined accepted cards and return 1 if that condition was met. However, if a card was not available to read or the card’s UID was not one of the desired cards, the function would return 0. It is important to note that we setup the PN532 shield using I2C because we were unable to setup the PN532 with SPI, which is the Adafruit’s recommendation for using the shield with the Raspberry Pi. We were having some reliability issues with the NFC detection, and it is probable that the issue was due to the PN532 being setup with I2C instead of SPI.
NFC authentication was initially tested by having a while loop that polled infinitely and then checking that the MiFare stickers that came with the PN532 shield had their UIDs properly read. Once we verified that we had basic functionality for NFC authentication, we changed our code as described above.
Voice Commands
We attempted many iterations of voice commands, beginning with Steven Hickson's Voice Control module in the PiAUISuite. However, we encountered many installation and setup issues with this suite. We also found that we would be using only one of the many features in this suite, and would be better suited to choose a more compact functionality. Ultimately, we chose to use IBM's Speech to Text online service, as it functioned with least delay on the Pi's wireless internet connection.
Our implementation requires use of PyAudio, which is used to both play and record sounds. After setting up what USB device was being used as input (the eBerry desktop microphone) and what audio device was an output (the audio jack), the system was ready to process audio clips.
The master program does not record a five second audio clip every loop--instead, it waits until a button press before playing a tone and beginning the recording. Once the duration ends, the audio clip is immediately processed by the IBM Speech To Text module. This module utilizes websockets to recognize speech. We modified the Watson Developer Cloud's Python example in order to process our created audio clips. Eventually, the transcript is created and parsed, and compared to our password phrase: "5 7 2 5." If the transcript matches the password, this authentication service returns valid.
This module went through significant testing stages. We struggled to get clear audio from the microphone, which is discussed in the Results section, and went through various iterations of alsamixer setup. We also attempted various speech recognition API, including Google, Bing, and various others. Due to the spotty Wi-Fi connection in the box, we chose IBM Watson, based on the response time for writing the transcript.
Once we had the IBM Watson module running and a separate audio recording module running and modularly tested, we were able to combine these modules to print the recorded phrases. We tested with both Amanda and Michael's recordings. Oddly, the module was more accurate with Amanda's audio than Michael's, but was still fairly reliably either way. This was merged into the master program. We tested recording the audio on button press--finding that we needed the audio feedback for when the recording began--and found this to be a success.
SMS Notifications
Setting up SMS notifications was surprisingly easy using Twilio’s API; however, in order for Twilio’s API to properly work, we had to setup a Twilio account and number. Luckily enough, we were able to implement the SMS notification functionality with a Twilio trial account. From this trial account, we had to use the account security ID (account SID) and the authentication token within our master program to communicate properly with the client. Next, we simply created and sent messages to Michael’s phone number at the appropriate times. This includes a message when the system detected something, the box unlocked, and the box locked.
SMS Notifications were tested simply by ensuring that the messages were being sent at the appropriate times and were received in a reasonable amount of time. No extra testing was really needed for this portion.
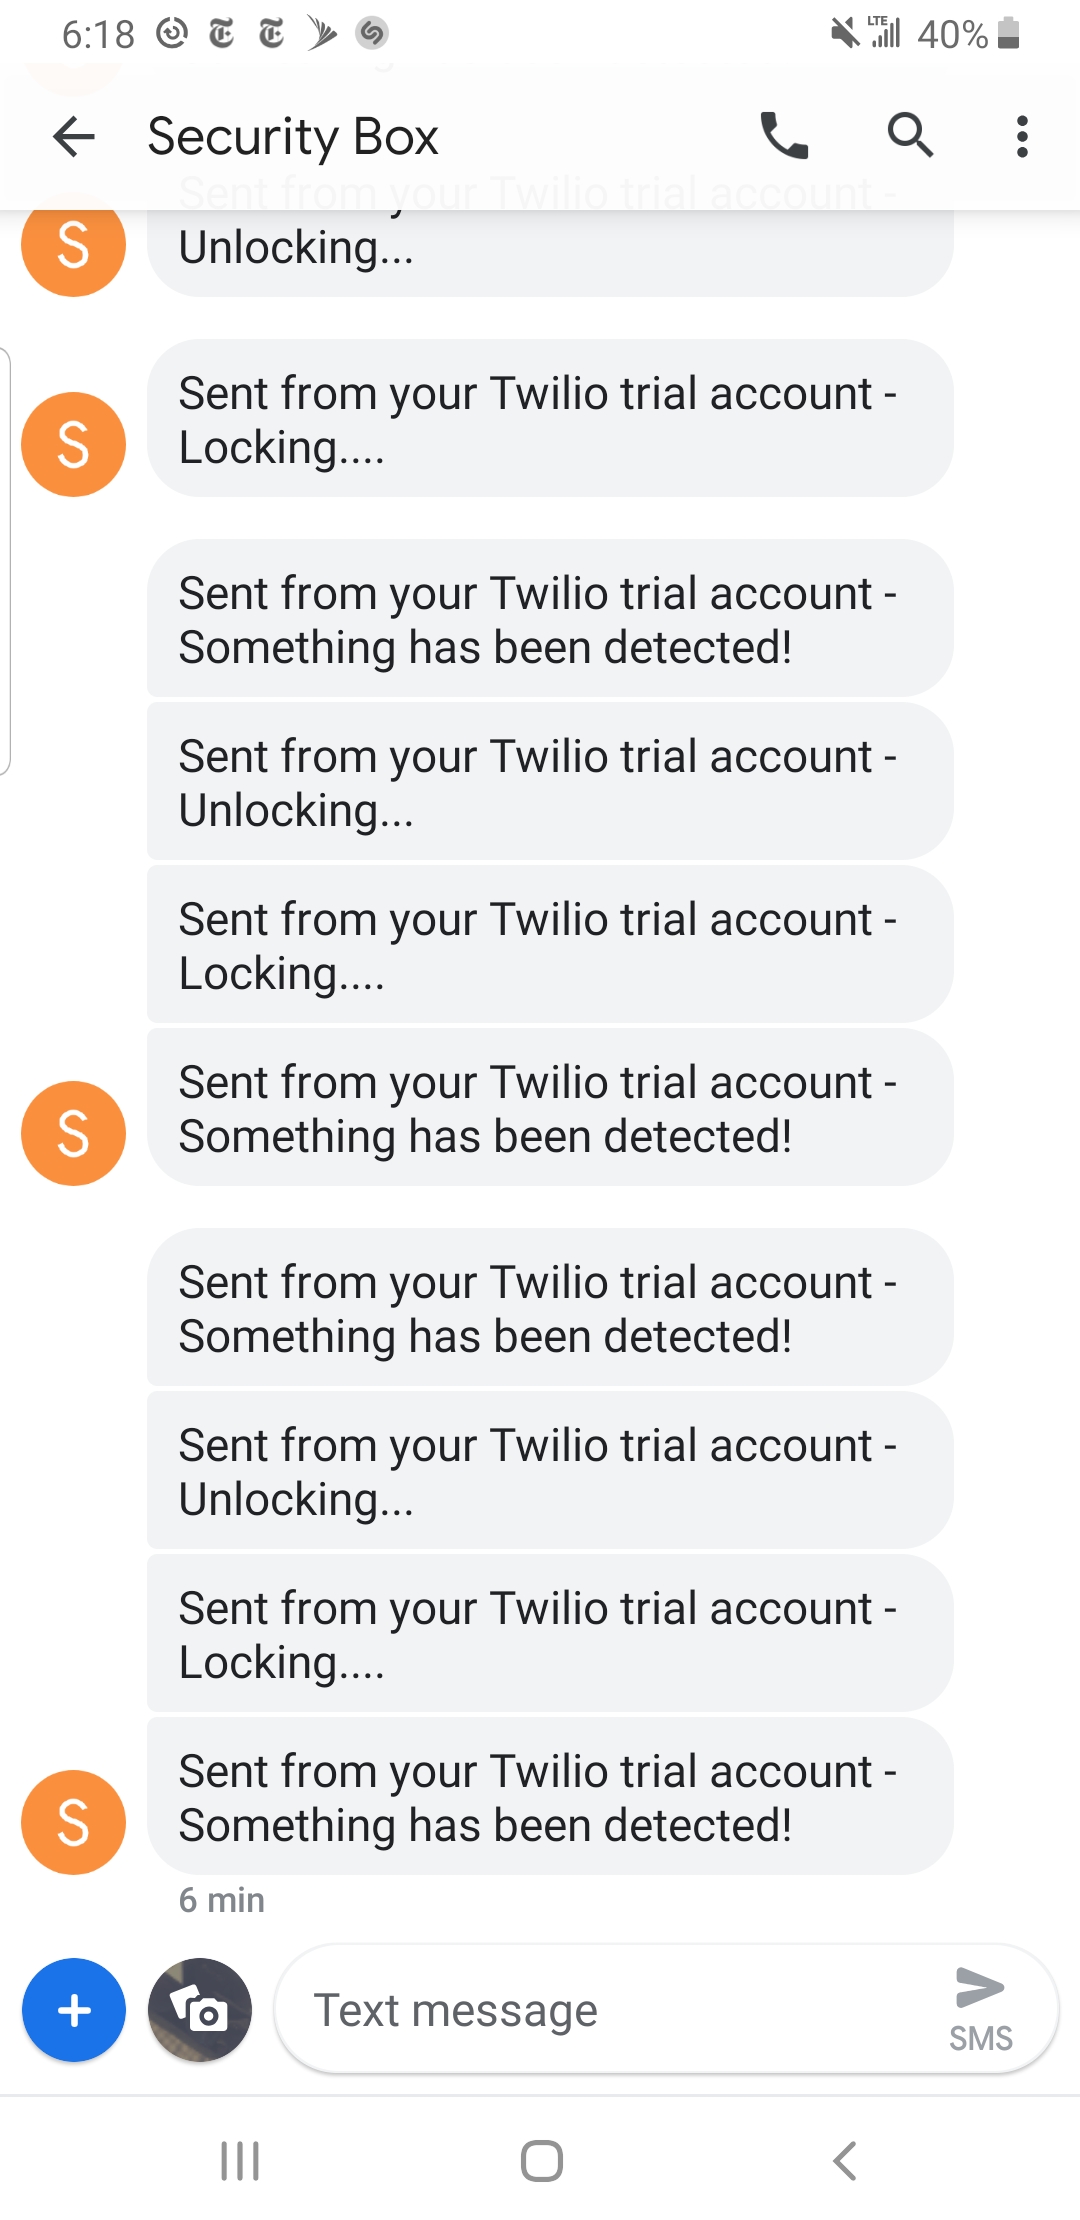
Figure 5: SMS notifications.
Laser Cutting
We initially had the intentions of 3D printing the box for our system and had already designed an initial version of the box using Fusion 360. However, we were informed by the Cornell RPL that the dimensions for our box would have been too big for their 3D printers, and we were advised to instead to design the box for a laser cutting instead. Using the older version of MakerCase.com, we were able to redesign our box with little difficulty. We decided to use the older version of makerspace because the newer version does not allow you to make holes or text engravings in the designs. After reading the specifications for the peripheral devices, we decided on the dimensions on the opening for each device. We opted to use t-slot edge joints instead of flat or finger because t-slot edge joints allowed us to keep the faces of the box together with just nuts and bolts. We made the openings as follows: a 2” by 2” rectangular hole for PN532 NFC shield, a round hole with a 0.80” diameter for the microphone, a 0.75” by 0.50” rectangular hole for the power, a 0.80” by 0.17” rectangular hole for the camera strip, and a 0.85” by 0.95” rectangular hole for the PIR sensor.
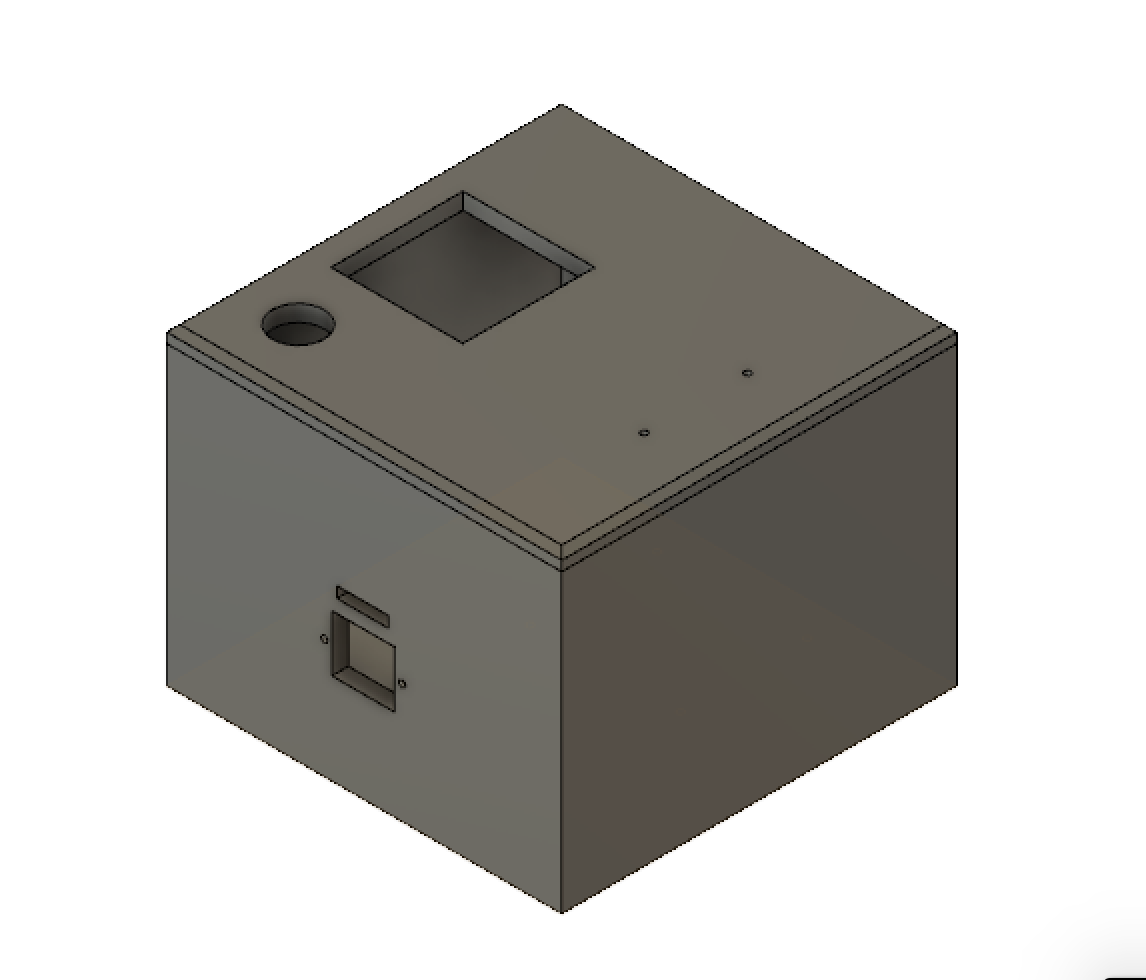
Figure 6: Fusion 360 box.
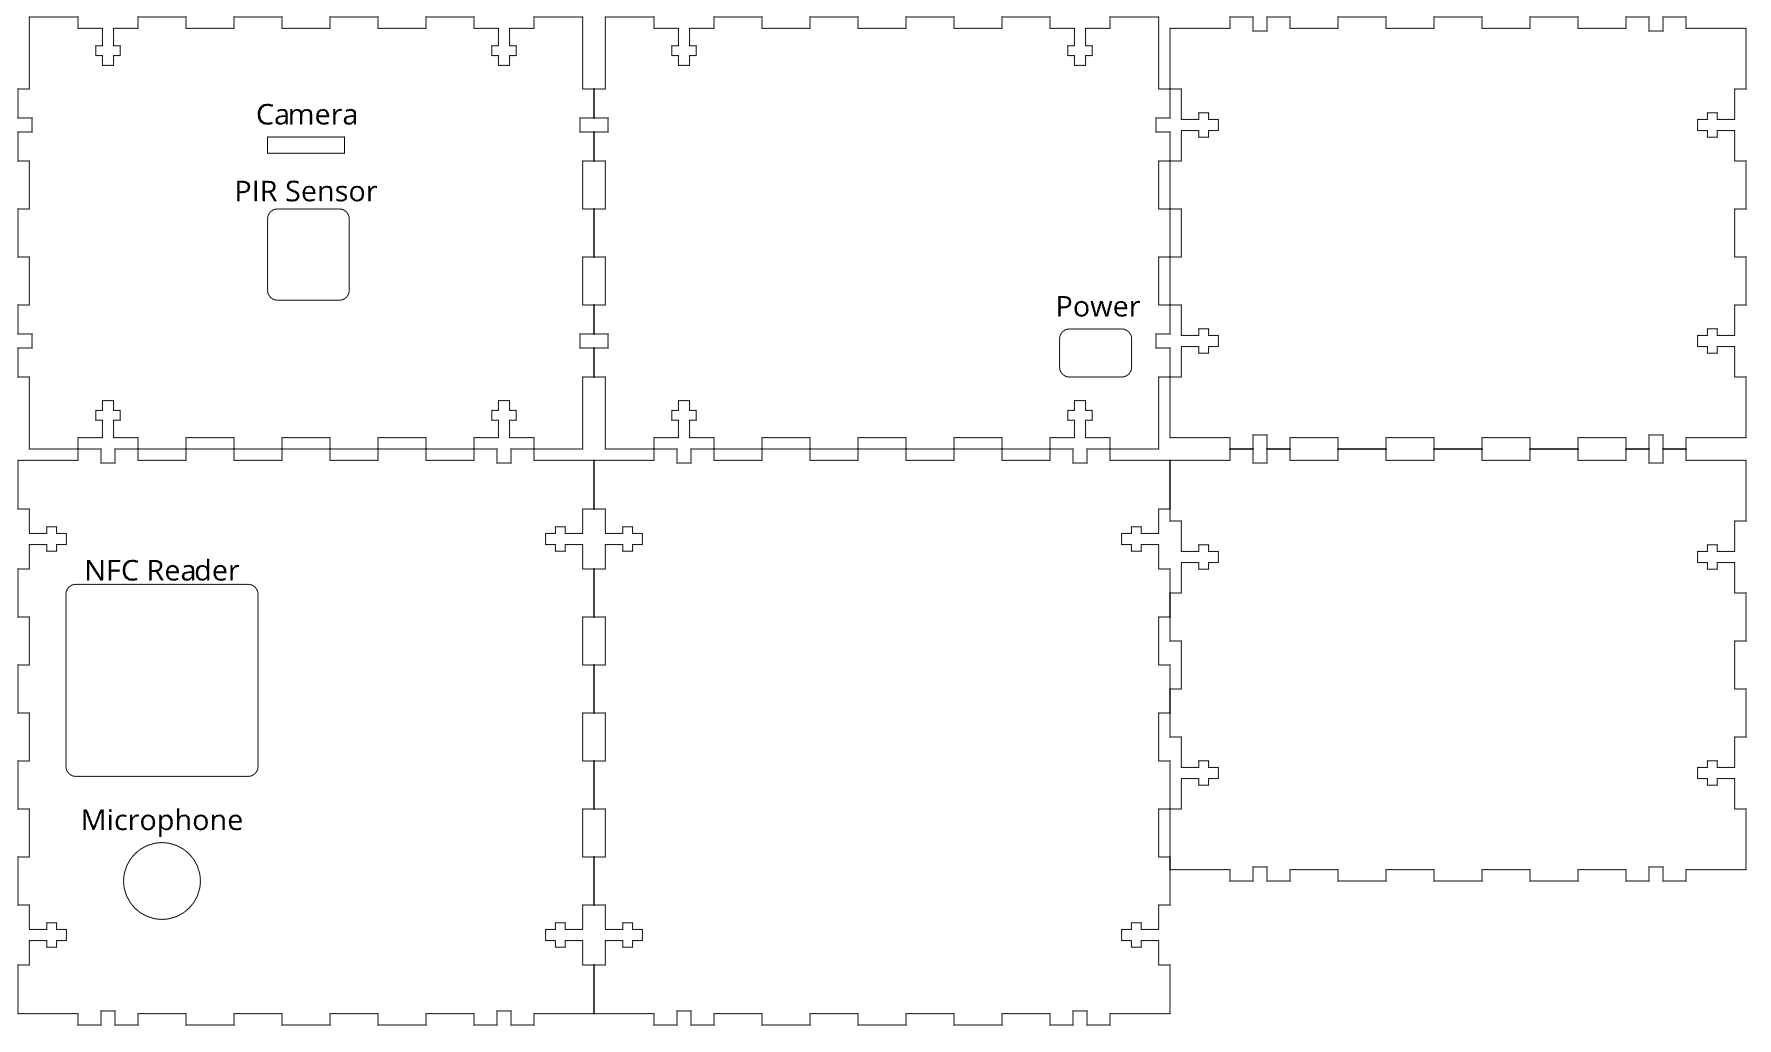
Figure 7: Laser cut plans.
Results
For all of the outlined points in our project description, we were able to successfully meet the requirements of each task, although some required slight modifications to the inital expectations.
We ran into some issues with recording audio from the microphone. After a lengthy debugging session that only output extremely noisy audio, we found that running the recording script from our previously compiled PreemptRT kernel was interfering with clean audio. This was a major setback, as it required us to transfer all of our progress to the original Raspbian kernel, including all package installations and manual library linkings.
Once that issue was solved, it became apparent that we could not constantly stream and record audio while providing clean enough audio for a reliable transcript, given that the other sensors had to run, but we already knew the audio could not constantly be interrupted. We initially tried to use the SpeechRecognition module, but the supported API ran unreliably on our Pi. We changed the design to include a button to begin recording an audio clip, which would block all other sensors until the speech recognition module had run.
There were other minor design setbacks, such as the laser cut housing being a little too small to easily fit the components. This was solved by simply leaving the speaker on the outside of the box. We had actually initially designed this box in Fusion 360, as discussed above, but was told laser cutting would be much more efficient. This cauesd a minor setback, as learning to use Fusion 360 had taken an amount of time, and we had to redesign the box to be laser cut. We also had countless compatibility errors with Python 2 and 3 and the various libraries utilized. This was resolved by manually linking multiple libraries to the installed packages.
Conclusion
We were able to achieve all of the outlined objectives, including a sensitive motion detector using a PIR sensor, a two-factor authentication system including NFC device detection and authorization, live facial recognition, voice-controlled password authentication, and a mobile nofitication system.
A significant portion of this project required researching, installing, and understanding various third-party API that would support the hardware on hand. Designing and cutting the box was a completely new experience, and using the servo as a mechanical lock was more involved than originally expected.
Ultimately, this project was a great learning experience, and the security box functioned reliably.
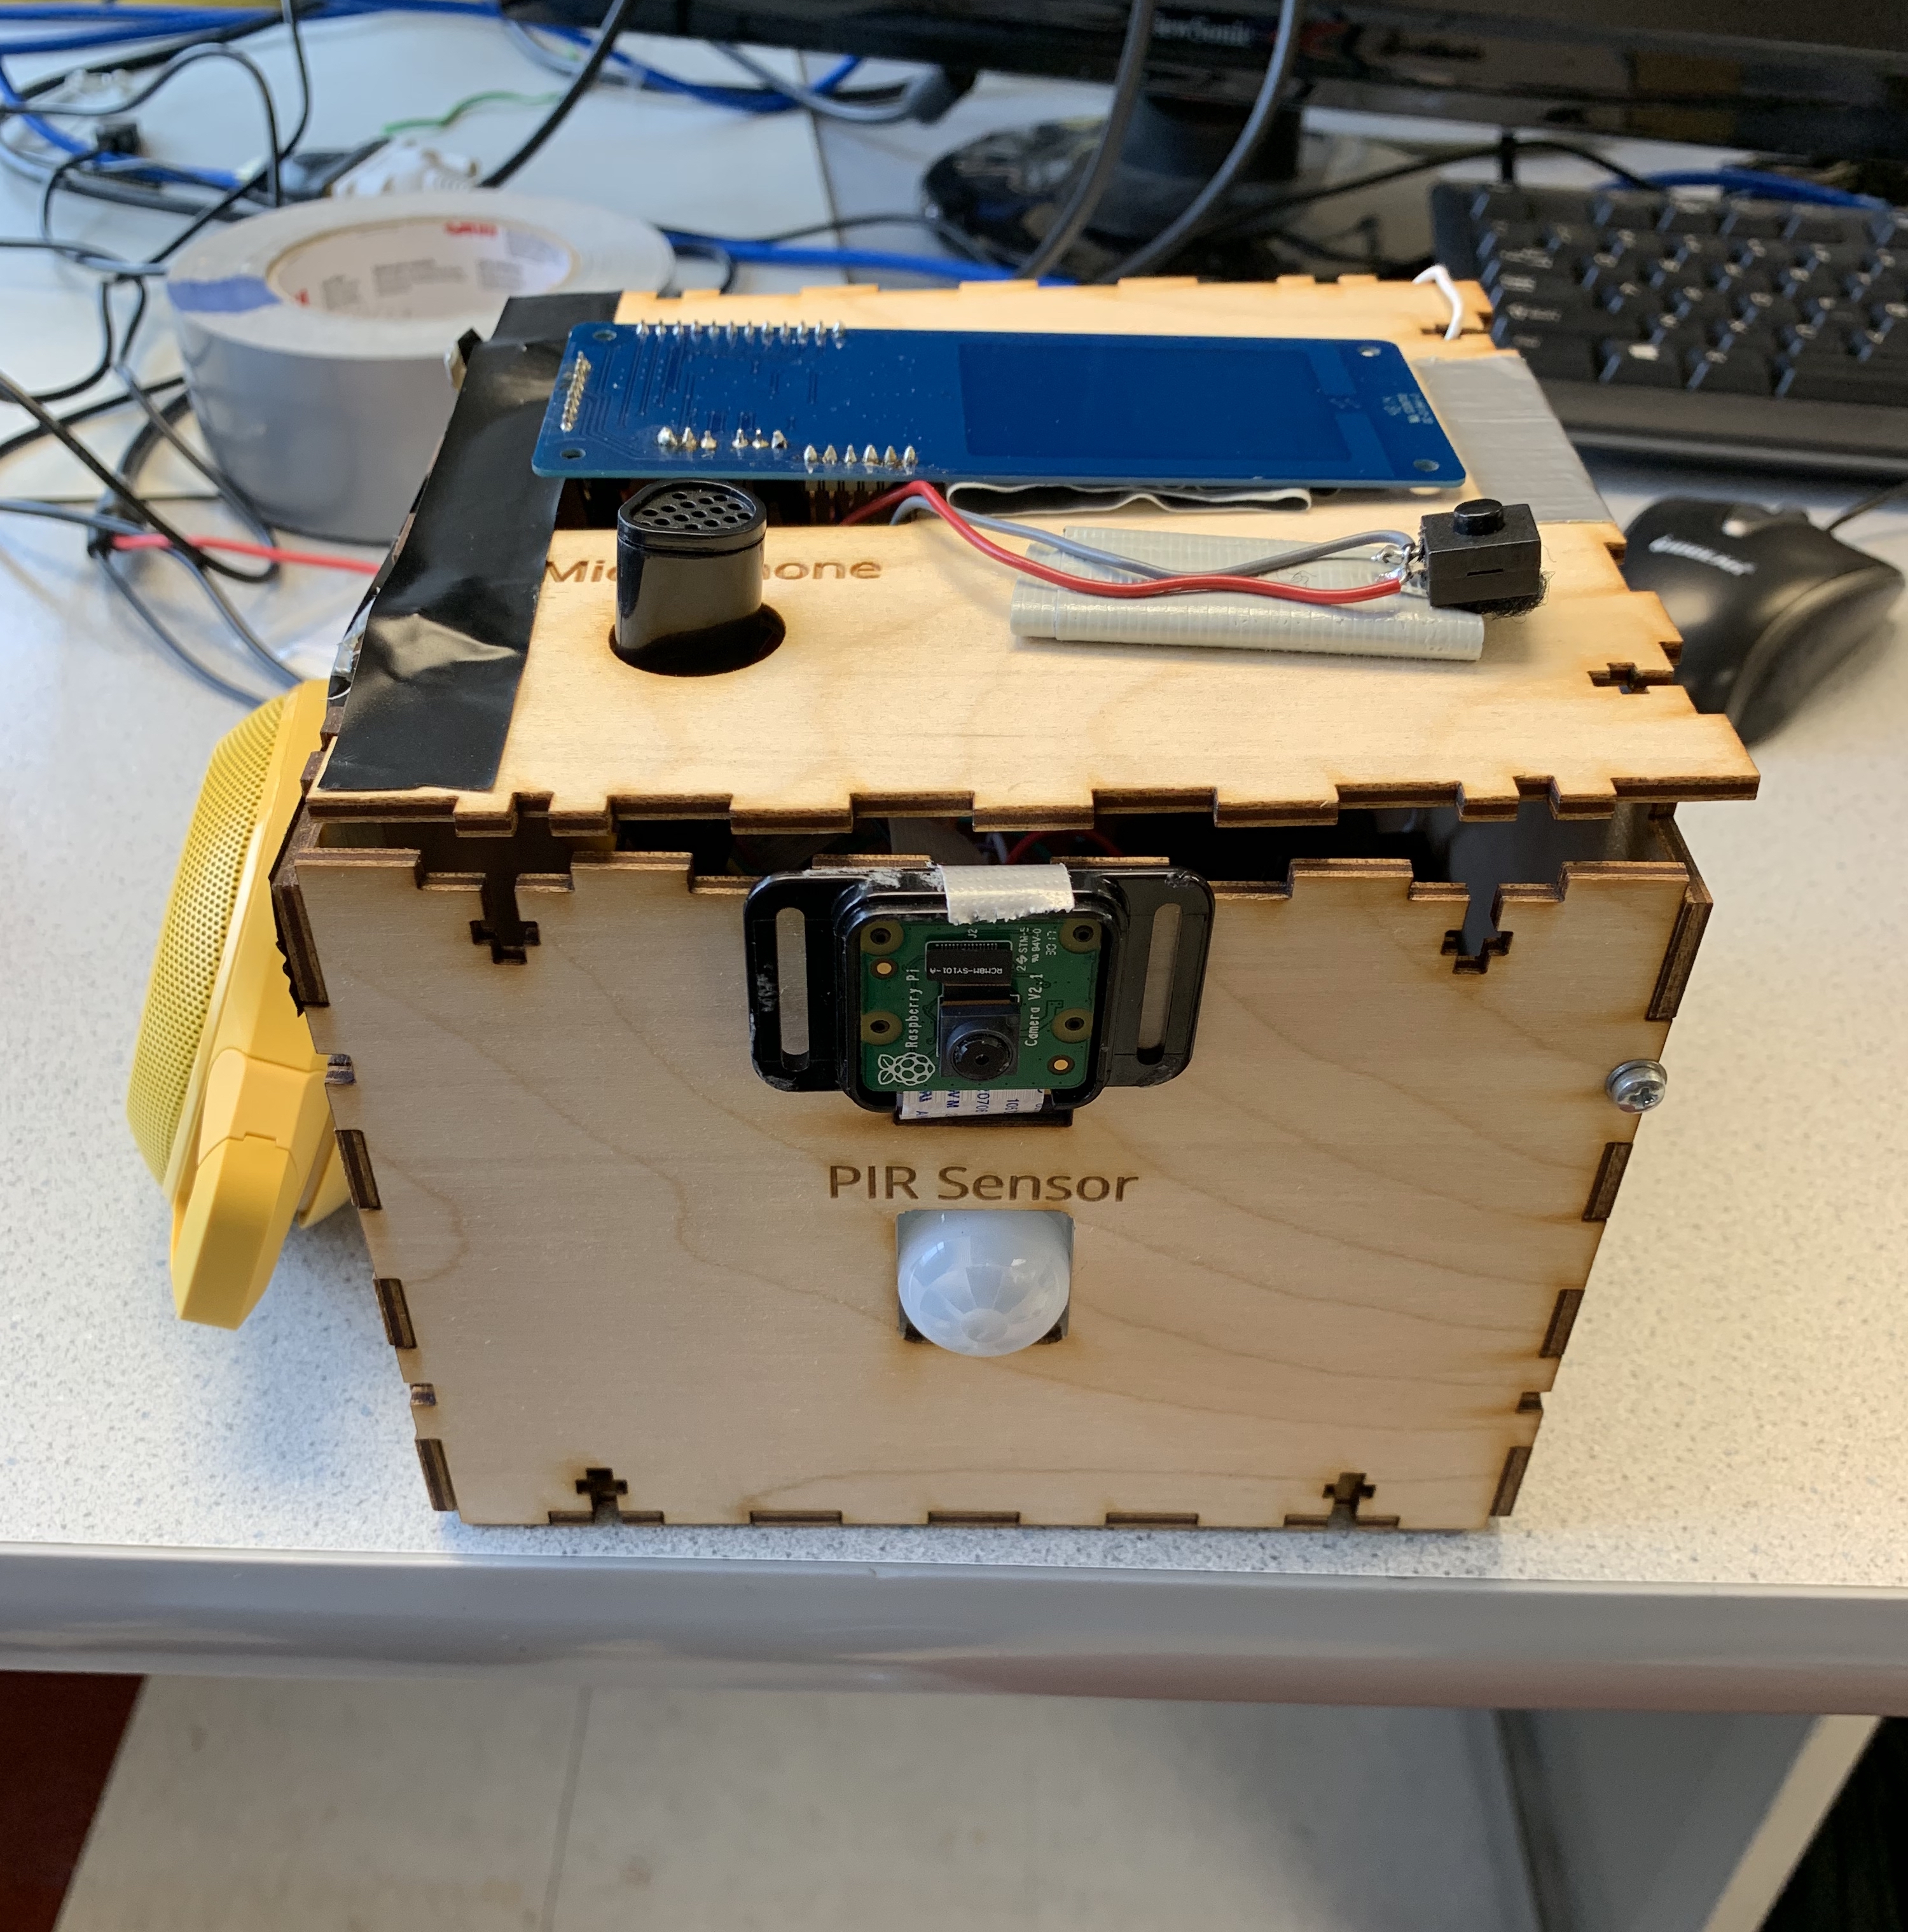
Figure 8: Completed product.
Future Work
Many improvements could be made to improve our security box. One of the biggest issues we had with our box was that we overestimated how much space we would have with the dimensions we used. However, this is not that complicated of a fix and would only require us to make the box longer and wider in MakerCase.com. Secondly, another improvement that could be done with future work is figuring out how to setup the PN532 shield with SPI instead of I2C. We really do not know why we were not able to setup the shield with SPI so we just used I2C due to time constraints. Lastly, another improvement that could be made with future work is to make some sort of external application or website to interact with the security box. The user would then be able to lock, unlock, or sound the alarm to the system externally.
Work Distribution

Team photo

Amanda
at669@cornell.edu
Hardware and software design.
Implemented facial recognition, audio feedback, and compiled master program. Collaboratively implemented NFC detection, motion detection, and voice recognition.

Michael
mr2242@cornell.edu
Hardware and software design
Implemented SMS notifications and designed the box. Collaboratively implemented NFC detection, motion detection, and voice recognition
Parts List
- Raspberry Pi - $35
- Raspberry Pi Camera v2 - $24.36
- PIR Sensor - $9.95
- PN532 NFC/RFID Controller Breakout Board - $39.95
- eBerry USB Desktop Microphone - $7.99
- SoundPal Cube F1 - $17.49
- LEDs, Resistors and Wires - Provided in lab
- Laser cutting tools and materials - Cornell RPL
Total: $99.74
References
Adafruit PN532 RFID/NFC BreakoutBootstrap
Connect, Configure and Test USB Microphone and Speaker with Raspberry Pi
Guide to Set Up Pi Camera & Some OpenCV Image Processing Basics
How to work out the missing dependencies for a Python package
IBM Watson Speech To Text
PiCamera Document
Pigpio Library
PIR Motion Sensor
R-Pi GPIO Document
Raspberry Pi Face Recognition
Recording Audio on the Raspberry Pi with Python and a USB Microphone
Code Appendix
master.py
# master.py
# Amanda Trang (at669), Michael Rodriguez (mr2242)
# Final Project
# 5/14/2019
# Thursday Lab

# Import modules
import nfc, pir, mic, playsound, time, servo
import pi_face_recognition as facerec
import ibmspeech as speechrec

# Misc imports
from twilio.rest import Client
import RPi.GPIO as GPIO

GPIO.setmode(GPIO.BCM)
GPIO.setup(26, GPIO.IN, pull_up_down=GPIO.PUD_UP)

# Twilio setup
account_sid = 'ACfbd404054a6297ec77dd2b94305600c1'
auth_token = '9937cade6ba6651913522d4762fb12ab'
client = Client(account_sid, auth_token)

# Calls all initialization functions
def init():
    pn532 = nfc.init()
    data, detector = facerec.init()
    service, models, model = speechrec.init()

    return pn532, data, detector, service, models, model

# Main function that loops after each open and close session
def main(pn532, data, detector, service, models, model):
    while (True):
        # Initialize values
        prev_val = GPIO.input(26) # initialize button value
        cur_val = prev_val
        pir_val = 0
        nfc_val = 0
        speech_val = 0
        face_val = 0

        # wait until motion is detected
        while(not pir_val):
            time.sleep(0.1) # sleep for poll
            pir_val = pir.PIR()

        # Motion has been detected
        playsound.main("fail")
        client.messages.create(to='+18316827737', from_='+18312564180', body="Something has been detected!")

        # wait until two-factor authentication done
        while(True):
            playsound.main("fail")
            time.sleep(0.1)
            cur_val = GPIO.input(26)
            if (not speech_val):
                # If button is pressed, begin microphone recording
                if (prev_val != cur_val):
                    mic.main()
                    speech_val = speechrec.main(service, models, model)
                    if (not speech_val): # failed speech recognition
                        prev_val = GPIO.input(26) # don't re-attempt until button press

            # Attempt one frame of facial recognition
            if (not face_val):
                face_val = facerec.main(data, detector)

            # Attempt to detect NFC device
            if (not nfc_val):
                nfc_val = nfc.read_nfc(pn532)

            # If one of two factors authenticated, play "ding"
            if (nfc_val + speech_val + face_val == 1): playsound.main("ding")

            # If two factors authenticated, play "success", break from loop
            if (nfc_val + speech_val + face_val >= 2):
                # play sfx
                playsound.main("success")
                break

        # Unlock box, wait for lock
        servo.main("unlock", 7)
        client.messages.create(to='+18316827737', from_='+18312564180', body="Unlocking...")
        prev_val = GPIO.input(26)
        cur_val = prev_val
        while(True):
            time.sleep(0.1)
            cur_val = GPIO.input(26)
            # Lock box
            if (prev_val != cur_val):
                servo.main("lock", 7.5)
                playsound.main("fail")
                client.messages.create( to='+18316827737', from_='+18312564180', body="Locking....")
                break
    p.stop()

# Call initialization function
pn532, data, detector, service, models, model = init()
# Play "ding" after initialization
playsound.main("ding")
# Run main loop forever
main(pn532, data, detector, service, models, model)
pir.py
# pir.py
# Amanda Trang (at669), Michael Rodriguez (mr2242)
# Final Project
# 5/14/2019
# Thursday Lab

# Import modules
import RPi.GPIO as GPIO
import time

pir_sensor = 19

GPIO.setwarnings(False)

# Set to Broadcom
GPIO.setmode(GPIO.BCM)
GPIO.setup(pir_sensor, GPIO.IN)

# Check PIR for one loop
def PIR():
    # if motion detected, return 1
    if (GPIO.input(pir_sensor)):
        return 1 # detected
    else:
        return 0

# while(True):
#      time.sleep(0.10)
#      print(PIR())
playsound.py
# playsound.py
# Amanda Trang (at669), Michael Rodriguez (mr2242)
# Final Project
# 5/14/2019
# Thursday Lab

# source: https://stackoverflow.com/questions/6951046/pyaudio-help-play-a-file

import pyaudio
import wave
import sys

def main(file):
    # length of data to read.
    counter = 50
    chunk = 1024
    filename = ""
    # Play filename
    if (file == "success"):
        filename = "/home/pi/ece5725-final/python/sounds/success.wav"
    elif (file == "fail"):
        print("is fail")
        filename = "/home/pi/ece5725-final/python/sounds/fail.wav"
    elif (file == "ding"):
        print("ding")
        filename = "/home/pi/ece5725-final/python/sounds/ding.wav"
    else:
        sys.exit(-1)

    # open the file for reading.
    wf = wave.open(filename, 'rb')

    # create an audio object
    p = pyaudio.PyAudio()

    # open stream based on the wave object which has been input.
    stream = p.open(format = p.get_format_from_width(wf.getsampwidth()), channels = wf.getnchannels(), rate = wf.getframerate(), output = True)

    # read data (based on the chunk size)
    data = wf.readframes(chunk)

    # Play audio
    while data != '' and counter > 0:
        stream.write(data)
        data = wf.readframes(chunk)
        counter -= 1

    # cleanup
    stream.close()
    p.terminate()

# main("success")
# main("fail")
nfc.py
# nfc.py
# Amanda Trang (at669), Michael Rodriguez (mr2242)
# Final Project
# 5/14/2019
# Thursday Lab

# source: https://learn.adafruit.com/adafruit-pn532-rfid-nfc/python-circuitpython

import board
import busio
from digitalio import DigitalInOut
from adafruit_pn532.i2c import PN532_I2C

# Initialize I2C connection
def init():
    i2c = busio.I2C(board.SCL, board.SDA)

    reset_pin = DigitalInOut(board.D6)
    req_pin = DigitalInOut(board.D13)
    pn532 = PN532_I2C(i2c, debug=False, reset=reset_pin, req=req_pin)

    # Set up PN532
    ic, ver, rev, support = pn532.get_firmware_version()
    print('Found PN532 with firmware version: {0}.{1}'.format(ver, rev))

    # Configure PN532 to communicate with MiFare cards
    pn532.SAM_configuration()
    print('Waiting for RFID/NFC card...')

    return pn532

# Attempt to read NFC once
def read_nfc(pn532):
    try:
        uid = pn532.read_passive_target(timeout=0.5) # Check if a card is available to read
        if uid is None: # Try again if no card is available.
            return 0
        # Accepted cards
        if (uid.hex() == "e4bda722"):
            print("#1 detected")
            return 1
        elif (uid.hex() == "f4f7a722"):
            print("#2 detected")
            return 1
        else: # Unauthorized
            print("Unauthorized!")
            return 0
    except (KeyboardInterrupt, SystemExit):
        return 0

# pn532 = init()
# while(not read_nfc(pn532)):
#    read_nfc(pn532)
servo.py
# servo.py
# Amanda Trang (at669), Michael Rodriguez (mr2242)
# Final Project
# 5/14/2019
# Thursday Lab

# Import modules
import RPi.GPIO as GPIO
import time

GPIO.setwarnings(False)

servo_pin = 5

# Run servo in specified direction for specified length of time
# Re-initializes and cleans up servo GPIO each call
def main(direction, length):
	GPIO.setmode(GPIO.BCM)
	GPIO.setup(servo_pin, GPIO.OUT) # pin 22 output
	GPIO.output(servo_pin, GPIO.LOW)
	p = GPIO.PWM(servo_pin,50)  # 50 Hz
	p.start(7.5)
	if (direction == "unlock"):
		val = 6.5
	elif (direction == "lock"):
		val = 8.5
	else:
		val = 7.5

	p.ChangeDutyCycle(val)
	time.sleep(length)
	p.stop()

# main("unlock", 7)
# time.sleep(2)
# main("lock", 7.5)
mic.py
# mic.py
# Amanda Trang (at669), Michael Rodriguez (mr2242)
# Final Project
# 5/14/2019
# Thursday Lab

# source: https://makersportal.com/blog/2018/8/23/recording-audio-on-the-raspberry-pi-with-python-and-a-usb-microphone

import pyaudio
import wave
import playsound
import RPi.GPIO as GPIO
import time

GPIO.setmode(GPIO.BCM)
GPIO.setup(26, GPIO.IN, pull_up_down=GPIO.PUD_UP)

def main():
    form_1 = pyaudio.paInt16 # 16-bit resolution
    chans = 1 # 1 channel
    samp_rate = 44100 # 44.1kHz sampling rate
    chunk = 4096 # 2^12 samples for buffer
    record_secs = 5 # seconds to record
    dev_index = 2 # device index found by p.get_device_info_by_index(ii)
    wav_output_filename = '/home/pi/ece5725-final/python/audio.wav' # name of .wav file

    audio = pyaudio.PyAudio() # create pyaudio instantiation

    # create pyaudio stream
    stream = audio.open(format = form_1,rate = samp_rate,channels = chans, \
                        input_device_index = dev_index,input = True, \
                        frames_per_buffer=chunk)

    # play "success" when recording begins
    playsound.main("success")
    frames = []

    # loop through stream and append audio chunks to frame array
    for ii in range(0,int((samp_rate/chunk)*record_secs)):
        data = stream.read(chunk, exception_on_overflow = False)
        frames.append(data)

    # stop the stream, close it, and terminate the pyaudio instantiation
    stream.stop_stream()
    stream.close()
    audio.terminate()

    # save the audio frames as .wav file
    wavefile = wave.open(wav_output_filename,'wb')
    wavefile.setnchannels(chans)
    wavefile.setsampwidth(audio.get_sample_size(form_1))
    wavefile.setframerate(samp_rate)
    wavefile.writeframes(b''.join(frames))
    wavefile.close()

# main()
ibmspeech.py
# ibmspeech.py
# Amanda Trang (at669), Michael Rodriguez (mr2242)
# Final Project
# 5/14/2019
# Thursday Lab

# source: https://github.com/watson-developer-cloud/python-sdk

# Imports
from __future__ import print_function
import json
from os.path import join, dirname
from ibm_watson import SpeechToTextV1
from ibm_watson.websocket import RecognizeCallback, AudioSource
import threading

# Example using websockets
class MyRecognizeCallback(RecognizeCallback):
    def __init__(self):
        RecognizeCallback.__init__(self)

    def on_transcription(self, transcript):
        print(transcript)

    def on_connected(self):
        print('Connection was successful')

    def on_error(self, error):
        print('Error received: {}'.format(error))

    def on_inactivity_timeout(self, error):
        print('Inactivity timeout: {}'.format(error))

    def on_listening(self):
        print('Service is listening')

    def on_hypothesis(self, hypothesis):
        print(hypothesis)

    def on_data(self, data):
        print(data)

# Initializes IBM Speech Recognition service using API key authentication
def init():
    service = SpeechToTextV1(
        url='https://gateway-wdc.watsonplatform.net/speech-to-text/api',
        iam_apikey='rEIVeCDlJxozqkYjM8TSr1u-occu7op_MG2DCO0FrCFh')
    models = service.list_models().get_result()
    model = service.get_model('en-US_BroadbandModel').get_result()
    return service, models, model

# Runs IBM Speech Recognition on specified audio file
def main(service, models, model):
    # Open recorded audio file
    with open(join(dirname(__file__), '/home/pi/ece5725-final/python/audio.wav'),
            'rb') as audio_file:
        speech_output = service.recognize(audio=audio_file, content_type='audio/wav', timestamps=True, word_confidence=True).get_result()
        print(json.dumps(speech_output, indent=2))

    # Example using threads in a non-blocking way
    mycallback = MyRecognizeCallback()
    audio_file = open(join(dirname(__file__), '/home/pi/ece5725-final/python/audio.wav'), 'rb')
    audio_source = AudioSource(audio_file)
    recognize_thread = threading.Thread(
        target=service.recognize_using_websocket,
        args=(audio_source, "audio/l16; rate=44100", mycallback))
    recognize_thread.start()
    try:
        # Parse out output string
        final_output = speech_output['results'][0]['alternatives'][0]['transcript'].rstrip()
        print("Final Output:", final_output)

        # Check output against passwrd "5725"
        if (final_output == "five seven two five"):
            return 1
        else:
            return 0
    except: # If anything goes wrong, catch the exception and return
        return 0

# service, models, model = init()
# main(service, models, model)
pi_face_recognition.py
# pi_face_recognition.py
# Amanda Trang (at669), Michael Rodriguez (mr2242)
# Final Project
# 5/14/2019
# Thursday Lab

# source: https://www.pyimagesearch.com/2018/06/25/raspberry-pi-face-recognition/

# Imports
from imutils.video import VideoStream
from imutils.video import FPS
import face_recognition
import argparse
import imutils
import pickle
import time
import cv2

# Load and read encodings
def init():
	# construct the argument parser and parse the arguments
	ap = argparse.ArgumentParser()
	ap.add_argument("-c", "--cascade", default="/home/pi/ece5725-final/python/haarcascade_frontalface_default.xml", required=False, help = "path to where the face cascade resides")
	ap.add_argument("-e", "--encodings", default="/home/pi/ece5725-final/python/encodings.pickle", required=False, help="path to serialized db of facial encodings")
	args = vars(ap.parse_args())

	# load the known faces and embeddings along with OpenCV's Haar cascade for face detection
	data = pickle.loads(open(args["encodings"], "rb").read())
	detector = cv2.CascadeClassifier(args["cascade"])
	return data, detector

def main(data, detector):
	try:
		# Initialize the video stream and allow the camera sensor to warm up
		print("[INFO] starting video stream...")
		vs = VideoStream(src=0).start()
		time.sleep(2.0)
		print("done sleep")

		matchFound = 0

		# grab the frame from the threaded video stream and resize
		frame = vs.read()
		frame = imutils.resize(frame, width=300)

		# convert the input frame from (1) BGR to grayscale (for face detection) and (2) from BGR to RGB (for face recognition)
		gray = cv2.cvtColor(frame, cv2.COLOR_BGR2GRAY)
		rgb = cv2.cvtColor(frame, cv2.COLOR_BGR2RGB)

		# detect faces in the grayscale frame
		rects = detector.detectMultiScale(gray, scaleFactor=1.1,
			minNeighbors=5, minSize=(30, 30),
			flags=cv2.CASCADE_SCALE_IMAGE)

		# reorder bounding obox
		boxes = [(y, x + w, y + h, x) for (x, y, w, h) in rects]

		# compute the facial embeddings for each face bounding box
		encodings = face_recognition.face_encodings(rgb, boxes)
		names = []

		# loop over the facial embeddings
		for encoding in encodings:
			# attempt to match each face
			matches = face_recognition.compare_faces(data["encodings"], encoding)
			name = "Unknown"

			# check to see if we have found a match
			if True in matches:
				# find the indexes of all matched faces
				matchedIdxs = [i for (i, b) in enumerate(matches) if b]
				counts = {}

				# loop over the matched indexes and maintain a count for each recognized face
				for i in matchedIdxs:
					name = data["names"][i]
					counts[name] = counts.get(name, 0) + 1

				# determine the recognized face with the largest number of votes
				name = max(counts, key=counts.get)

				# if Amanda or Michael's face is detected, end
				if (name == "amanda" or name == "michael"):
					matchFound = 1
					cv2.destroyAllWindows()
					vs.stop()
					return matchFound

			# update the list of names
			names.append(name)

		# cv2.imshow("Frame", frame)
		key = cv2.waitKey(1) & 0xFF

		# if the `q` key was pressed, break from the loop
		if key == ord("q"):
			return 0

		# cleanup
		cv2.destroyAllWindows()
		vs.stop()
		return matchFound

	except (KeyboardInterrupt, SystemExit):
		cv2.destroyAllWindows()
		vs.stop()
		return 0

# data, detector = init()
# while(not main(data, detector)):
# 	main(data, detector)