Design and Testing
Multiprocessing
Our project can be subdivided into 3 main tasks: reading MIDI input, audio playback, and recording/looping. All of these tasks need to happen in parallel. We looked at three major ways to parallelize - threads using the Python Threading library, running separate processes in separate windows, and running multiple processes in the same window through the same parent process using Python Multiprocessing. We learned about Python's Global Interpreter Lock (GIL), an optimization that provides better single-threaded performance but serializes multi-threaded programs by putting a lock around the interpreter and thus making it so only one thread can run at a time. Hence when we tried using threads we noticed significant latency, for example between pressing a key on the keyboard and hearing an output. This issue went away when we used multiple processes in different windows, but it was difficult to manage all the windows as a user.
We then stumbled upon the Multiprocessing library, which provides an interface very similar to the Threading library but uses processes instead of threads to get around the GIL. Through it, we got both the ease of programming and the level of performance we desired. In order to communicate between the processes, we use a combination of Fifos and Multiprocessing provided shared memory variables. We use Fifos to pass raw MIDI signals from the reading process to the playback and record processes using two fifos, a playback_fifo and a record_fifo. We use shared memory variables to communicate recorded tracks between the record process and the playback process as well as to communicate volumes between the read process and the playback process. The decision of when to use a Fifo versus when to use shared memory ultimately boiled down to our use cases - for cases where the shared information was simple text, we used Fifos. For more complex objects such as the recordings, we used shared memory to avoid serialization/deserialization overhead.
In total, we create 7 separate processes: a metronome process, a volume control process, separate read processes for both keyboards, a generic playback process (to play all notes pressed on the keyboard), a record process, and a record playback process (to loop the recorded tracks). All processes and shared data structures are created and run in main.py.
Reading MIDI Input
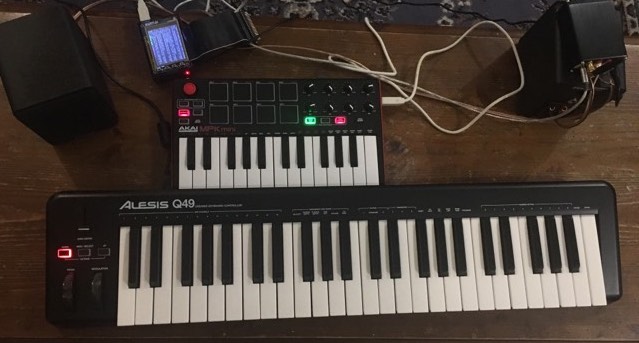
Our MIDI keyboards (Akai MPK and Alesis Q49) are connected to the Pi via USB and send signals already encoded in MIDI. In order to read these signals, we made use of a Python library called Mido. Reading from a MIDI device in Mido is syntactically similar to reading through a file - our code specifically uses the non-blocking methods provided by Mido to reduce latency. There are three types of signals we use in our project: note on/off, program change and control change. As the name suggests, note on/off signals indicate that a note should be played or stopped. Program change and control change are more generic control signals - we use program change signals to toggle instruments as well as start recording. They are essentially discrete unary signals. Control change signals, on the other hand, have continuous values. We use them to control the volume of each track we record. We read note on/off signals from both the Akai and the Alesis keyboards, but only read program and control change signals from the Akai.
To help match the raw MIDI input provided by Mido, we use regular expression matching using the Re standard library. Once matched, we handle each signal slightly differently. For note on/off signals we echo the signal to the playback_fifo so that the playback process (described next) can output the appropriate sounds. If a recording is in progress, we also echo to the record_fifo. For control change signals, we modify a shared volumes data structure. For instrument changes, we also just change a shared variable. For a start recording program change, we send a signal to the record_fifo to let the record process know it can begin recording.
The code for this section can be found in read_midi.py
Playback
We make use of the Mingus library for audio output. It is built on top of fluidsynth, an open source audio synthesizer. When a new line is sent to the playback fifo by the reader processes, the playback process reads the line and immediately plays/turns off the note. Using regular expression matching, we first identify whether there is a note on or note off event. Once we identified the type of event, we converted the events to our own wrapper class around the Mingus.containers Note class called NoteSignal which we define in signals.py. We then play the note using NoteSignal's play() function which is built on top of the Mingus.Container Note's play function.
NoteSignal has attributes to identify the device, time of event, note pressed, velocity, whether it was a note on or note off, and what channel the note is being sent to. When a NoteSignal is initialized, a Note object is also created using mingus.containers. The Note object is set to the key specified and the channel specified. As part of its parameters, the play() function takes in a volume. It first sets the note velocity to this volume. Then it plays the note on the specified channel if it is a note on event and stops the note if its a note off event. Playing of notes is handled through fluidsynth via mingus.
The code for this section can be found in playback.py
Here is a graphical representation of our playback architecture:

Record Logic
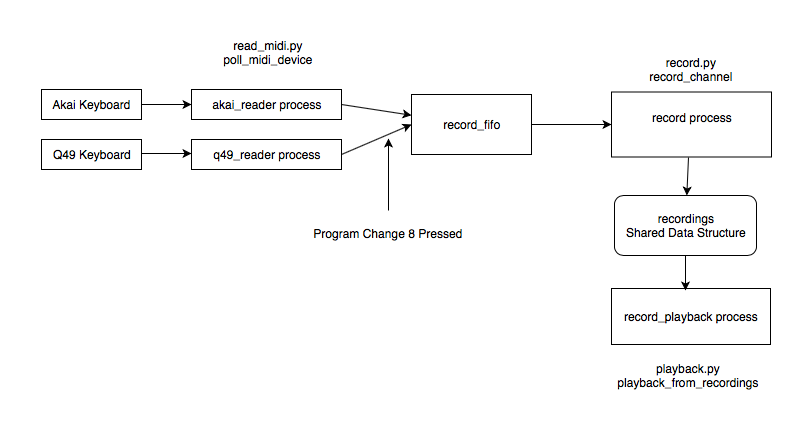
When program change 8 is pressed, the read logic sends a "Start" message to the record fifo. The record process reads this message and begins recording a new track - by this we mean it creates an empty array and appends every incoming note on/off signal to the array with a timestamp relative to the start of the recording. The recording continues for a fixed amount of time determined by the bpm (beats per minute) and beats_per_bar values defined in constants.py. This time is kept track of in the read process, and after the time has elapsed the read process sends a "Stop" message to the record fifo. Upon consuming the "Stop" message, the record fifo will add the array to a shared recordings variable. The code for this segment can be found in record.py
The record playback process runs as an infinite loop that initializes a start time at the beginning of the loop and iterates through the recordings variable. For every recording, it keeps track of the next unplayed note signal and compares the timestamp of the note to the time elapsed from the loop start. If the current time elapsed is greater than or equal to the timestamp of the note signal, it plays the signal. It then moves on to the next recording and repeats this process until the time elapsed from start is greater than the record length. In the case when a new recording is added while the last loop playback is not complete, the code waits for the loop to complete before adding the new recording. The code for this segment can be found in the playback_from_recordings method in playback.py.
Here is a graphical representation of our record architecture:
Metronome
The metronome is a set of notes on channel 7 (our drum channel) that repeats every beat. We first take in the empty recordings dictionary and set the first 6 keys to empty lists. We basically set the notes at fixed time intervals (60/bpm) apart starting at t = 0. We repeat these time intervals in channel 7's recording list beats_per_bar times as specified in constants.py
The code for this segment can be found in the metronome.py
Volume
The volume process simply initializes the volume for all channels to max (127). Upon a volume change via control signal, the read logic in read_midi.py handles the signal inline and changes the shared volumes data structure.
Virtualenv
We chose to use of Python's Virtualenv library to create an isolated environment for our project. Doing so ensured that our packages are not affected by other packages installed on the Pi. The full set of Python dependencies can be found in the requirements.txt file, and one can easily install the requirements by running
pip install -r requirements.txt