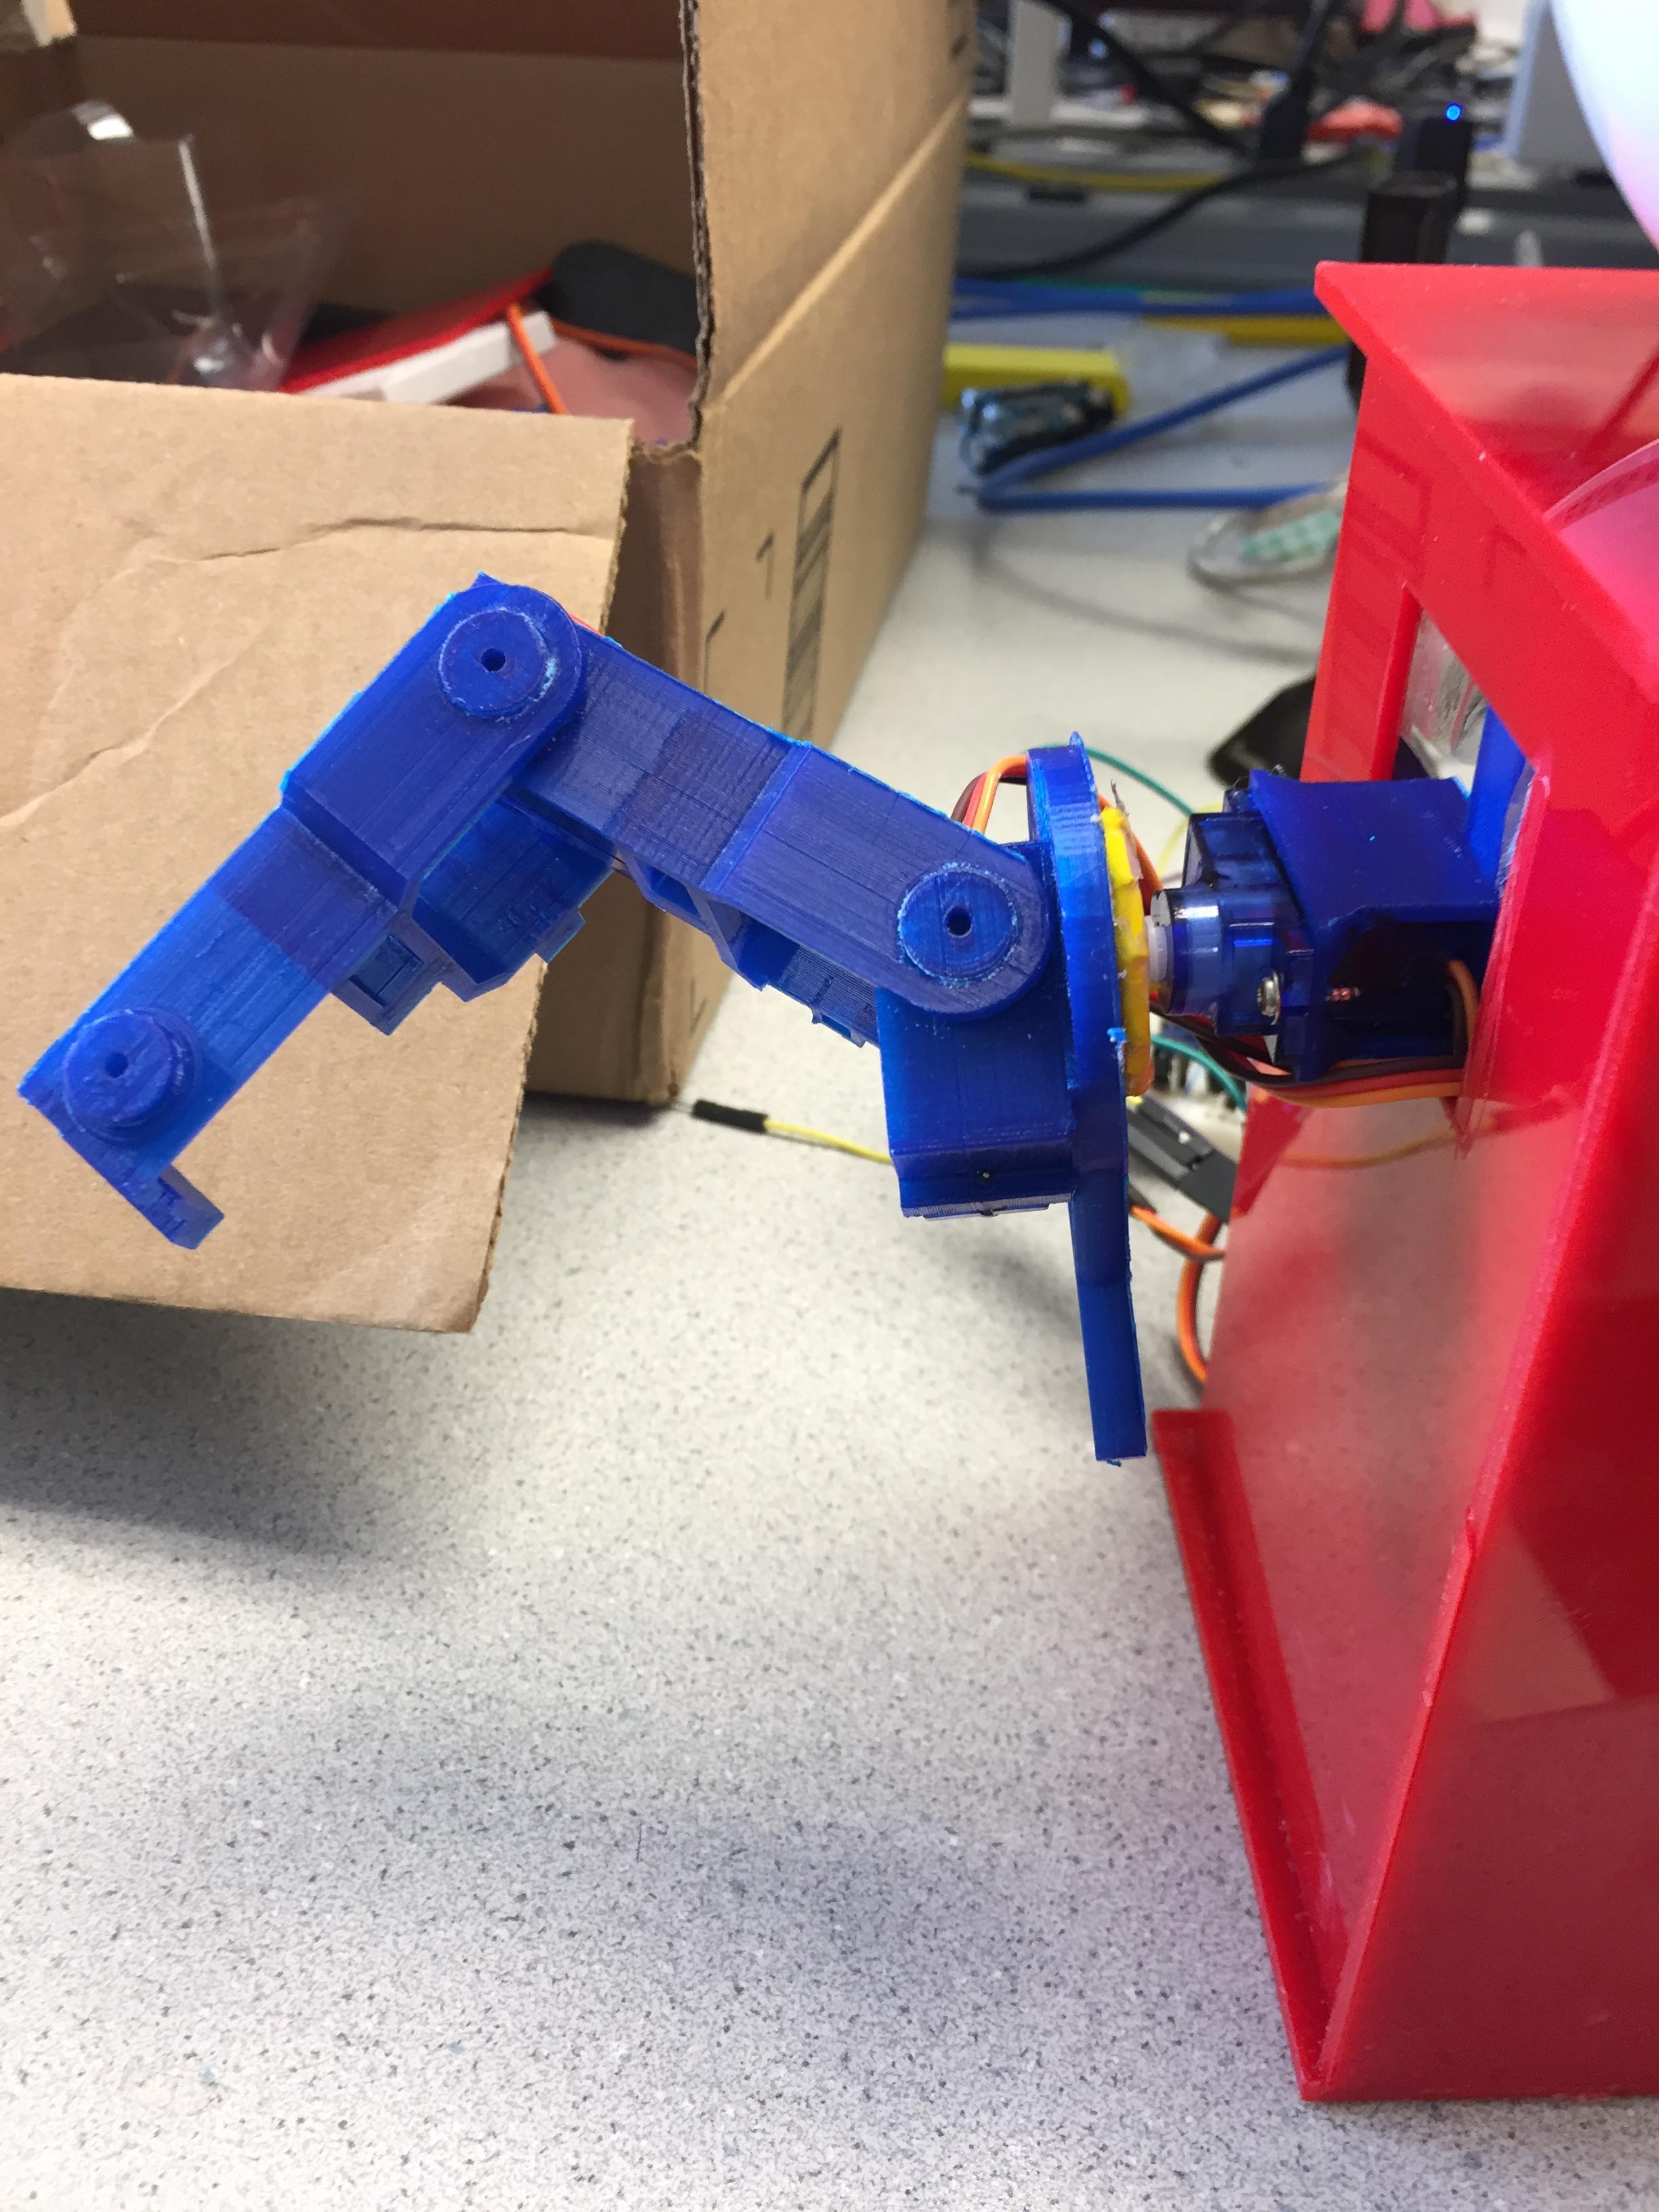
Microphone Audio Processing
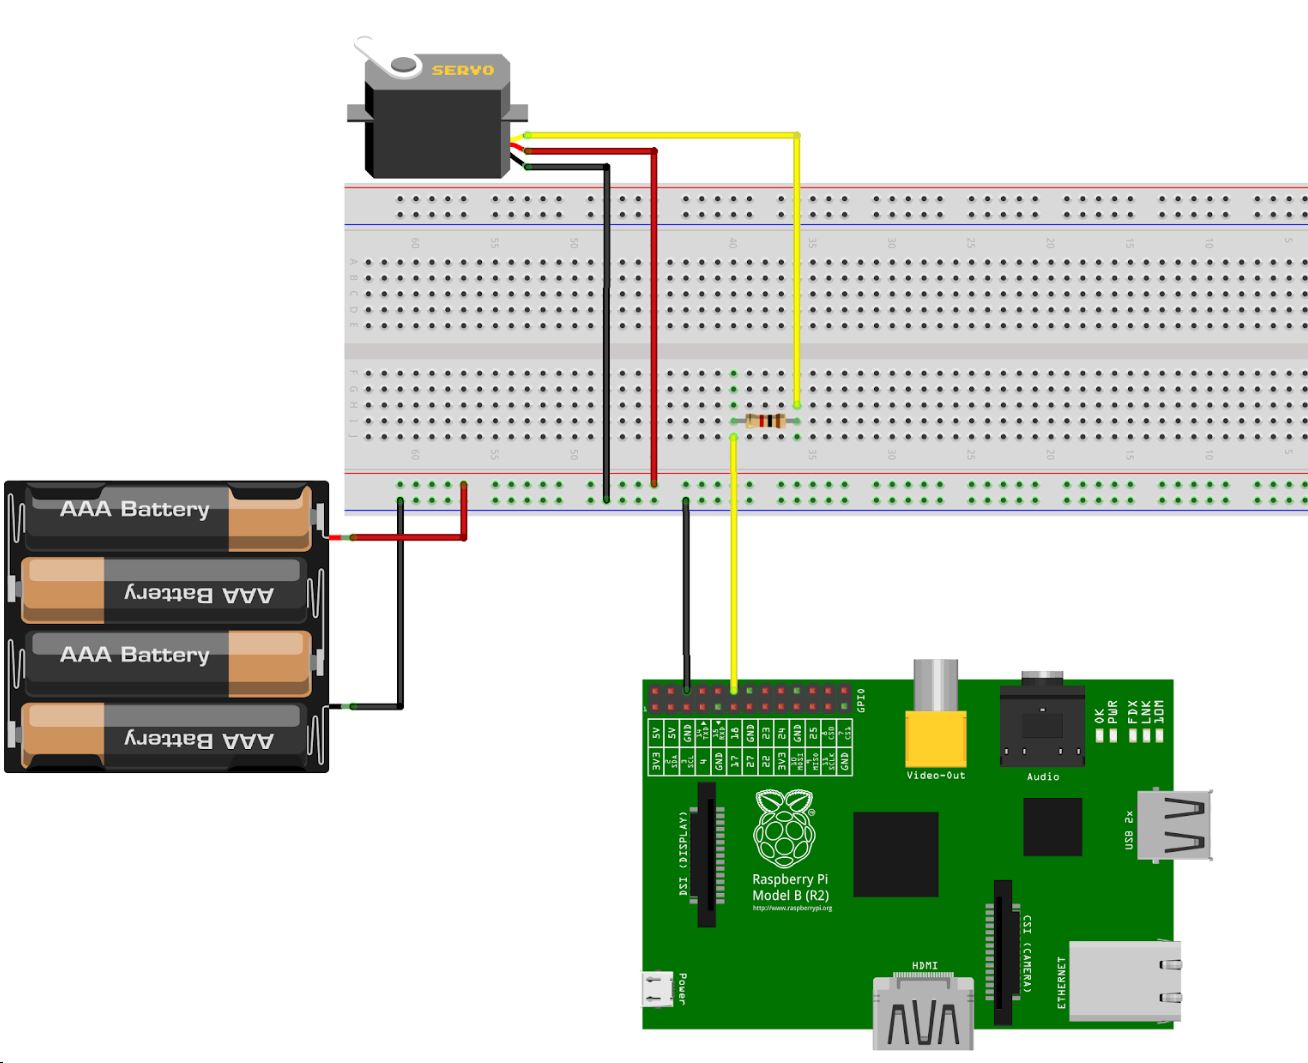
In order to do real time audio acquisition and processing, we needed to run non-blocking calls for microphone sample reading in a thread. To do this, we used alsaaudio’s pulse code modulation tool, and read data from our USB microphone 1000 samples at a time. At first, we used pyaudio’s acquisition code, but we ended up switching over to alsaaudio due to the better non-blocking calls. We also bought an “Ice blue snowball” microphone which was able to record with much higher quality compared to the cheaper microphone that we found in lab. Beat estimation is a bit complex in real time, there are many algorithms, most used the spectrogram of the sound and do analysis on that to detect patterns in specific frequencies. Librosa’s librosa.beat.beat_track uses an algorithm from the following paper:
Ellis, Daniel PW. “Beat tracking by dynamic programming.” Journal of New Music Research 36.1 (2007): 51-60. http://labrosa.ee.columbia.edu/projects/beattrack/
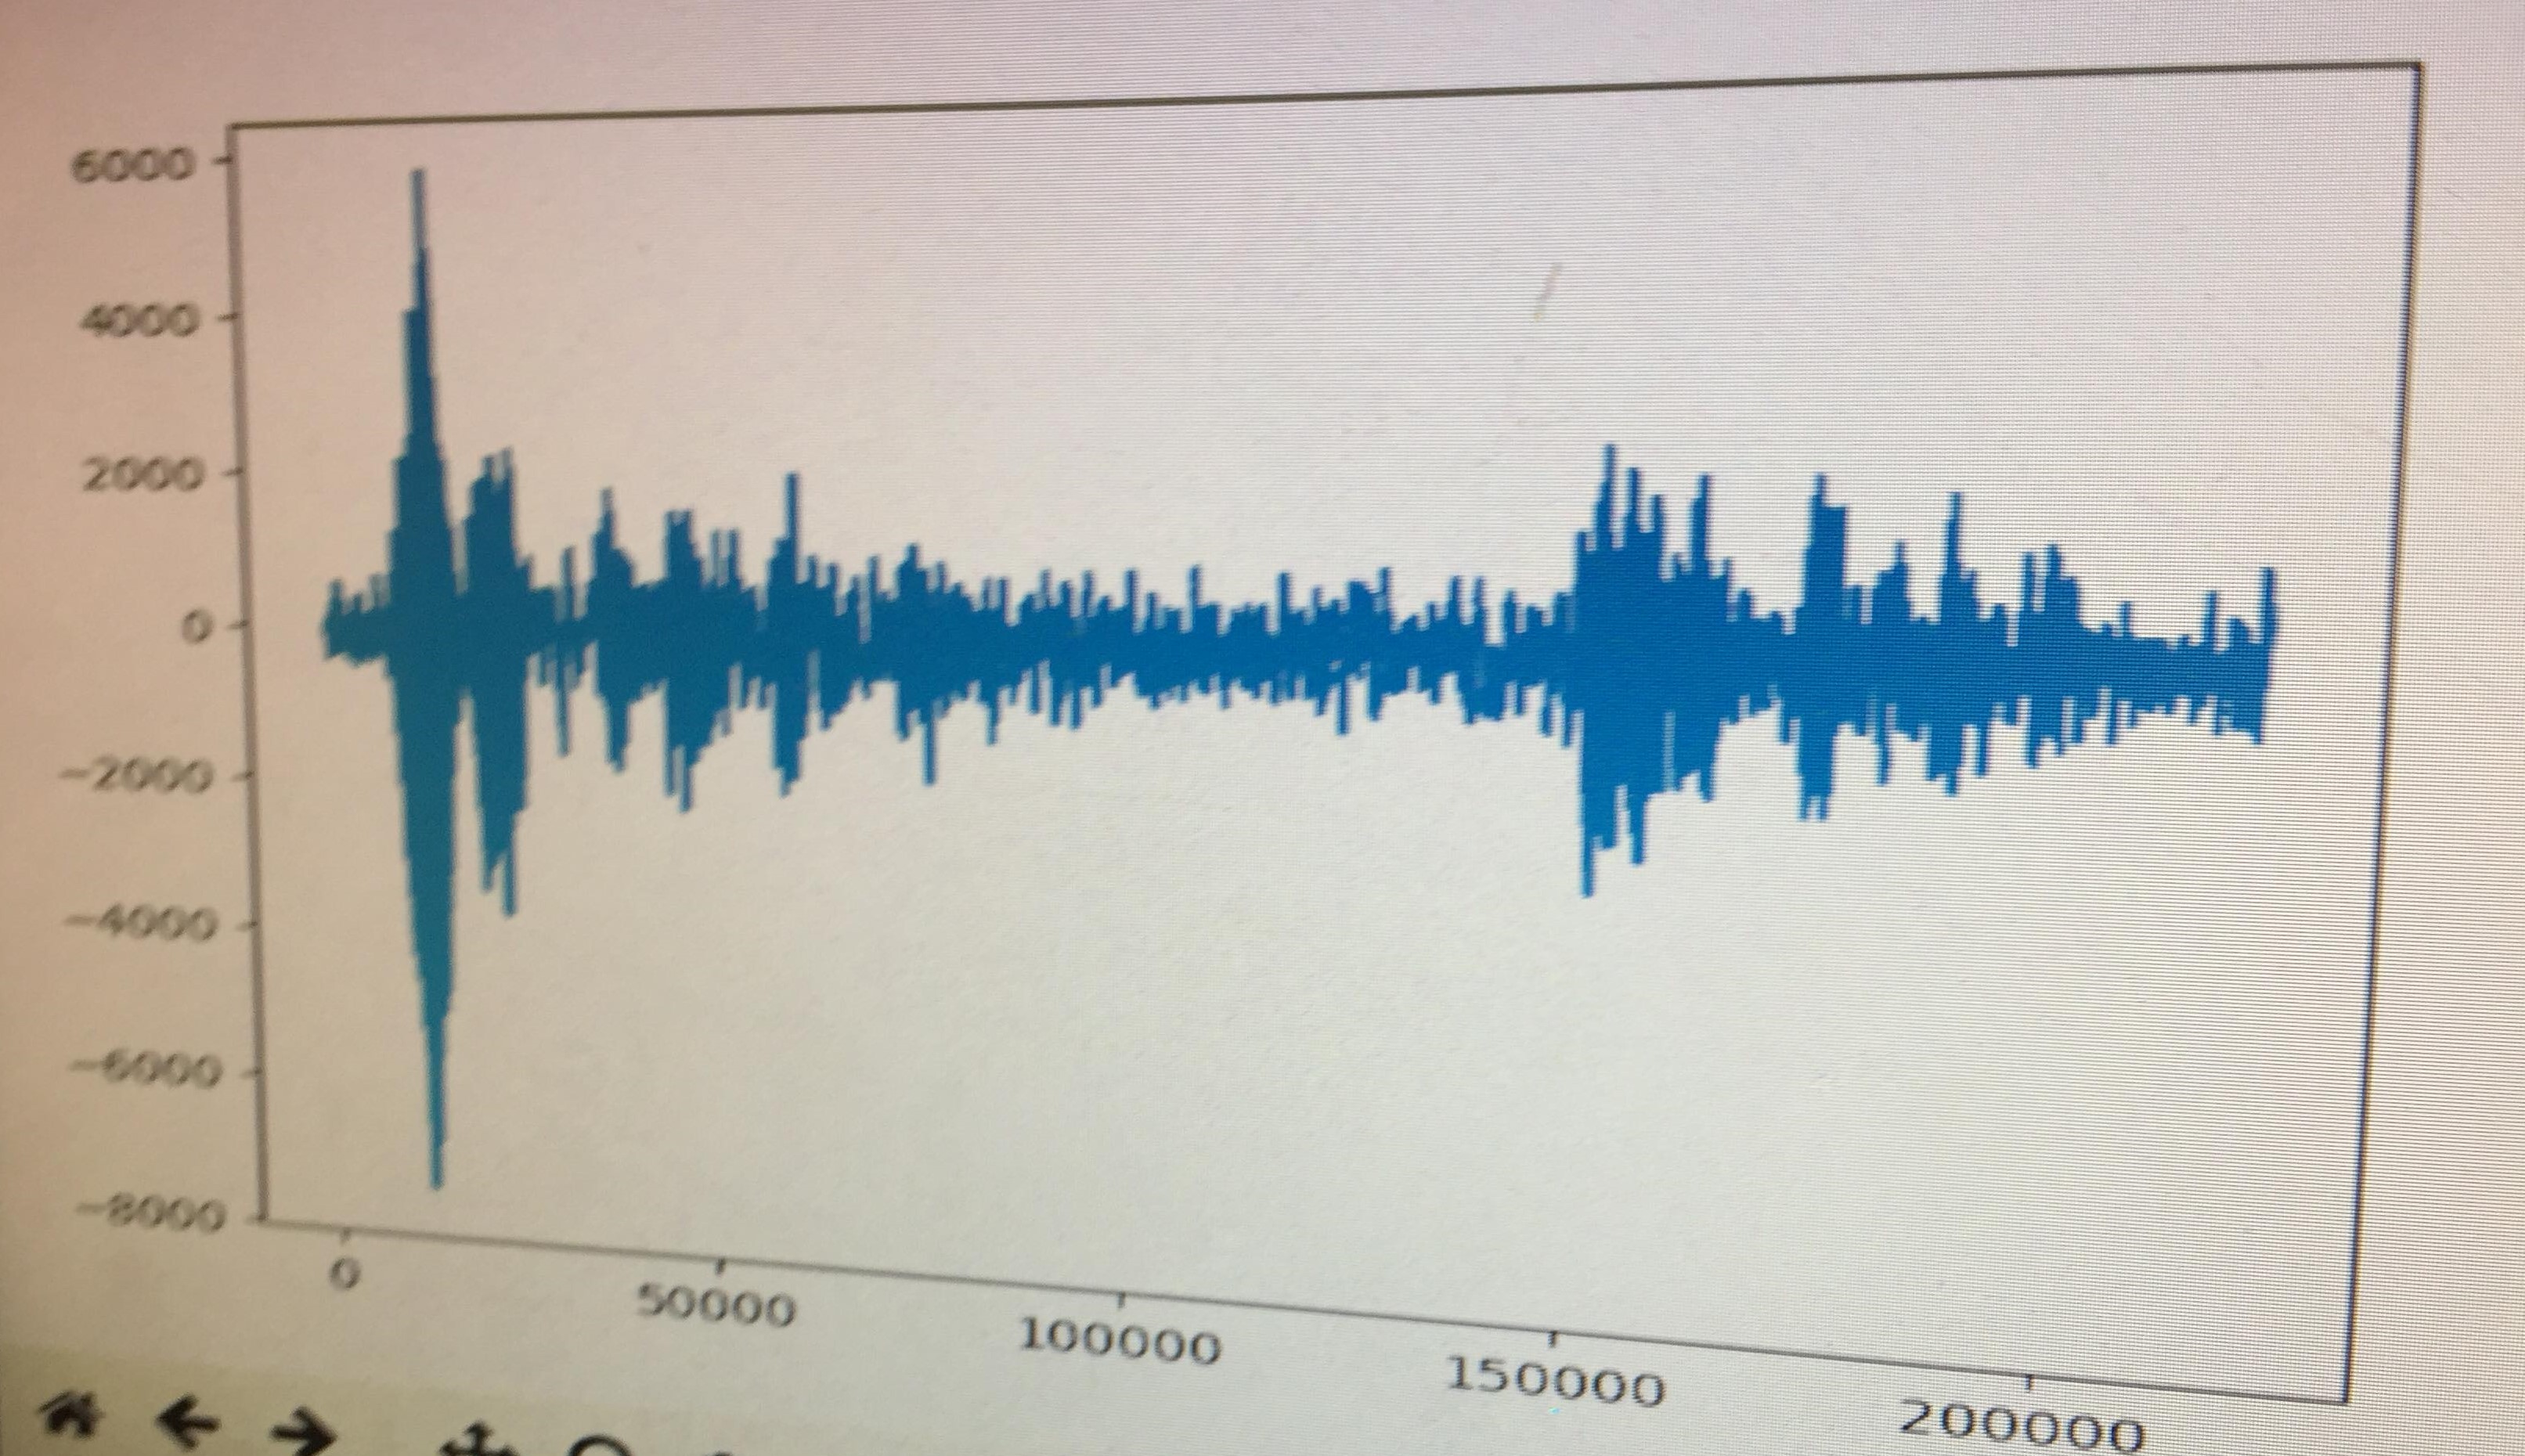
This graph displays how unreliable the lab's mic was when we played audio for a clear distinct, regular, drum beat.
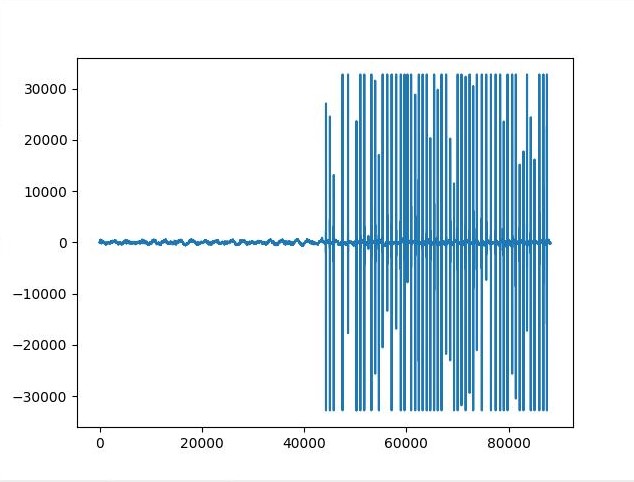
This graph displays how much clearer the input from the ICE microphone was in silence and how drastic the chage was when we tapped on the microphone.
The newer microphone was less choppy, more sensitive and had less noise the lab’s microphone.
Librosa’s librosa.beat.beat_track returns two things, a beat per minute estimate as well as an estimate of the times in the sound array when it thinks the beats are. We store both and use both to help the robot dance. The bpm estimate is stored along with the last 10 bpm’s estimated and then the mode out of all of them is used to produce the most accurate estimate. If two bpm’s are tied for the code, then the mean between the is used. Times of beats are used to make the robot dance on beat, which I will explain in the next section.