System Overview
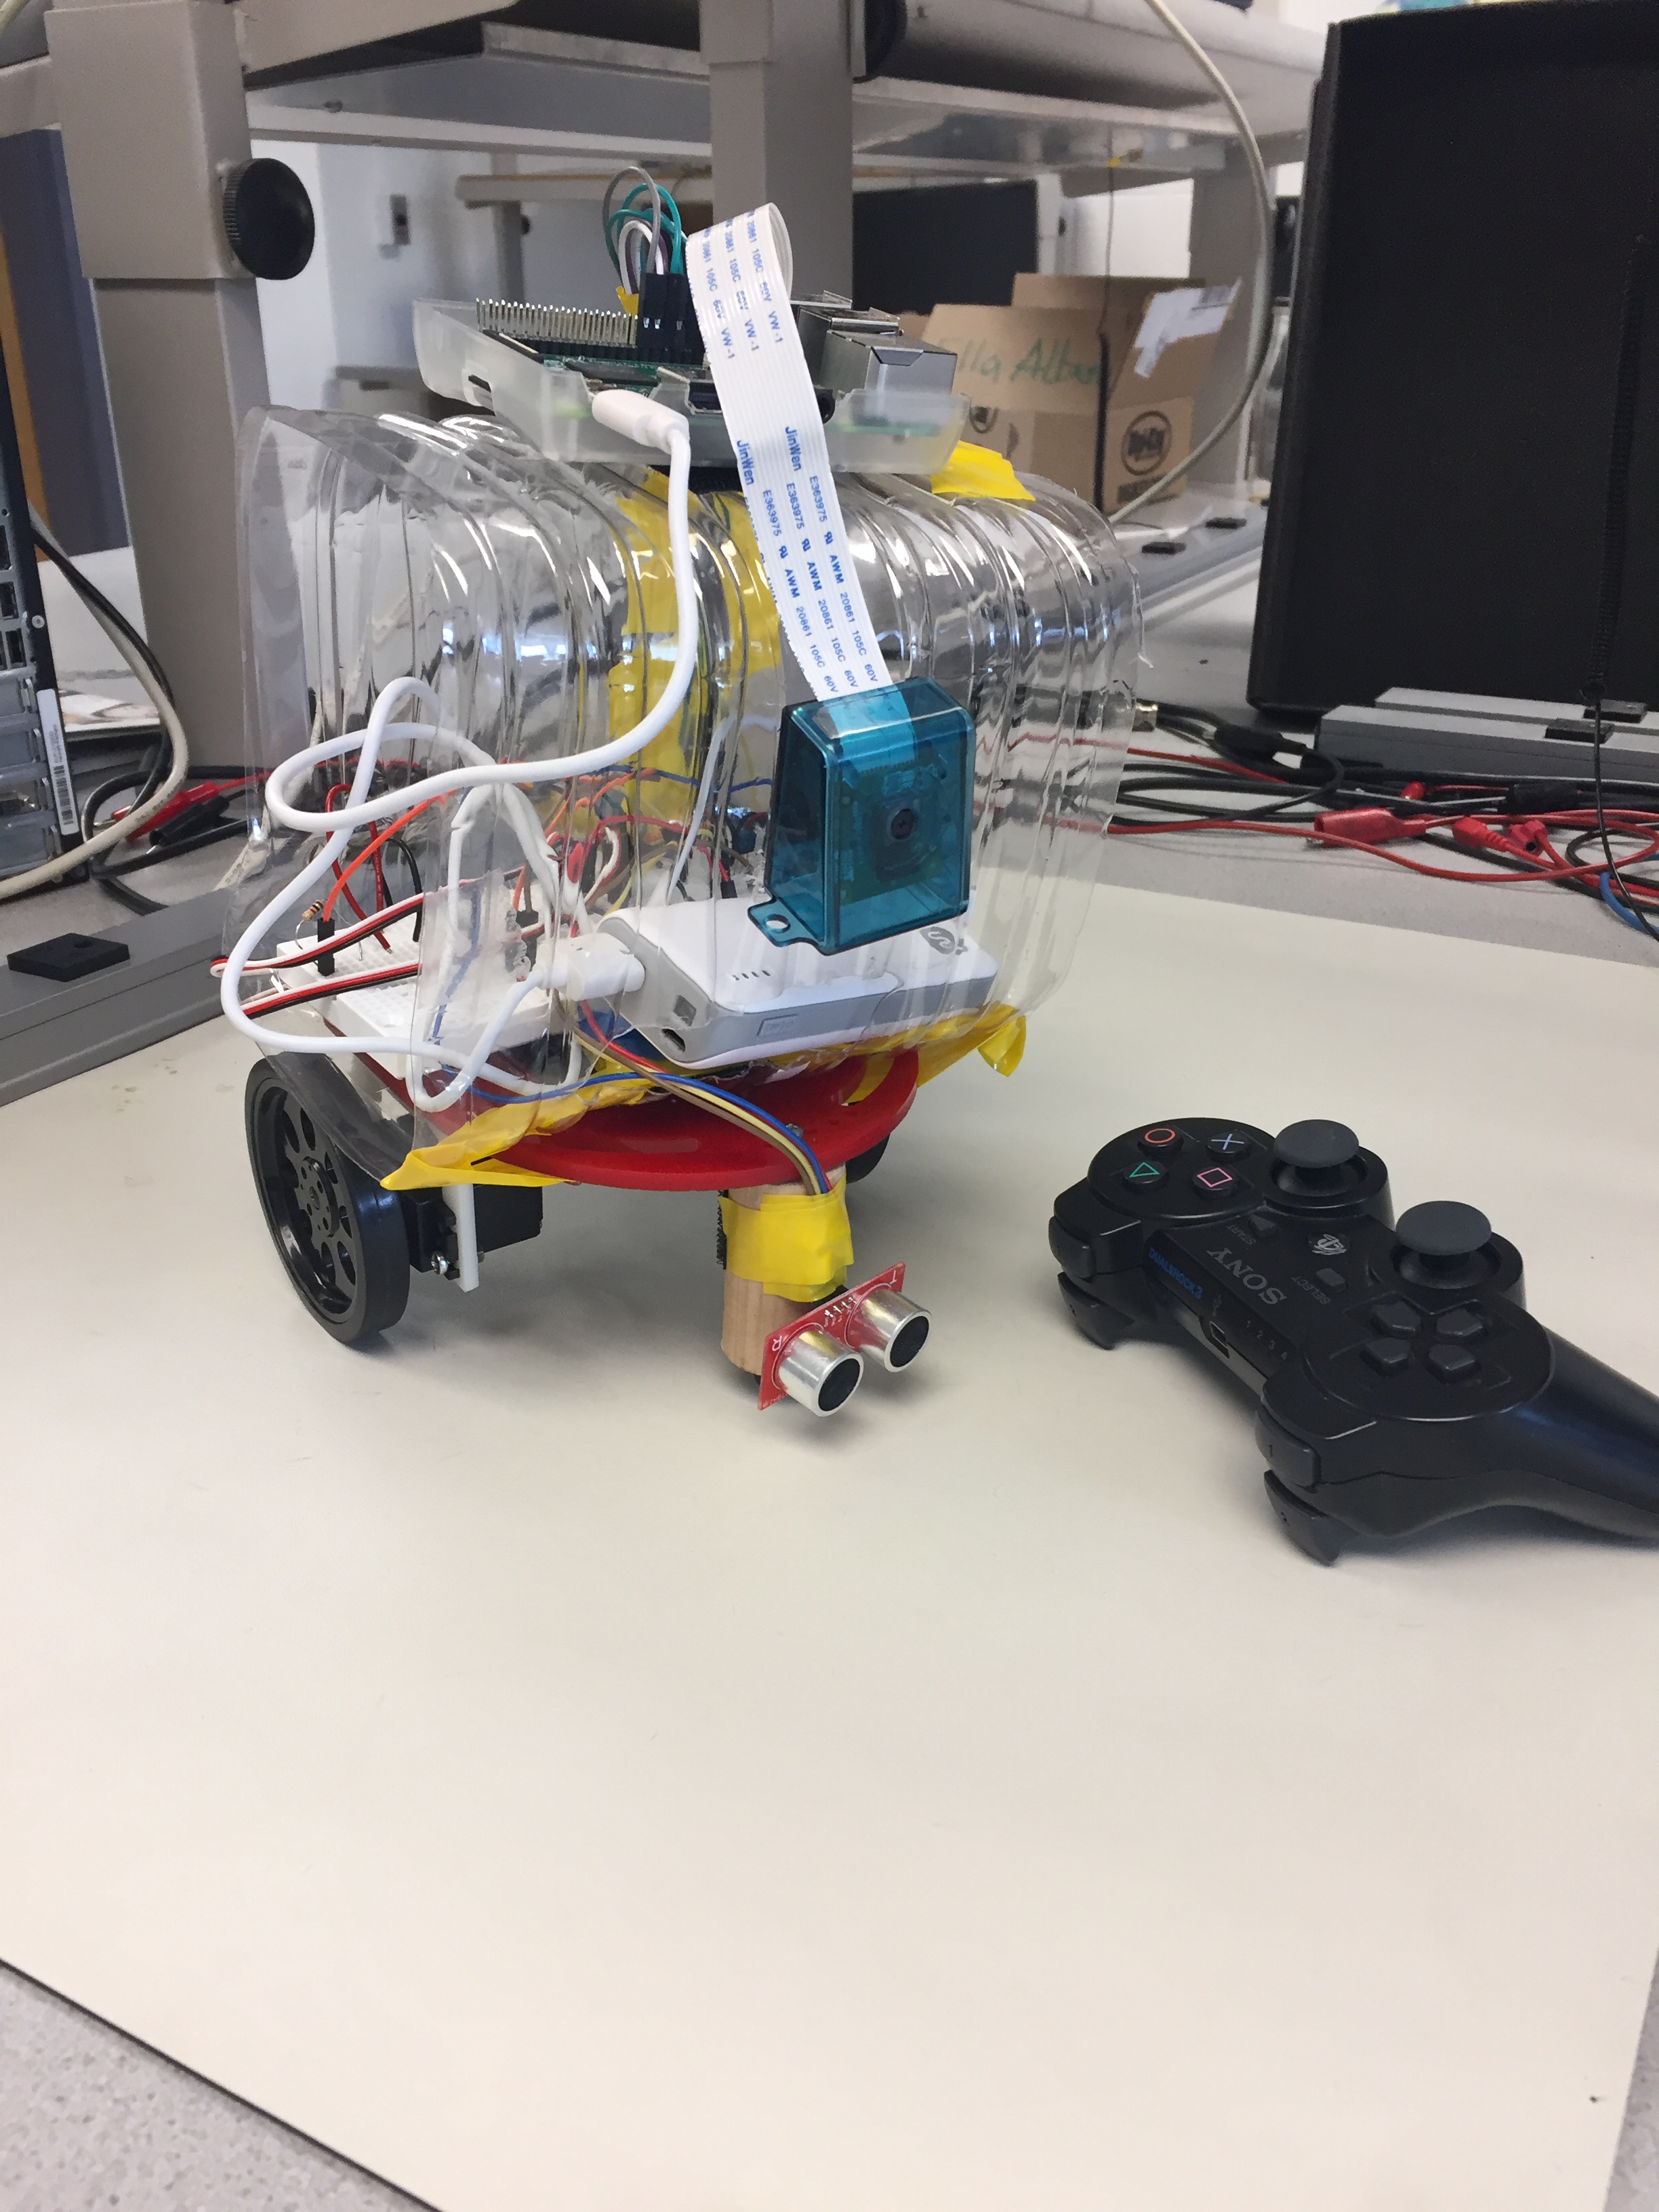


The goal of this project was to create a cleaning robot butler that could be controlled both manually and autonomously. The robot is manually controlled using a Sony Playstation 3 controller. To switch the robot into its autonomous cleaning mode, the user presses the select button on the controller.
In this project, a cleaning robot butler was successfully built. This project was inspired by ‘Rosie the robot maid’ from the popular children’s cartoon ‘The jetsons’. The cleaning robot butler had two modes: a manual mode and an autonomous mode. In the manual mode the robot was controlled using a Sony Playstation 3 controller connected to it via bluetooth, while During the autonomous cleaning mode, the robot utilized a Pi Camera as a tool for vision which allows the robot to see the environment. The robot observes any objects that fall in its line of vision and guides itself to the object. It then picks the object up and begins to move itself to a designated trash area. This project was done using a Raspberry Pi as the development platform, the program for this project was written using python and the python openCV module and the picamera module was used with the Raspberry Pi camera to achieve autonomous control. At the completion of every major step, we carried out tests to confirm that it worked appropriately before we proceeded.


The Raspberry Pi 3 served as the development platform for the robot. The Pi was used to connect all the other peripherals to each other and have them communicated with each other. The onboard bluetooth allowed us to connect the Playstation 3 controller to the Pi as an input device. The GPIO pins on the raspberry Pi were used to communicate with the two servo motors responsible for movement of the robot wheels, GPIO pins were also used to communicate with the sensor as well as the two motors responsible for controlling the arm of the robot. The raspberry Pi had a built in slot that was used to communicate with the Pi camera necessary for autonomous mode.

The Sony Playstation controller was used to communicate with the robot in manual mode. The decision to use a game controller came from Anthony’s desire to combine two of his personal interests together, video games and robotics. A Playstation controller in particular was chosen because of its ergonomic physical design. The playstation controller was interfaced with the Pi through a bluetooth connection as an input device. In order to achieve this we utilizes the Linux bluetooth configuration tool bluetoothctl. This allowed the Pi to become the Bluetooth master for the controller and so the controller could connect to the Pi after logging into the system by pressing the Playstation button in the center of the controller. In addition to pairing the controller, we had to the evdev library in order to use it with our python program. This library gives the ability to use linux input devices in Python code.
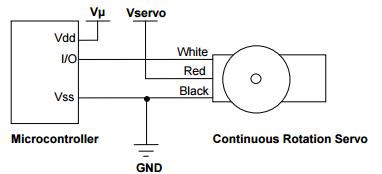
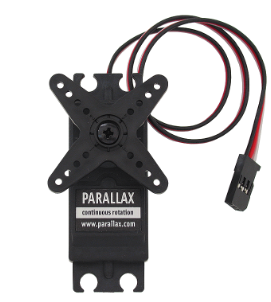
Two continuous servo motors were used for to move the wheels of the robot. We used the functions developed in Lab 3 of ECE 5725 to operate the servos. The servos were connected to the GPIO of the RPi using 1k resistors. The basic circuit diagram is shown below.
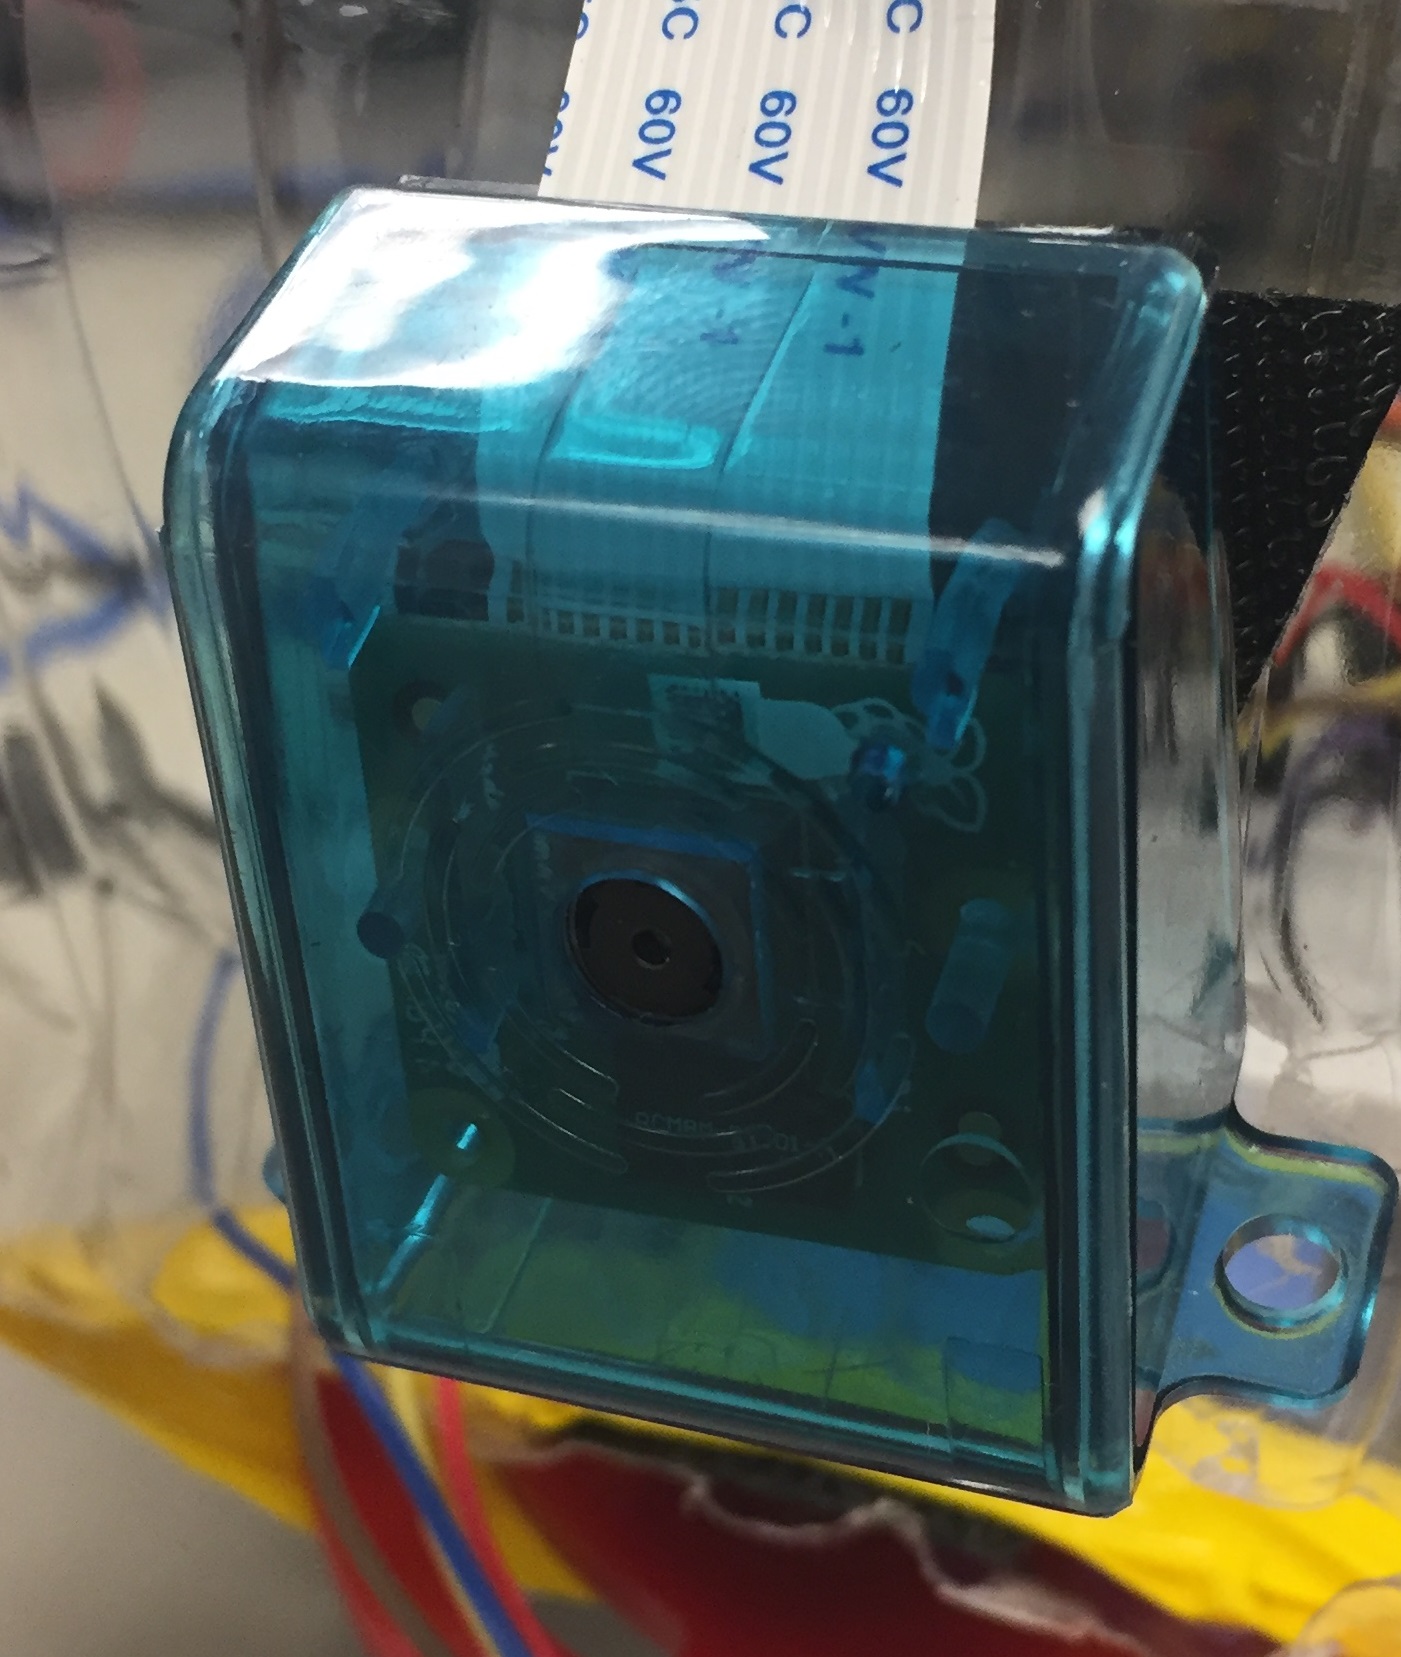
The Pi Camera was an essential piece of the project. It was the basis for vision of our robot during its autonomous cleaning mode. It was connected to the Pi through the specified camera slot on the board. After physically installing the camera, we had to enable the camera functionality on the Pi in order to interface with it in our code.
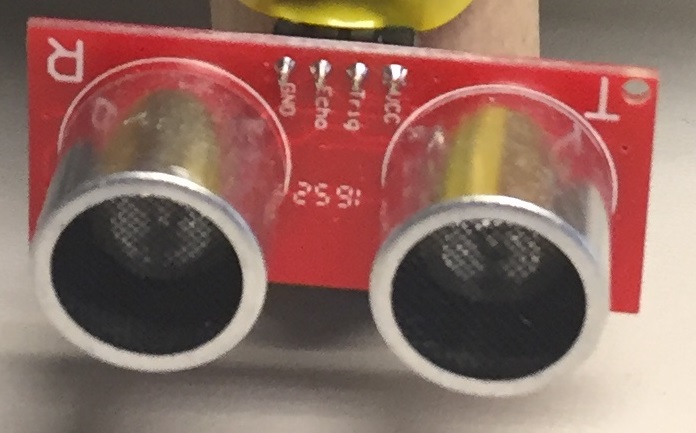
The ultrasonic sensor is another piece of hardware that was needed for the autonomous cleaning mode. The sensor was used to detect the robot’s distance from objects and walls in order to determine when the robot was close enough to an object to stop moving and grab it. It was placed on the lower part of the robot and was centered so it could detect when objects were directly in front of it. This was a design decision made to make grabbing objects with the robot arm much easier.
The USB power bank was used to power to Raspberry Pi. By using this, the robot's movement was not restricted by the typically power supply cable.
The robot arm was controlled by two small 180 degree servo motors. Both motors were connected to two GPIO pins. One motor controlled the opening and closing of the claw, while the other motor initially controlled the arms wrist motion. We made a decision, based on a recommendation by Professor Skovira, to take that motor, alter the arm and use that motor for a shoulder joint rather than a wrist joint. This would allow the arm to move up and down rather than just rotate it.

In this section, we discuss the design of the software for the autonomous and manual mode.
The manual mode of the robot is the starting point of the program. This mode means the robot takes input from the Playstation 3 Controller. It starts with opening a Linux input device using the function InputDevice(). The function takes a string to the path of the desired input device. This function is accessible due to the evdev library. Before talking about how we use the data from the controller, we must discuss how event data is sent from the controller. Input events are read as a struct, with attributes for time of the event, code of the event, the value of the event and the type of the event. As we were not concerned with the time the events happened, we didn’t need to use that information. Buttons are grouped together by event type. Each button has its own unique event code, and their own range of possible values. To actually use input values from the controller we use an endless loop using the read_loop() to poll for events read from the controller. In our code we use lots of condition statements to block out receiving input values from buttons we won’t be using, to avoid any potential mishap with using the robot. For example, the playstation 3 controller has a 3 axis accelerometer and a 3 axis gyroscope but we don’t want to use those values for controlling the robot. So we make sure to block out the event codes corresponding to those values when polling for input. After our code makes it past all of the input checking, we use a series of if and elif statements to determine what motion the robot should make base on the event code that is read, and the values that are being passed. We use the left analog stick to send information to the robot telling it whether to move forward or backward, which would call the forward or backward motor functions. We used the right analog stick to tell the robot whether it should pivot left or pivot right, which would then call the appropriate turn left or right function. If a value is sent that has the same event code as the left or right analog sticks but the values are outside of the directional thresholds, the robot knows it’s not supposed to be moving. After checking for movement info, we check for button input, once again dictated by event code and values. We check to see if the start button is pressed, if so the robot goes into stop mode, which doesn’t allow any other input to affect the robot until the start button is pressed again, leaving stop mode. Checking to see if the select button on the robot is pressed makes the robot go into autonomous cleaning mode which will be explained in more detail below. Finally we check to see if the Playstation button is pressed and if so, the entire program quits.
There autonomous mode of the robot has several major components. We will explain each in detail below in order of execution.
The Raspberry Pi camera was used with the Python PiCamera and OpenCV modules. When the program is run, each frame is compared with the previous frame. Achieving accurate results from this comparison was initially quite difficult and so we used a very elaborate means described in stages in below.
Convert the frame to an array.
Change the frame color format from bgr to gray format using openCv BGR2GRAY function.
Get the absolute difference between the current frame and the previous frame in gray formats using openCV absdiff function.
Get the threshold of the absolute difference using OpenCV threshold function.
Compute the norm of the current threshold calculated and the previous threshold calculated.
Calculate the absolute difference between the two norms in step 5. If this value is 0, no change occurred , if it is greater than zero, then a change occurred in the frame and the program proceeds to the next stage.
When the robot detects that a change occurs, it waits till the frames stop changing before it computes the coordinates to move to. This was done to ensure the robot moves in the right direction, as when an object is thrown, it moves for a while before becoming static.
If a change was detected, once again the robot computes the absolute difference of the norm of the current threshold and previous threshold. In this case, if the norm is greater than zero, it does nothing, when the norm is zero, it means the new object is now static and it proceeds to step 9.
In step 9, the current frame is then compared with the initial frame at the start of the camera in autonomous mode. This is done to get the absolute to change in frame to detect the exact position of the object that was thrown the environment the robot is in charge of.
Next the threshold computed from the absolute difference of the current frame and the first frame is passed into the openCV edge detection mode called canny in order to get the edges of the new object.
In the next stage, we compute the contours of the frame resulting from the canny function using the openCV findContours functions.
The maximum contour is then computed and used to get the centroid of the object. When the centroid is computed a red cross bow is drawn at the center of the object.
After computing the centroid of the object, we use a function to centralize the robot with the centroid. During the centering stage, we used color filters to ensure that the robot was being centralized with the right object. This was done as we could not use the comparing method in this stage. Due to the fact that the robot was moving, comparing frames would not give accurate result. The centering algorithm is described in a section below. When the robot has been centralised, it then calls the motor function responsible for moving it in the forward direction. After sometime, if the robot has not reached the object, it re-centralizes itself using the current computed centroid of the object and proceeds.
When it gets to the object, it stops , updates the variable that tracks this occurrence , moves backwards and then proceeds to the section responsible for detecting the thrash area.
In order to center and recenter the centroid without getting inaccurate results when re-calculating the centroid (We could not compare previous frame with current frame as the robot was no longer stationary), we used a complex filtering method and then used a function to compare the center of the frame with the centroid. The steps are described below.
Convert the color format of the current frame from bgr format to hsv format.
Split the hsv colored frame into its three components - hue, saturation and value using the openCV split function.
Next, a threshold is calculated using the saturation component. The threshold function basically converts the image passed into it into two values, if the pixel values are below a value, it assigns it one color, if greater, it assigns the pixels a different color. Using this method, we were able to focus the robot on just the object detected (This worked because we were using an ideal universe in which everything was the same color except the new object).
Next, we blur the resulting threshold image and use the image that results from it to get the contours.
When we get the contours we get the maximum contour and calculate the centroid as discussed above.
We also calculate the area using the maximum contour and openCV contourArea function.
Next if the area calculated is less than a value, we center the robot. We use this bound on the area as if no object is present, we observed areas that gave very large values were still calculated.
In order to centralize the robot, we compare the centroid of the object with the center of the size of the window used for the robot and then based on decide, the program decides whether to move the robot left or right.
We made use of parallax continuous rotation servo motors in order to use these motors. The motors were controlled using Python and the Python RPi.GPIO module, GPIO pins 5 and 6 were setup for to move the motors for the wheels. These motors were controlled using pwm values specified in the datasheet, pwm value of 0.0014 was used to move the motors in the clockwise direction and pwm values of 0.0016 were used to move the motors in the counterclockwise direction. A duty cycle was then calculated using a the pwm value a frequency of 50, next the changedutycycle function was used to change the duty cycle of the motor. We had functions responsible for moving the motors forward, backward, left and right.
In order to move the robot forward, we moved the left motor in the clockwise direction and the right motor in the counterclockwise direction.
In order to move the robot backward, we moved the right motor in the clockwise direction and the left motor in the counterclockwise direction.
In order to move the robot in the left direction, we moved both motors in the clockwise direction.
In order to move the robot in the right direction, we moved both motors in the counterclockwise direction.
Depending on the stage the program was at in the detection algorithm, it called the appropriate move functions.
In order to make the robot stop whenever it reaches its desired destination, whether that is an object or the trash area, we used the ultrasonic sensor to detect the distance between the sensor and the destination. The distance detection function first starts off with sending the sensor a 10 microsecond burst, by setting the trigger pin high and low, to begin sensing. The duration of the pulse is calculated by subtracting the last time right before the return signal is received by the time the signal is actually received by the sensor. We then multiply the value of the pulse duration by 17150 which gives us the distance in centimeters between the sensor and object in question. Finally we round the distance two decimal places. We then use this distance value to determine we should tell the robot to call the immediate stop function. For us, we decided to use a threshold value of 7 centimeters to determine whether it should stop or not.
After picking the object, the robot moves back for some time, it then spins around on its axis until it detect an area with a green dot. When it detects this area, it moves towards it and stops when it gets to the appropriate location. This part was done using color detection and so it was not as complex as the objecting detecting algorithm described above. The algorithm we used to achieve color detection is described below .
Define an upper and lower hsv range for green color.
Convert the color format of the frame from bgr format to hsv format using the openCV cvtColor and COLOR_BGR2HSV functions.
Create a mask using the ranges defined and the converted hsv frame format using the cv2.inRange function.
Pass the mask through the openCV erode and dilate functions to make the results more accurate.
Next use the findContours function to get compute the contours of the green object.
Compute the centroid as described in the detection algorithm.
Due to the fact that we took a modular and incremental development approach to building this robot we tested each individual aspect separately.
We started by determining if we could correctly parse information sent from the controller into different function calls.We started this by determining all of the possible event codes, types and values and figuring out what was relevant to our needs. We wrote a simple code that ran an endless for loop and printed out event codes, values and types. We then made note of what was associated with both analog sticks, the start, select and Playstation buttons. After having a list of all the different event types and codes, we were able to write input validation checks to block out any unnecessary input data from the controller. After that, we began to test the values of the of each button. Every button has a value of 1 when it is pressed and 0 when it is released. The analog sticks have values that range from 0 to 255. After finding this out, we used trial and error to find the perfect threshold values for determining when a directional function should be called. As we weren’t interfacing with the robot at this time we used print statements to determine what direction the robot would be moving in.
When testing the sensor we broke it up into two parts. The first part involved testing to see if we could read data from the sensor and use it in the code. After setting up the hardware and writing the simple code, we tested the sensor by putting different objects in front of it and seeing if the distance value printed changed accordingly. Once we confirmed that the distance detected was accurate, we wrote another simple code. This time we took our previous distance sensing code and added some motor control functions. After fastening the sensor to the robot we altered the logic of our previous code. We first start off with the robot moving forward, constantly checking the distance between the sensor and an object every 1/10 of a second to check to see if the distance sensed between the robot and an object was less than a certain value, to stop the robot. This ended up working rather quickly but we changed the threshold value a number of times to determine what distance would work best to account for the need for the robot to stop and not run into it and for the arm to pick up the object.
While testing the robot arm, we wrote simple code to alter the pulse width values for the motors needed to open and close the claw and move the shoulder joint up and down. Finding the correct values to raise and lower the arms, as well as how wide to open and close the claw came from trial and error when running the code. Eventually we found the perfect values to fit the needs and design specification of our robot. There was no real need to test how to move the robot because we took our motor control functions and code from Lab 3.
After installing the camera, we tested that the camera operated correctly by running a simple script that used the camera. When we completed the section of the code that recentered the robot based on the centroid, we tested to see its operation. During this testing, all bugs found were fixed. On completing the part of the code that drew the red crossbow, once again we tested by running the code and throwing an object in the environment the robot monitored, when we confirmed the crossbow was tested, we proceeded. We also tested the green color detection code responsible for detecting the thrash area in this way.
The robot was able to achieve most of the goals we set out to achieve. We successfully controlled the robot manually and autonomously. In autonomous mode, we got the robot to automatically detect an object that was thrown in its environment, move towards it, stop when it gets to the object, move backwards and then search for a designated trash location and move towards it. Unfortunately, we unable to get the grabber part of the robot to function properly, we were also unable to get the robot to switch continuously between manual control to autonomous and vice versa, and seek out more objects to clean up. Although we are able to go from manual to autonomous at any time, going from from autonomous to manual at any time proved to be extremely difficult. While we were successful in making it continuously seek out new objects after moving one to the trash area, we were unable to make it stop this process after all objects were moved. As a result of this we weren’t able to move back into manual control mode.Currently our robot switches back to manual control only once it is done with its autonomous cleaning mode. We will go into detail about the problems we encountered in the section below.
As one can imagine, trying to create a robot that not only receives input data from an external source but moves autonomously, we encountered a myriad of issues along the way.
Because the Playstation 3 controller has an accelerometer and gyroscope, initially trying to find out the values of each button was difficult. We were bombarded with numerous print statements from our test code taking values based on the changes in motion of the controller. The solution to this issue involved us running the code a handful of times and try to see all of the different event codes that may have been associated with the motion of the controller and write validation checking statements to them out. After repeating this process we were able to get rid of all of the accelerometer readings and only focus on the buttons and analog stick outputs.
When trying to map the position of the analog sticks to the movement of the robot, we ran into a problem. Initially we tried to make the entire control of the happen with one analog stick, much like how it would be to play video game. However, this proved to be difficult as the movement of the robot didn’t always correspond correctly to the specific threshold values of the directional functions. First we tried to splitting direction calling functions by using separate event codes. Each analog stick had 2 event codes associated with them, however they read data differently. For example, the left analog stick has event codes 0 and 1; the position of the analog stick under event code 0, might read at 237 but under event code 1 might read at 79. Because there was no way to determine how the code would read the event codes there was no way to figure out how to use split the movement of the robot amongst the varying event codes and associated position values. However, using the idea of splitting the movement functions up, we decided to keep forward and backward movement limited to the left analog stick and the turning functions limited to the right analog stick. We also decided to block out one of the two event codes associated with each of the analog sticks, to prevent any wrong value readings.
The robot arm was probably the source of the most frustration during this project. As shown in our demo video, there is no arm attached. We ran into numerous issues not only trying to move the arm, but keeping it sturdy enough on the robot, and how to utilize it to do its required function
After assembling the arm, we began to wire up the arm to the GPIOs on the Raspberry Pi. We were initially unable to move the arm. Due to a slight overview when looking at the data sheet for the motors, we realized that we needed not only 5 volts to power the motors, but the signal also needed to be 5 volts. Because the Pi outs 3.3 volts from the GPIOs we needed to use a quadruple bus buffer gate to up the voltage of our signal. This allowed us to move the robot arm.
The arm as shipped does not support raising and lowering, which is a feature we needed to move objects to the the trash area. So we had to take parts of the grabber apart and use taped together coffee stirrers to make a make shift arm to connect to the grabber. We then had to connect the back end of this coffee stirrer arm to the motor that was originally used for the wrist movement to be used for the new shoulder joint to give us up and down motion.
Trying to find a way to make our redesigned arm sturdy enough to move on our robot chassis was also difficult, because of the lack of size we had available and the awkward position we needed to place the motor in for the raising and lowering motion to work to our needs. We eventually utilized lots of electrical tape to hold the motor down and altered the pulse width values of the motor to allow us to place it on its side and still be able to lift and drop.
The final issue was that we blew out the motors needed to grab and lift the arm. We eventually realized that although we needed the quadruple bus buffer to up the voltage of our signal, we needed to be 5 volts, not 6 volts which is what we were passing into it. We were using a 5 volt regulator to limit the direct power to the motor but w didn’t realize we were passing in a signal voltage of 6 volts until we had blown the motors. Because we had blown both motors there was no was to fix this non working arm, which caused us not be able to meet all the project specifications.
Switching between manual and autonomous mode was easy to implement. However making the change in the opposite direction proved to be much harder than anticipated. Due to time constraints when we discovered this issue we were unable to take steps needed to fix this issue. The issue stemmed from not being able to use input from the controller during the autonomous function call. However, after thinking about the problem, we believe we could have solved this by placing an event reading loop within our autonomous function, so while it ran we could still pass in data from the controller and stop the function at any time, which would promptly go back to pure manual mode.
As an addition to the issue above we were unable to go from autonomous mode to manual mode until the autonomous function was done. We ran the function alone numerous times and we were able to make the robot move to new objects as they were placed in its line of view but because the function would just repeat over and over and we had no way of getting out of it, we decided for the sake of the demo we would make it stop after one complete iteration of the autonomous function.
We successfully designed a robot with manual and autonomous control. In manual mode we were able to control the robot using a sony playstation controller that communicated with robot using bluetooth, the controller could be used to switch the robot to autonomous mode. In autonomous mode we successfully got the robot to respond when it observed a change in the environment it was responsible for keeping clean, we got the robot to move to the area where the object was and then spin around looking for a thrash area designated by green. Initially, we tried using mean shift algorithm but this did not work effectively for our purpose. Overall we successfully completed a proof of concept for a trash collecting robot.
Although the robot butler performed most of the functions we set out to perform, this robot can definitely be improved upon. Some improvements that could be done on this project include the following.
Make the robot suitable for a non ideal everyday environment
Work on getting the grabber arm of the robot to work appropriately.
Work on switching between manual and autonomous mode continuously without having to restart the code.
Get the robot to identify the word trash and move towards it instead of using color to designate the trash area.
Work on a better frame for the body of the robot.
We are grateful to Professor Joseph Skovira for the opportunity to carry out this project and his constant willingness to help us overcome our challenges. We are also grateful to the TAs, Jacob George, Stephen (Dongze) Yue and Brendon Jackson for their help in the course of this project.
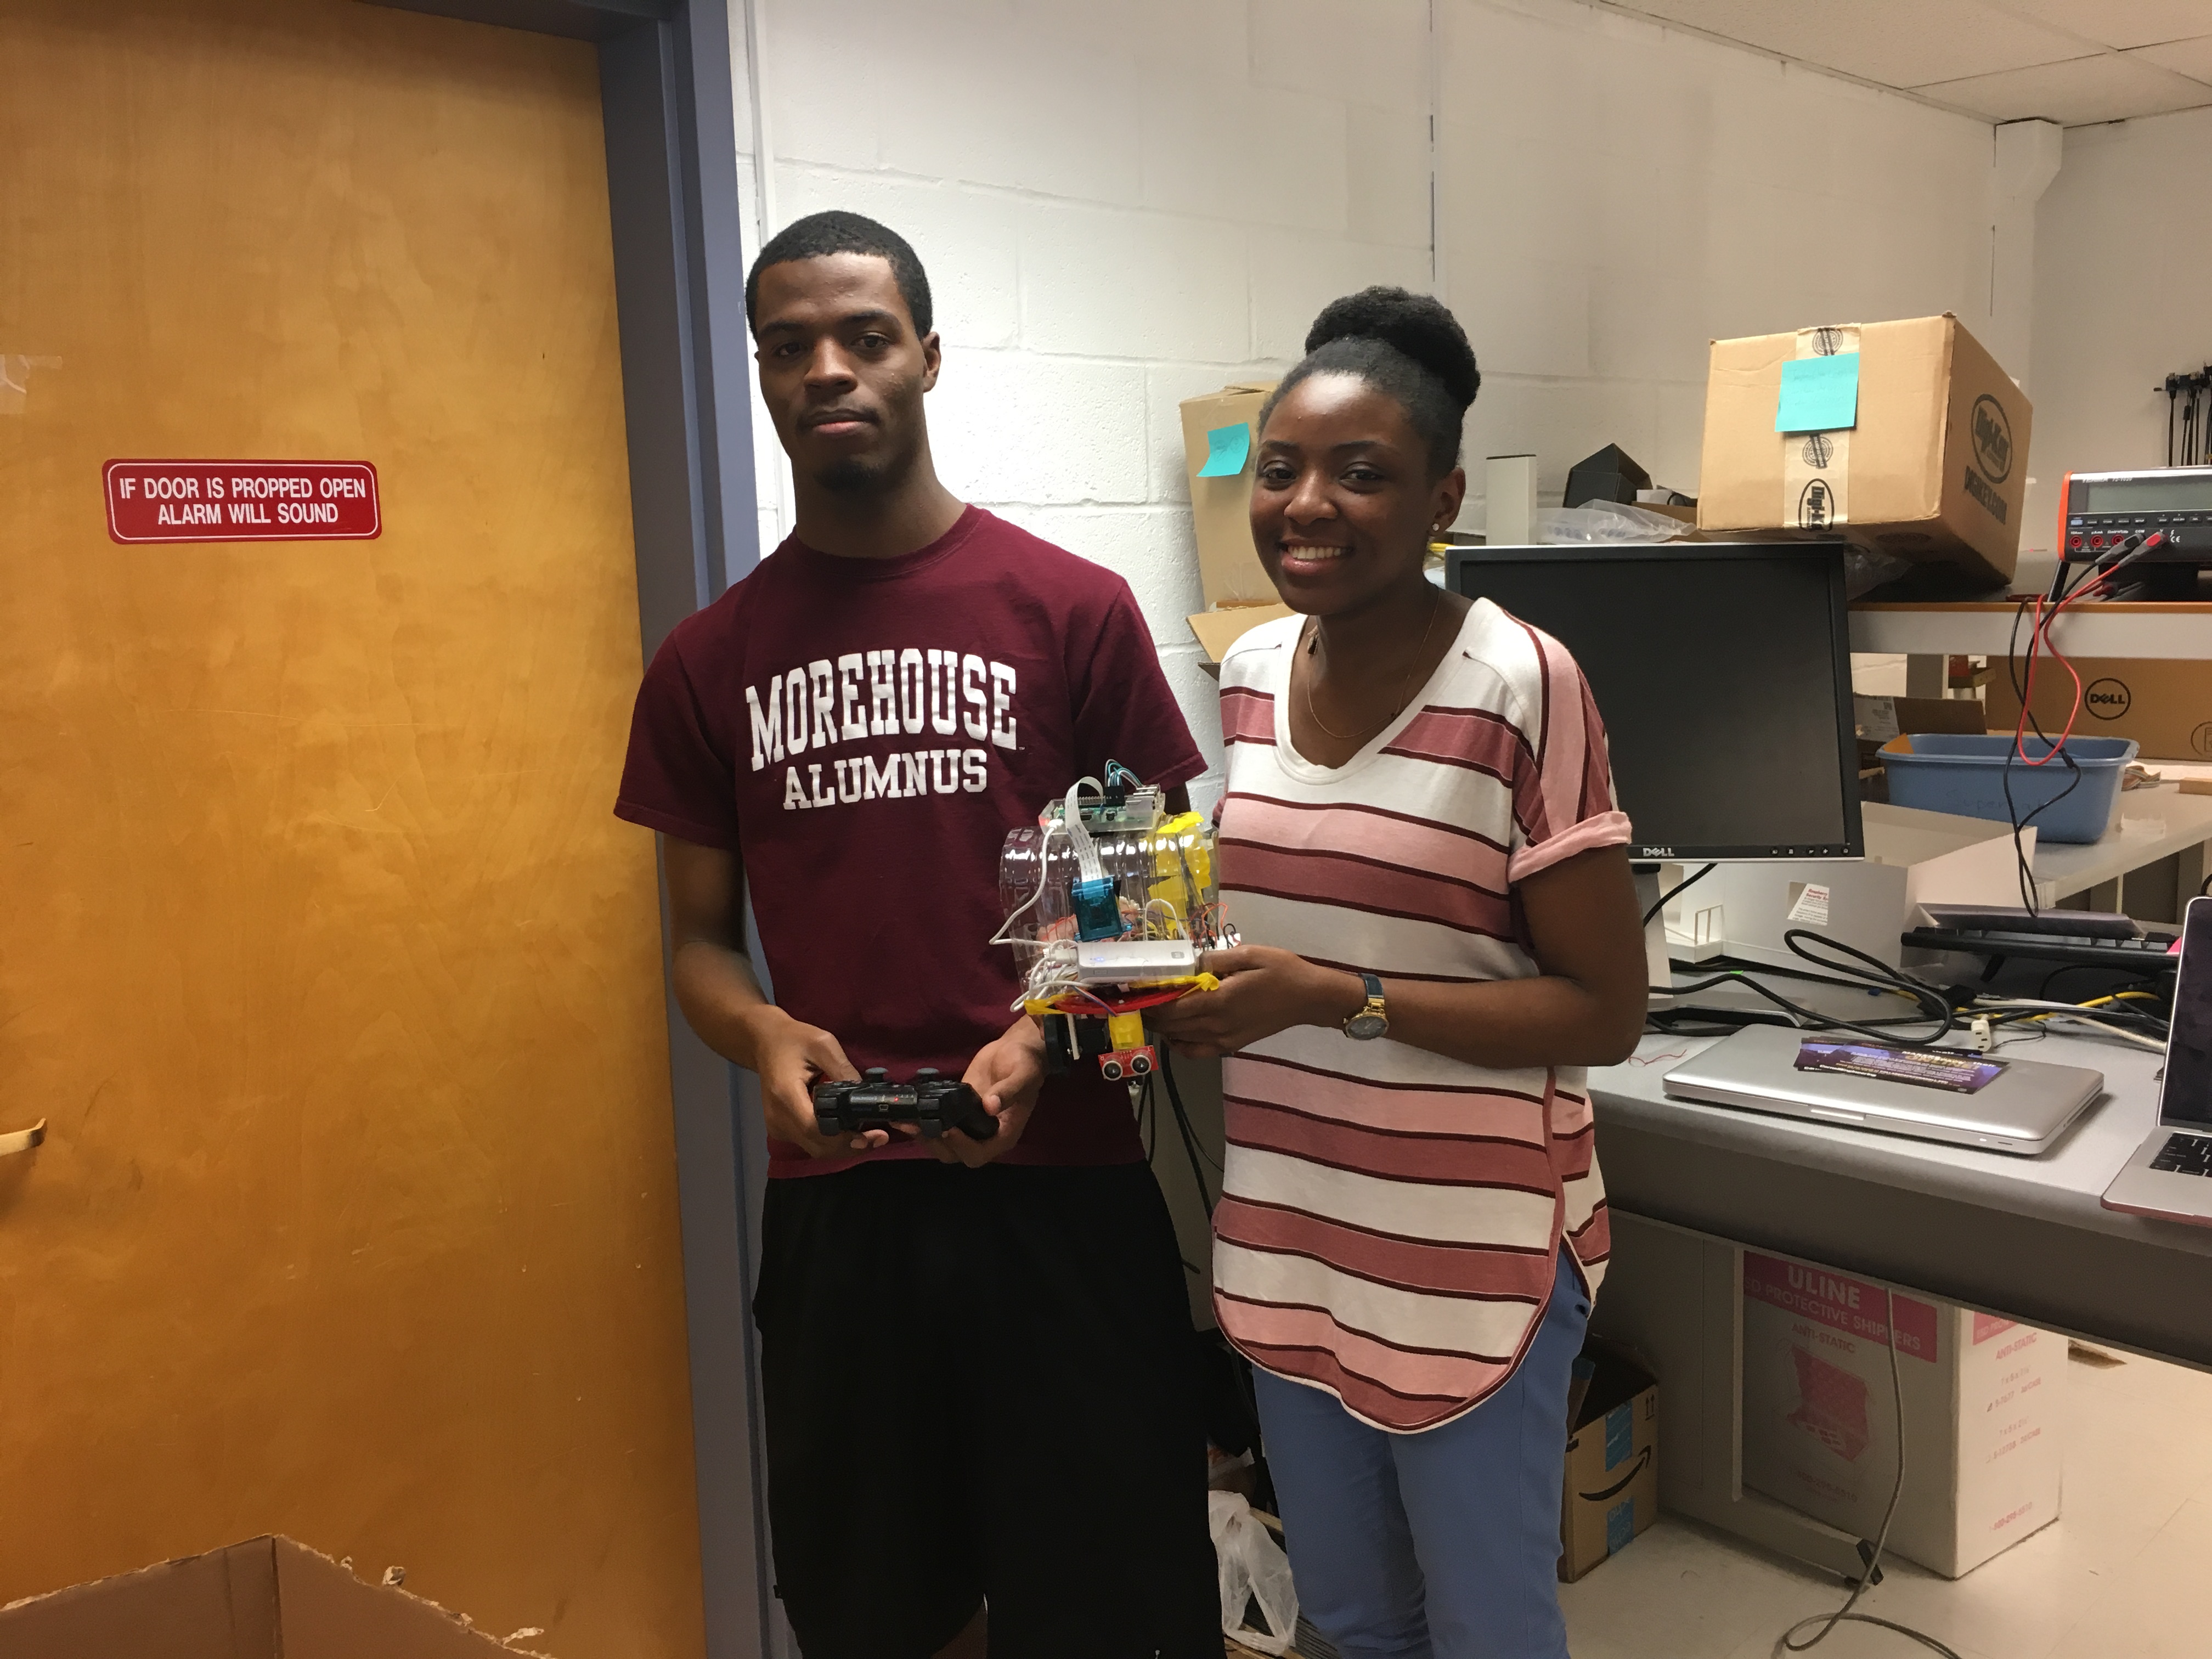
Manual control of robot using the Playstation controller.
Working on arm functionality.
Interfacing sensor with robot.
Writing of report.
Website development
Autonomous control of robot.
Robot response and movement to objects thrown into environment.
Getting the robot to place the object in a designated location.
Writing of report.
Raspberry Pi camera: $29
Raspberry Pi camera case: $6
Ultrasonic sensor: $10
Resistors and wires - provided in the lab
Voltage Regulator - provided in the lab
Playstation 3 Controller - belongs to Anthony
Breadboard - belongs to Anthony