ECE5725 Pet Robot Project
By Ziyan Wang(zw627) Peicheng Lu(pl568)
Demonstration Video
Introduction
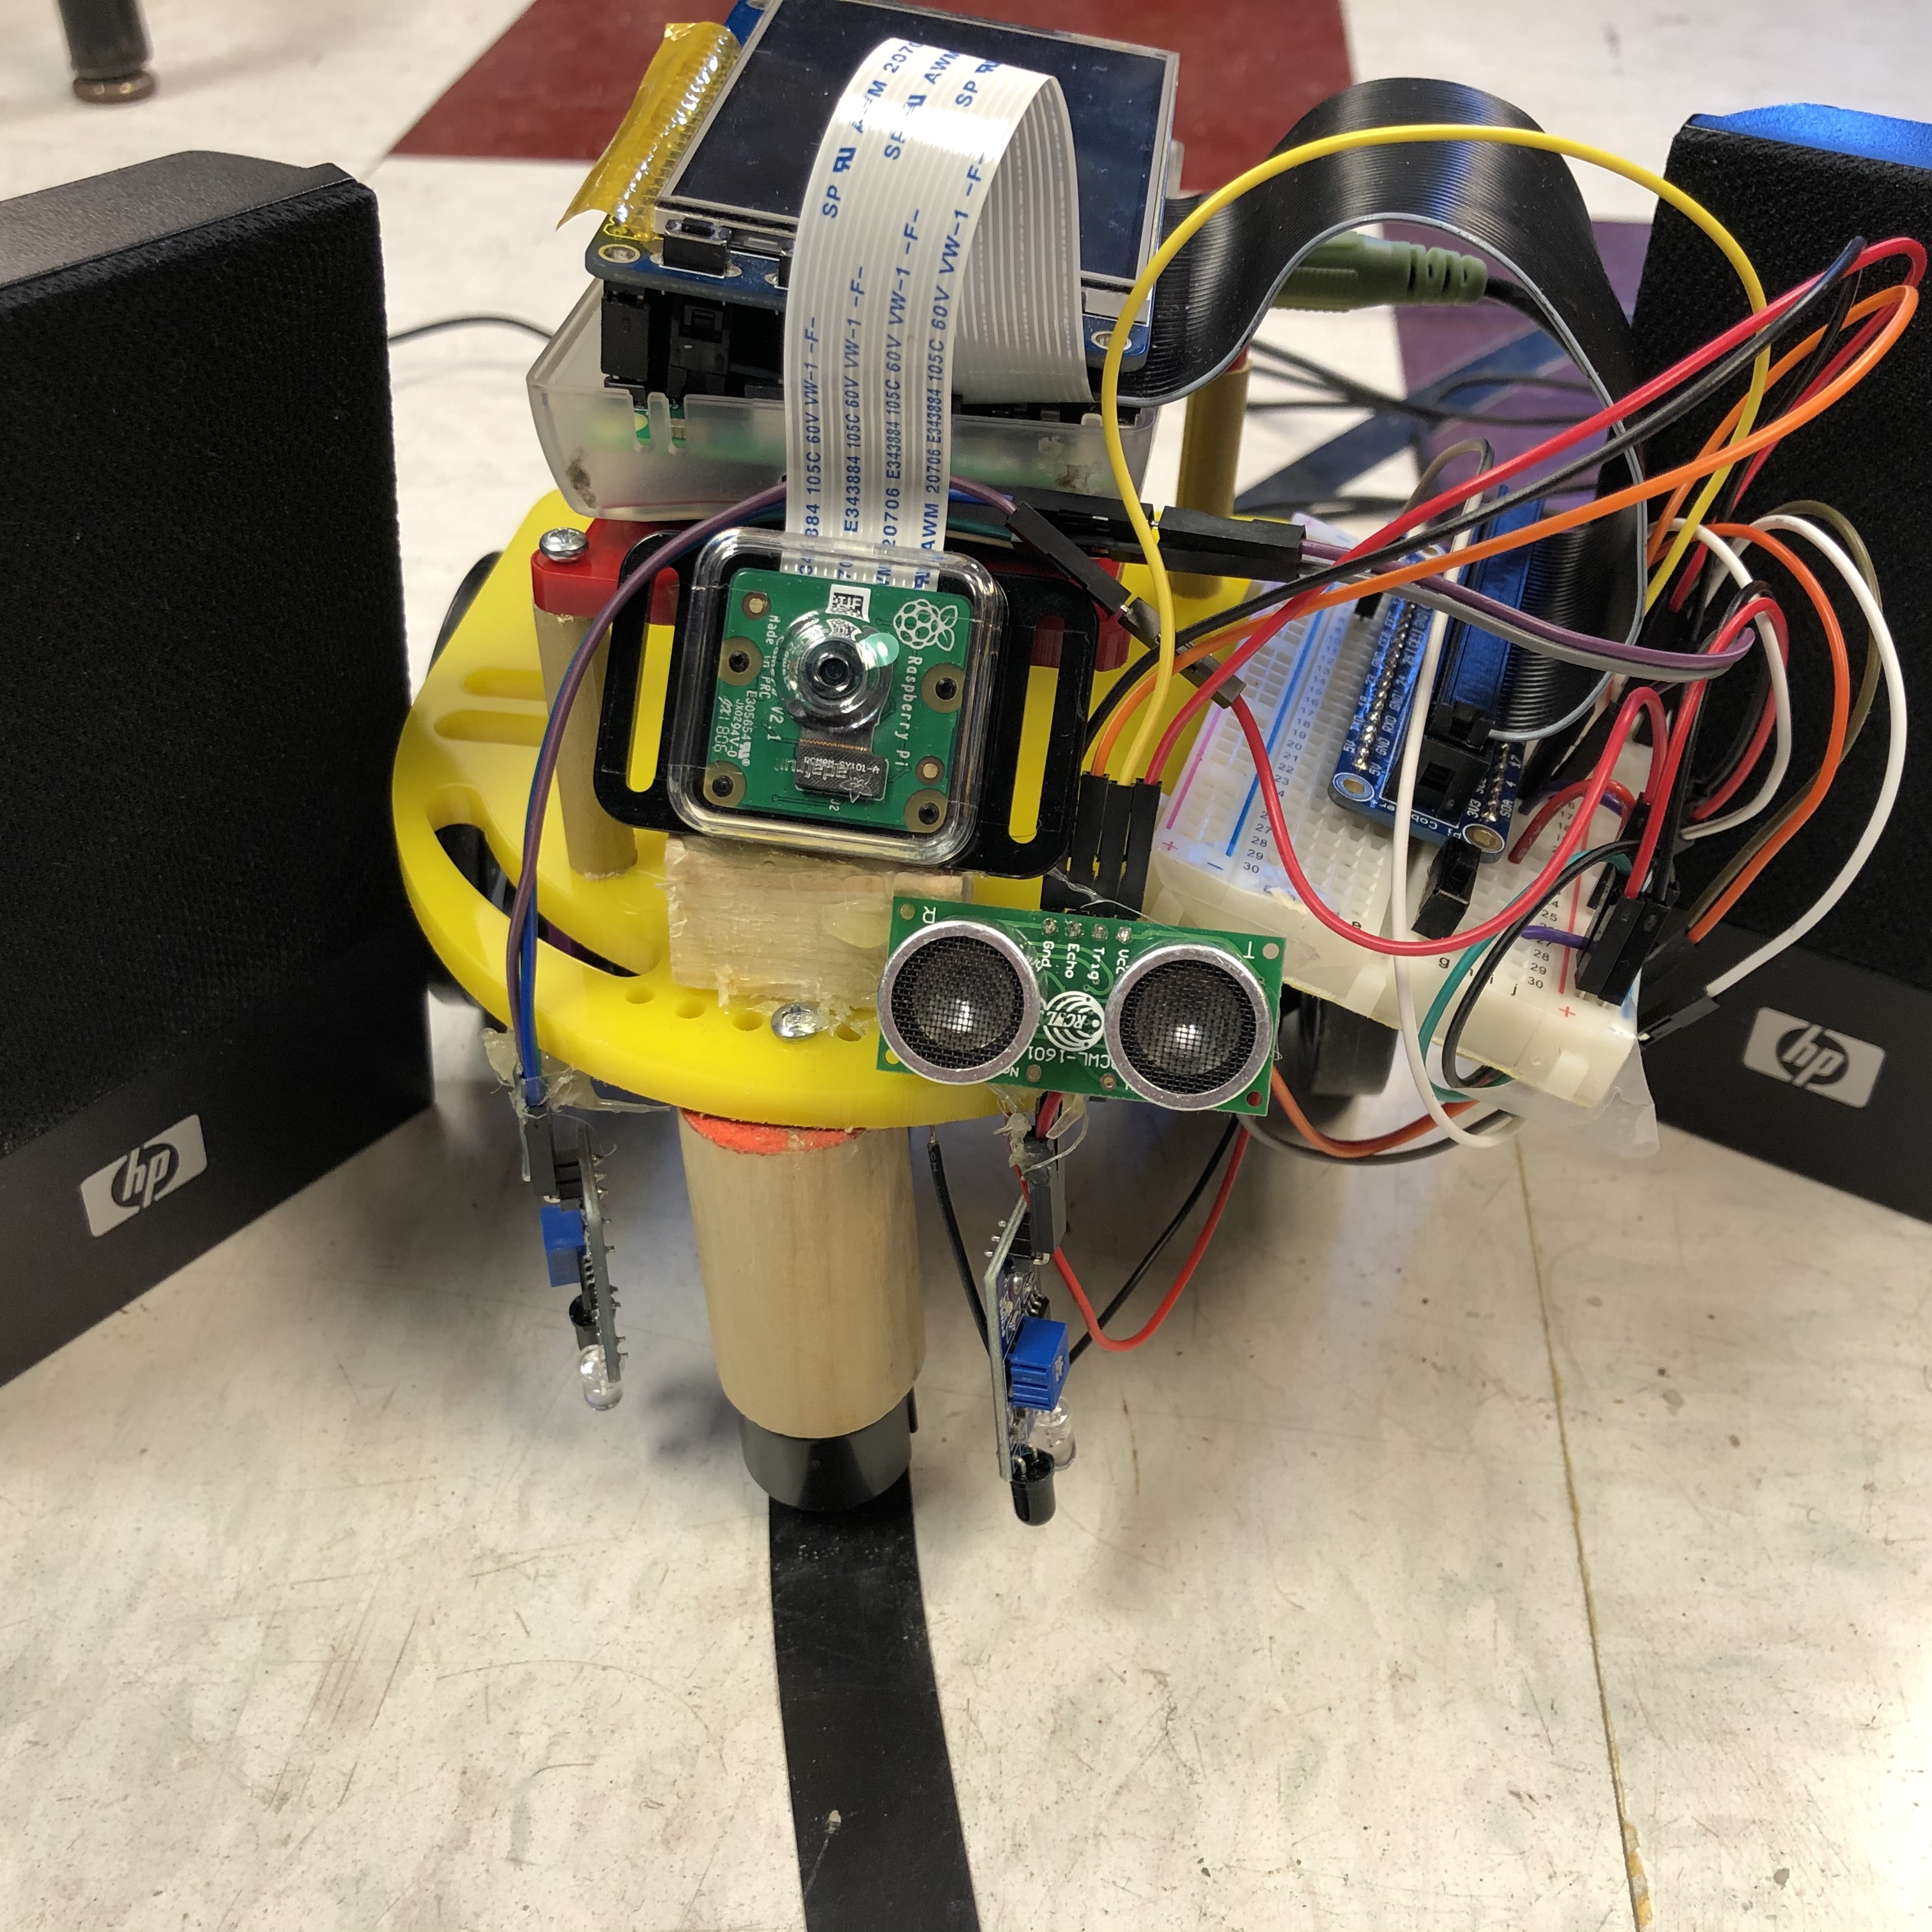
The robot can move accross the room following the line on the floor. It will use ultrasound sensor to detect obstacles. After an obstacle is detected, the robot starts to detect human faces and the red-light blinks on the PiTFT. When it finds someone, it moves right opposite to him or her and begins face recognition. If the person is known, a hello sound will be played. Also, it can move toward someone and keep a distance. This is achieved by adjusting the size or position of the frame in the image of human faces.
Project Objective:
In this project, we aimed to design a pet robot with following functions:
- Obstacle detection and corresponding PiTFT control.
- Line following.
- Facial detection and corresponding control.
- Face recognition with speech facility.
Design and Testing
Obstacle detection
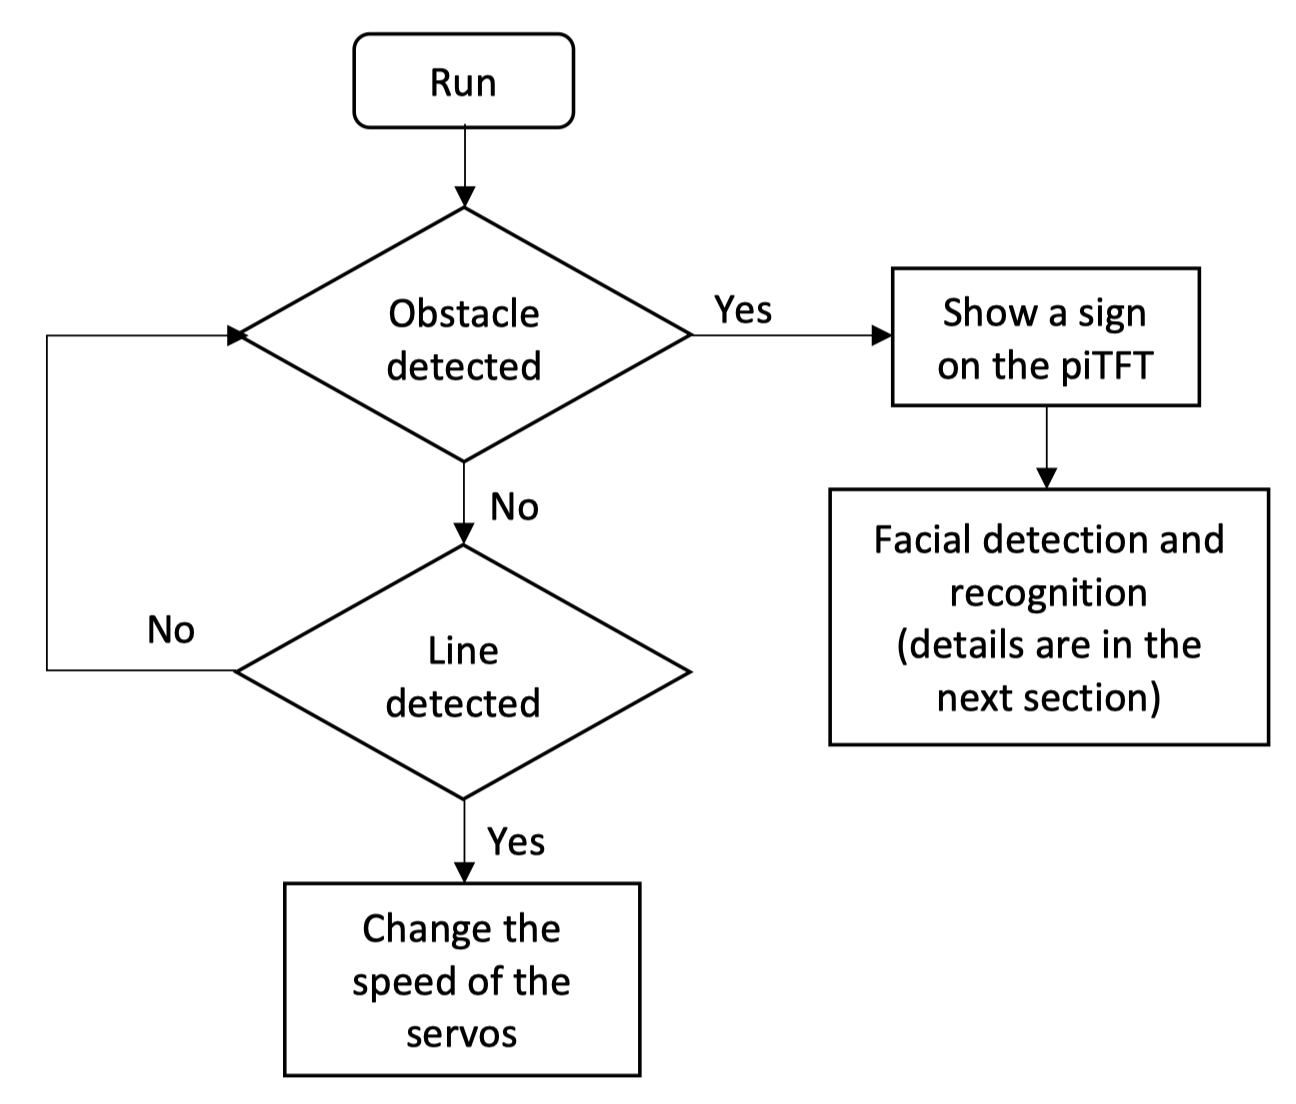
Flow Chart for Obstacle Detecting and Line Following Part
To detect the distance, we use ultrasound sensor (HC-SR04) as part of the project. The ultrasound sensors are designed to sense object proximity or range using ultrasound reflection, which is inaudible to the human ear and is relatively accurate within short distance. There are four pins on the sensor: GND, ECHO, TRIG and VCC. We give the TRIG pin a 150 us pulse to trigger the sensor. We chose GPIO17 on the Raspberry Pi as the output mode. After it output a high digital signal, the program will run to the sleep ( ) function to control the width of the pulse. The GPIO22 is set to the input mode to receive the signal input form the ultrasound sensor. Because we have imported “time” library, the time.time () function can save the exact time when Raspberry Pi receive the signal from the sensor. The distance can be easily calculated form the equation based on the time the ultrasound has traveled.
Line following
To detect the line, we use two infrared line sensors to detect the line on the floor. The line sensors are composed by two parts, the first is an infrared transmitter sends an infrared signal and the second part is that an infrared receiver that captures the signal. When the surface is dark or absent, which means infrared receiver cannot receive the reflected light sent by the IR transmitter, the output of the sensor will be high.
To follow the line, we use hot glue to place two line sensors on the two side of robot. Due to the range limitation of the sensor, the distance between the sensor and the floor should be less than 5cm. The robot is supposed to move in a straight line unless one of its line sensor detects the line on the floor. When one of the sensors outputs a low signal to the Raspberry Pi, which means the robot is going to deviate from the line and finally fail to follow the line if it keeps moving forward. Then we will make one wheel turn faster and the other slower to make a turn. For example, when the sensor on the left detects the line, the robot should turn left a little to follow the line. The servo on the right will rotate faster and the servo on the left will rotate slower in order not to make the robot move too fast.
Facial detection and recognition
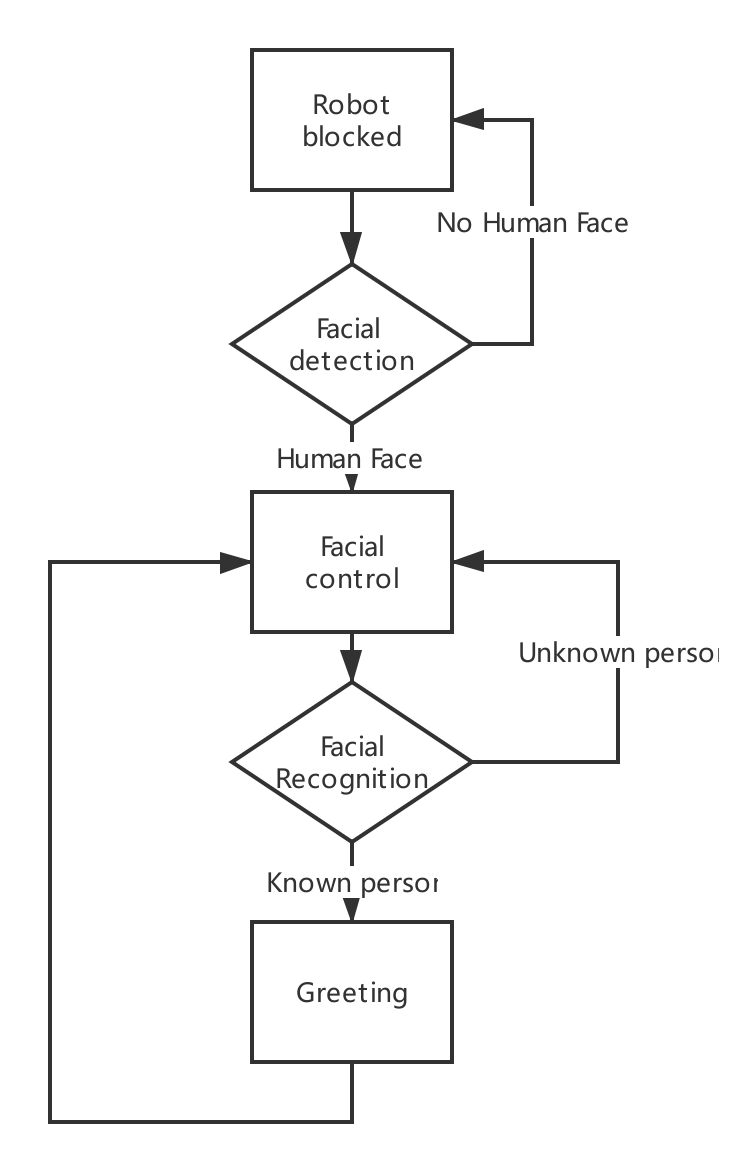
Flow Chart for Facial Detection and Recognition Part
The first step is facial detection. Pi-camera is used to capture the image, which is then converted to a numpy array. To detect the human face, we used CascadeClassifier file to look for faces in the image. And finally, if the number of faces it detected is larger than zero, true will be returned from this face detection function.
Next, if faces are detected, or the return value of the face detection function is true, the robot will be controlled by the movement of the human face. This is achieved by adjusting the size or position of the frame in the image of human faces. For example, if one is too far from it, it will move closer to him or her because the frame of face in the image is too small. And if the person is too close, it moves backwards. If head is shifted to the right, it will turn right due to the position of the frame of face it detected. Otherwise, it will turn left.
The last step is real-time facial recognition based on OpenCV. This process can be divided into three parts. The first one is face detection and data gathering. Here we gathered 30 images of each of the two persons to be identified as dataset and mark them with id one and id two. The images are store in a specific folder named dataset. Secondly, recognizer is trained using the dataset we collected in the first step. A trainer.yml file is generated by this process. Finally, facial recognition is started, and the real-time images captured by the Pi-camera are compared with those in the dataset. If the confidence is less than 100, the person is recognized and a “hello” sound will be played. Otherwise, the person is marked as unknown and no greetings will be played.
To test the functioning of facial recognition, we trained two different types of faces, one is human face, the other is printed photo. Comparing with human face, static photos are harder for the robot to recognize, and, hence, it sometimes loses track of the facial image.
Result
Our robot can move around the room according to the line on the floor very efficiently. When it detects obstacles in front of it, it will show a sign on the PiTFT and start the facial detection and recognition. Our robot turned out to accurately detect human face. While for recognition, the accuracy is relatively lower. To improve the accuracy of recognition, it is necessary to reduce the speed of movement. And, in this case, the camera can capture clear images for recognition.
Project Group
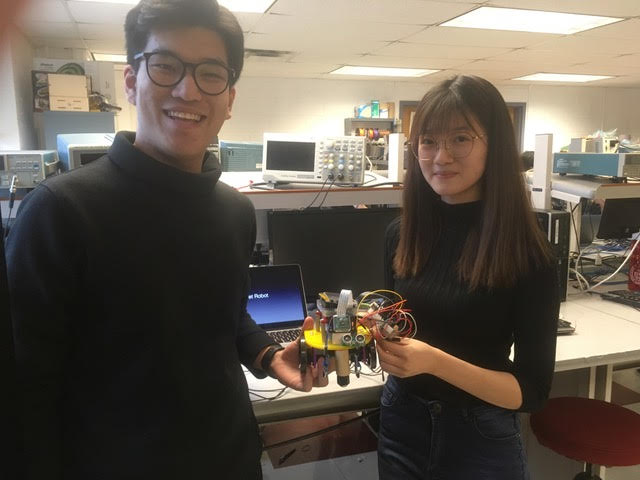
Project group picture

Ziyan Wang
zw627@cornell.edu
Peicheng Lu
pl568@cornell.edu
Parts List
- Raspberry Pi $35.00
- Raspberry Pi Camera V2 $25.00
- Speaker - Provided in lab
- NeoPixel Ring - $9.95
- LEDs, Resistors and Wires - Provided in lab
Total: $69.95
Code Appendix
// project.py
import pygame
from pygame.locals import*
import os
import RPi.GPIO as GPIO
import time
import serial
from pygame import mixer

#import for face detection
import io
import picamera
import cv2
import numpy

os.putenv('SDL_VIDEORIVER','fbcon')
os.putenv('SDL_FBDEV','/dev/fb1')
os.putenv('SDL_MOUSEDRV','TSLIB')
os.putenv('SDL_MOUSEDEV','/dev/input/touchscreen')
black = 0, 0, 0
startTime = time.time()

pygame.init()
# pygame.mouse.set_visible(True)
pygame.mouse.set_visible(False)

# define colors to be used
BLACK = 0,0,0
RED = 255,0,0
GREEN = 0,255,0
WHITE = 255, 255, 255

Text_left = ['Stop  0', 'Stop  0', 'Stop  0']
Text_right = ['Stop  0', 'Stop  0', 'Stop  0']
text = ['Clkwise ', 'Stop ', 'Counter-Clk ']

# Initialize
size = width, height = 320, 240
screen = pygame.display.set_mode(size)
my_font = pygame.font.Font(None, 20)

#GPIO setup
GPIO.setmode(GPIO.BCM)
GPIO.setup(12, GPIO.OUT)
GPIO.setup(19, GPIO.OUT)
linesensor = 26
GPIO.setup(26,GPIO.IN)
GPIO.setup(27,GPIO.IN)
trigPin = 17
echoPin = 22

#audion initialization
mixer.init()
sound = mixer.Sound('hello.wav')

##################################################################

low = 0.02
pl = GPIO.PWM(12, 1 / low)
pr = GPIO.PWM(19, 1 / low)

pl.start(0)
pr.start(0)

status = [0, 0]
prevStatus = [0, 0]

def face_detection():

	stream = io.BytesIO()

	with picamera.PiCamera() as camera:
		camera.resolution = (320, 240)
		camera.vflip = True
		camera.capture(stream, format='jpeg')

	buff = numpy.fromstring(stream.getvalue(), dtype=numpy.uint8)
	image = cv2.imdecode(buff, 1)

	face_cascade = cv2.CascadeClassifier('/home/pi/Project/face.xml')

	gray = cv2.cvtColor(image, cv2.COLOR_BGR2GRAY)

	faces = face_cascade.detectMultiScale(gray, 1.1, 5)

	return len(faces)


def face_control():
    sound_flag = 1
    while True:
        stream = io.BytesIO()

        with picamera.PiCamera() as camera:
            camera.resolution = (320, 240)
            camera.vflip = True
            camera.capture(stream, format='jpeg')

        buff = numpy.fromstring(stream.getvalue(), dtype=numpy.uint8)
        image = cv2.imdecode(buff, 1)

        face_cascade = cv2.CascadeClassifier('/home/pi/Project/face.xml')

        gray = cv2.cvtColor(image, cv2.COLOR_BGR2GRAY)

        faces = face_cascade.detectMultiScale(gray, 1.1, 5)

        print(str(len(faces)))

        for (x,y,w,h) in faces:
            cv2.rectangle(image, (x, y), (x+w, y+h), (255, 0, 0), 2)
            print("x = ",x)
            print("y = ",y)
            print("w = ",w)
            print("h = ",h)
            #face on the right
            if x < 90:
                #turn left
                print("x = ", x)
                control(0.3, 0.5)
                time.sleep(0.3)
                control(0, 0)

                print("left")
            elif x > 155:
                #turn right
                control(-0.5, -0.3)
                time.sleep(0.3)
                control(0, 0)
                print("right")

            elif w < 70:
                # move forward
                control(-0.5, 0.5)
                time.sleep(0.8)
                control(0, 0)
                print("fw")
            elif w > 100:
                # move backward
                control(0.5,-0.5)
                time.sleep(0.8)
                control(0, 0)
                print("bw")
            else:
                #stop
                control(0, 0)
                #time.sleep(0.8)
                print("stop")

            if x >= 100 and x <= 160 and w >= 60 and w <= 110 and sound_flag:
                recog_res = recognition()
                if recog_res == True:
                    print("recog")
                    # speaker
                    sound.play()
                    print("hello")
                    sound_flag = 0

        cv2.imwrite('result.jpg',image)
        if len(faces) == 0:
            return

def recognition():

    recognizer = cv2.face.createLBPHFaceRecognizer()
    recognizer.load('trainer/trainer.yml')
    cascadePath = "haarcascade_frontalface_default.xml"
    faceCascade = cv2.CascadeClassifier(cascadePath)

    font = cv2.FONT_HERSHEY_SIMPLEX

    #iniciate id counter
    id = 0

    # names related to ids: example ==> Marcelo: id=1,  etc
    names = ['None', 'Cindy', 'Huge']

    # Initialize and start realtime video capture
    cam = cv2.VideoCapture(0)
    cam.set(3, 640) # set video widht
    cam.set(4, 480) # set video height

    # Define min window size to be recognized as a face
    minW = 0.1*cam.get(3)
    minH = 0.1*cam.get(4)

    while True:

        ret, img =cam.read()
        img = cv2.flip(img, -1) # Flip vertically

        gray = cv2.cvtColor(img,cv2.COLOR_BGR2GRAY)

        faces = faceCascade.detectMultiScale(
            gray,
            scaleFactor = 1.2,
            minNeighbors = 5,
            minSize = (int(minW), int(minH)),
           )

        for(x,y,w,h) in faces:

            cv2.rectangle(img, (x,y), (x+w,y+h), (0,255,0), 2)

            id, confidence = recognizer.predict(gray[y:y+h,x:x+w])

            # Check if confidence is less them 100 ==> "0" is perfect match
            if (confidence < 100):
                id = names[id]
                confidence = "  {0}%".format(round(100 - confidence))
                return True
            else:
                id = "unknown"
                confidence = "  {0}%".format(round(100 - confidence))
                return False


def control(v_left, v_right):
    screen.fill(black)
    # left servo
    now = time.time()

    ####################
    if v_left == 0:
        pl.ChangeDutyCycle(0)
    else:
        high_l = 0.0015 + 0.0001 * v_left
        pl.ChangeFrequency(1 / (low + high_l))
        pl.ChangeDutyCycle(100 * high_l / (low + high_l))

    # right servo
    now = time.time()

    if v_right == 0:
        pr.ChangeDutyCycle(0)
    else:
        high_r = 0.0015 + 0.0001 * v_right
        pr.ChangeFrequency(1 / (low + high_r))
        pr.ChangeDutyCycle(100 * high_r / (low + high_r))
#want to show the stop sign but fails
    if v_left==0 and v_right==0:
        ball1 = pygame.image.load("obstacle.jpg")
        screen.fill(black)
        ballrect1 = ball1.get_rect()
        ballrect1.x=130
        ballrect1.y=160
        screen.blit(ball1, ballrect1)
        pygame.display.flip()

cmd = ['forward', 'stop', 'backward', 'left', 'stop', 'right', 'stop']
t = [3, 3, 3, 2, 1, 2, 1]

prev = time.time()
stopTime = 0
i = 0

started = True
stopped = False
coderun = True

while coderun:
    ################################Ultrasonic Sensor
    def checklist():
        GPIO.output(trigPin, GPIO.HIGH)
        time.sleep(0.00015)
        GPIO.output(trigPin, GPIO.LOW)

        while not GPIO.input(echoPin):
            pass
        t1 = time.time()

        while GPIO.input(echoPin):
            pass
        t2 = time.time()

        return (t2 - t1) * 340 * 100 / 2

    #GPIO.setmode(GPIO.BCM)   #set up GPIO pins

    GPIO.setup(trigPin, GPIO.OUT, initial = GPIO.LOW)
    GPIO.setup(echoPin, GPIO.IN)

    time.sleep(0.1)
    print('calculating distance....')
    dist = checklist()
    print('Distance: %0.2f cm'%dist)
    print("exit")
    #####################################Ultrasonic Sensor End
    cur = time.time()
    if not started:
        prev = time.time()
    elif not stopped:
        print("in not stopped, i: ", i)
        i=0
        prev = cur
        if dist<50:
            print("stop")
            control(0, 0)
            if face_detection() > 0:
                print("face detected")
                # follow the person
                face_control()

        #elif cmd[i] == 'forward':
        ###################Line follow#################
        # try:
        elif  GPIO.input(26) and not GPIO.input(27):
            control(-0.4,-0.03)

            print ('model1')
        elif not GPIO.input(26) and GPIO.input(27):
            control(-0.1,0.3)
            print GPIO.input(27)
            print ('model2')
        ####################Line follow end############
        else:
            print("forward")
            control(-0.21, 0.1)


    if stopped:
        #### push the stop button to show
        ball1 = pygame.image.load("magic_ball.png")
        screen.fill(black)
        ballrect1 = ball1.get_rect()
        screen.blit(ball1, ballrect1)

    else:
        pygame.draw.circle(screen, RED, [160, 120], 30, 0)
       ##############Change stop to start
        text_surface = my_font.render(' ', True, WHITE)

    rect = text_surface.get_rect(center=(160, 120))
    screen.blit(text_surface, rect)

    # detect event from the touch screen
    for event in pygame.event.get():
        if (event.type is MOUSEBUTTONUP):
            pos = pygame.mouse.get_pos()
            x, y = pos

            if  y > 100:
                coderun = False

            elif x >280:
                if not started:
                    started = True

    pygame.display.flip()
pl.stop()
pr.stop()

GPIO.cleanup()