Remote Control Rescue Robot
Demo Date: 2019.12.4
A Project By Fan Lu & He Gao
Demonstration Video
Introduction
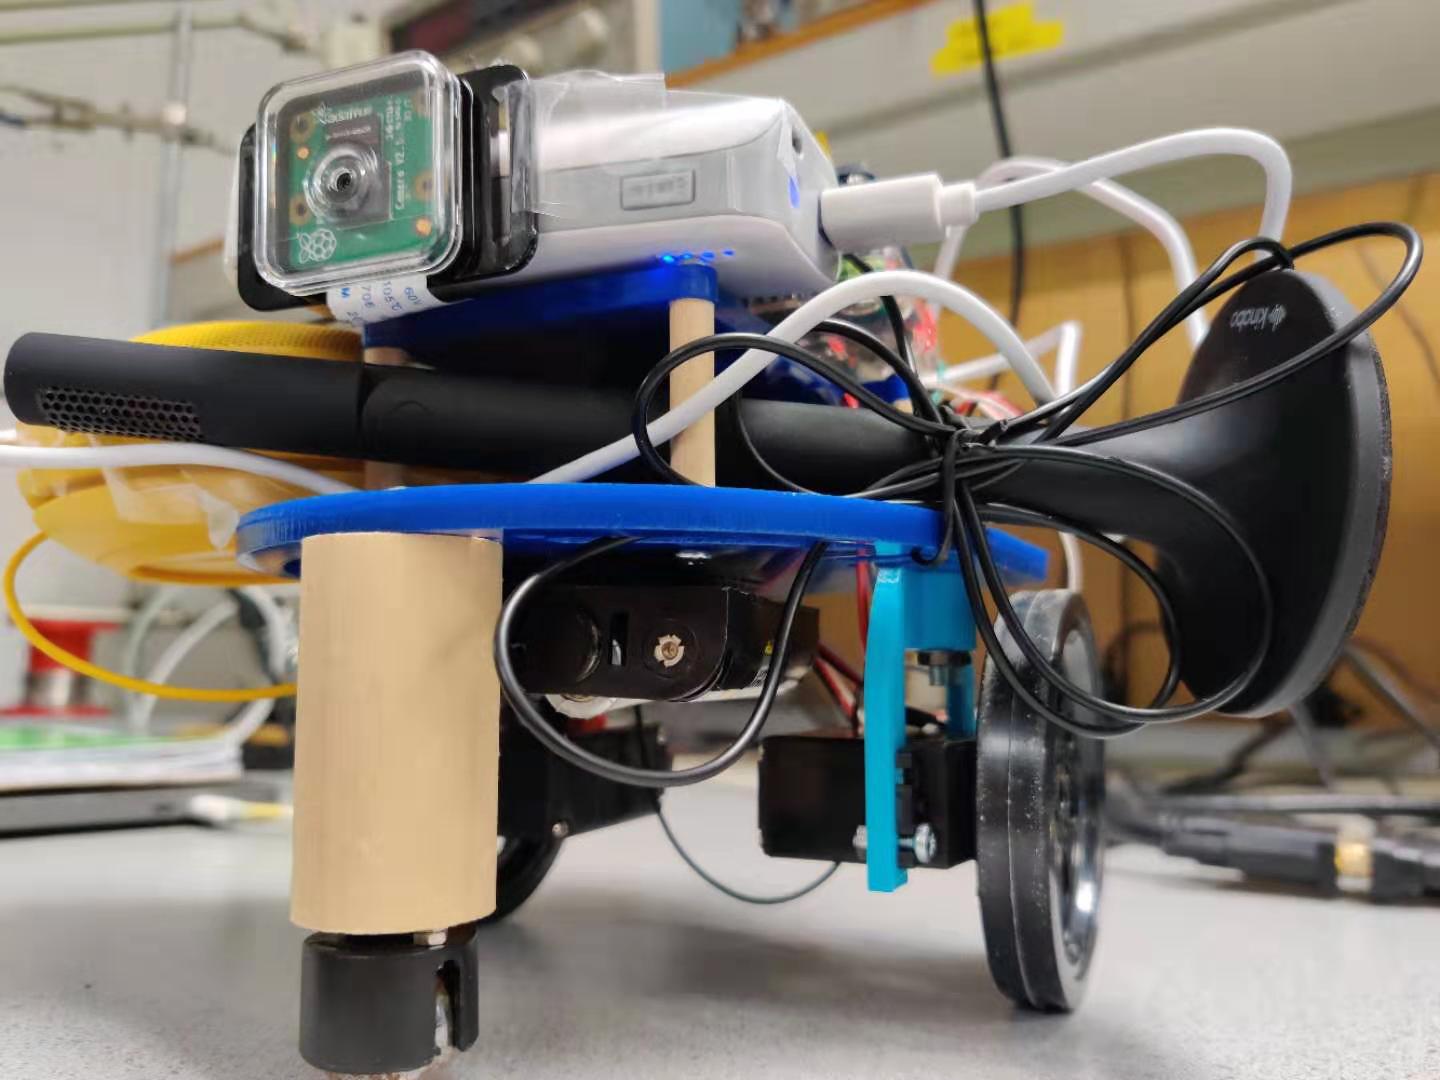
This project is to build a robot that can be used for rescuing purposes with remote control methods. It can perform multiple functions that will help the rescue missions or the victims to save themselves. Raspberry Pi is used as a server, processing the requests sent from remote controller through wifi connection. The remote controller is developed on a laptop as a web page using Node.js and React. The Pi can process the request and control the robot. Several functions have been implemented, including controlling the robot to move, catching the live stream shoot by the camera, bidirectionally transfering audio message between the controller and the server, uploading images and displaying them.
Project Objective:
- Control the robot to go and turn as the command goes
- Control the robot to return automatically
- Enable live stream captured by the camera
- Transfer the audio message from the robot side to the controller side
- Upload images and Display on piTFT
- Play audio message coming from the controller
Design
Moving
Camera Stream
On the controler side, MPlayer is used to catch the live stream. After specify the server address, port number, and video format, the MPlayer can play the Pi camera live video with low latency using command " ./mplayer -fps 200 -demuxer h264es ffmpeg://tcp://10.148.2.206:8090".
After the camera recording is started with 'raspivid' command, it starts to push video stream to the port. And when the MPlayer start to read the stream, it will first read the message recorded before. So we need to wait for some tiem to get the live video stream with low latency and start the control.
Audio Recording On Robot Side
Image Upload & Display
Voice Recording On Controler Side
Drawings
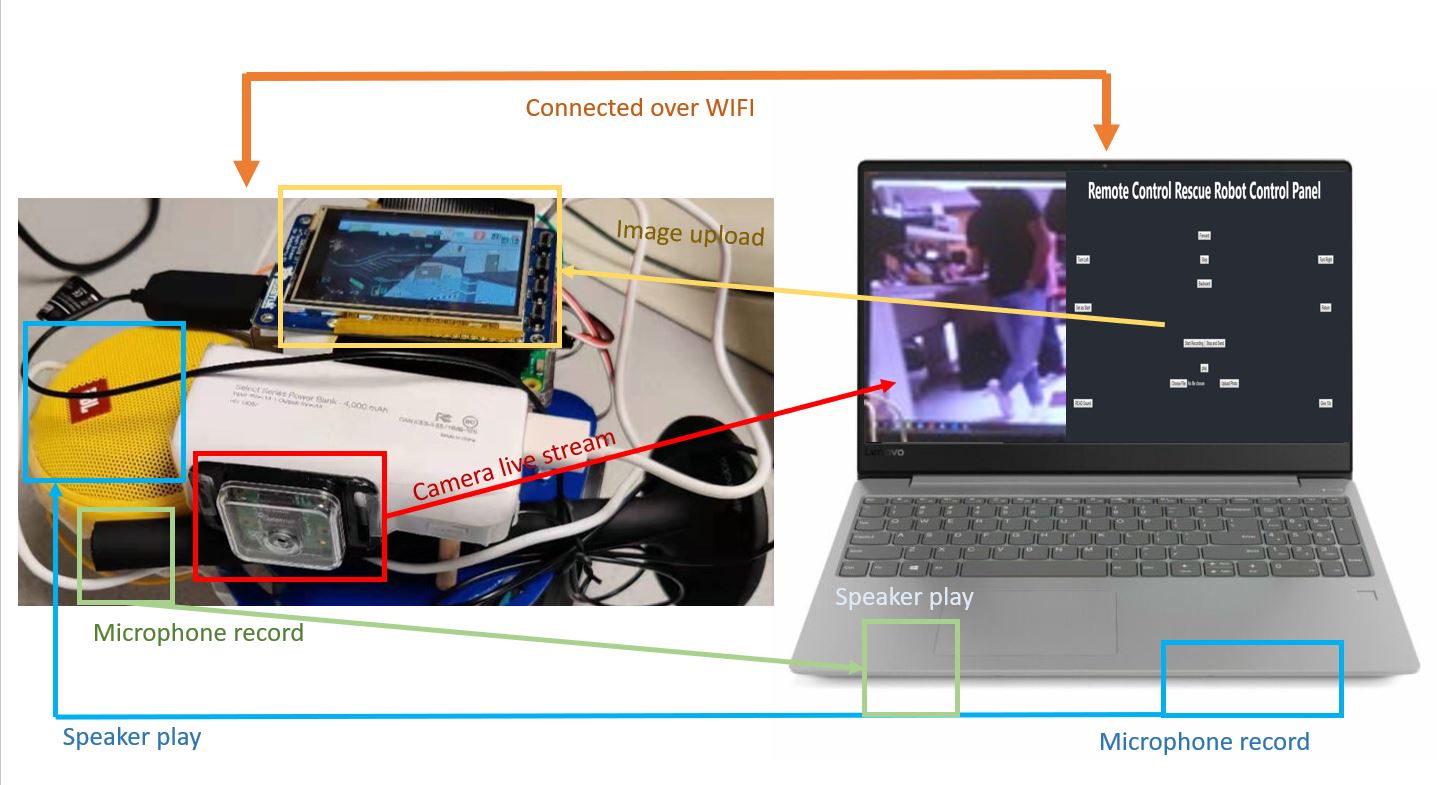
Signal flow

Control panel website
Testing
We have a robot car which is needed to be controlled by the controller side. The robot car should complete two tasks: the first one is to go and turn as the command goes, the second is to return automatically. For the first task, things go relatively smooth. We firstly check the trajectory of the robot car, and we observed that the speed of two wheels are different, so we continuously modified the parameters to ensure the robot moved as we expected. For the second task, things didn’t go well. We spent a lot of time to solve the problem that the movement of “return” function is not in the expected track. Finally we add a time.sleep function to the move_control.py, the program reads FIFO, if empty then sleep for some time, else call move function. By adding the sleep function, we observed that the “return” function works as we expected. Also, we needed to complete such tasks: the first task is to transfer the video captured by the camera to the control side, the second task is to realize bidirectional audio transmission, the third task is to upload an image and display it on the piTFT. In the first task, we observe that there is a certain delay in the video picture, and the video is a little fuzzy. We calibrated the camera and improved the clarity of the video. In the second task, we tested that the video sent from our controller side can be successfully played through the Raspberry Pi. We tried to start the program from the command line and then tried to start it from the server. When we passed this check, we tested to see if the audio can be sent back to our controller side. We tried three different microphones to ensure that the volumn of recorded audio is approximate. In the third task, we tested whether the files can be uploaded successfully. We observed that we cannot find the right relative path for scripts with Multer, so we had to use absolute path for all the paths in the modules with Multer. Then we tested whether the image can be displayed on the PiTFT. We first test whether this program can successfully run by starting the program in the command line. Then we test whether this function can be started at power on.
Result & Conclusions
We successfully built a rescue robot that can be controled over the WIFI signal. It can move as the command goes with two wheels on servos and return to any point we set as the start point. It has a live stream camera and the controler can play the live video from the camera. It has a PiTFT screen to display images sent from the controler. It can also utilize a speaker and a microphone to bidirectionally transfer audio messages with the controler to allow the user hear what the victim says and allow the victim to hear the words from the driver. Raspberry Pi is used as a linux server on the robot to deal with requests with commands, and the controler is developed as a web site. We implemented almost all the features we designed at the start of the project.
Future Work
If more time is available, we will try to implement the live video stream with audio. More study on the command documents are necessary for this. And we will add measurement and feedback on the servos to make sure the wheels run with the desired speed and to make sure that it can accurately return to the start point. Also, the control panel should be refined.
Work Distribution
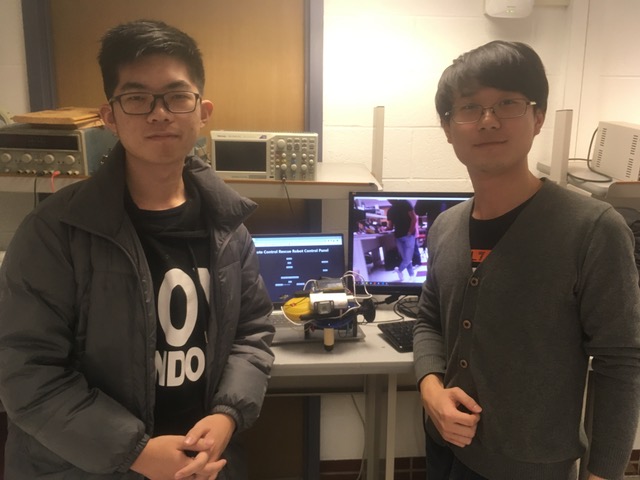
Project group picture
Fan Lu
fl427@cornell.edu
Designed the Image and Voice system and completed all testing.

He Gao
hg446@cornell.edu
Designed the moving system, camera live stream system, Front-end and back-end.
Parts List
- Raspberry Pi $35.00
- Raspberry Pi Camera V2 $25.00
- YBL Speaker $30.00
- USB Microphone $7.00
- Servos, Resistors and Wires - Provided in lab
Total: $97
References
PiCamera DocumentTower Pro Servo Datasheet
Bootstrap
React
Pigpio Library
R-Pi GPIO Document
Lab1 FIFO
Lab3 Robot Control
Pi Camera Live Stream
Multer
Mplayer for stream
Arecord
FFMPEG
FFMPEG streaming
Code Appendix
please use the following Github link:
https://github.com/Leopard12286027770/5725-Project.git